AccuMic Microphone — AccuMic VC
9
AccuMic VC
Connecting the AccuMic VC
The AccuMic VC easily connects to most video codecs at the line level audio input and output. Please refer to the table in the appendix for a list of video codecs that are compatible. You can connect an optional AccuMic VC Extension Mic (kit part no.
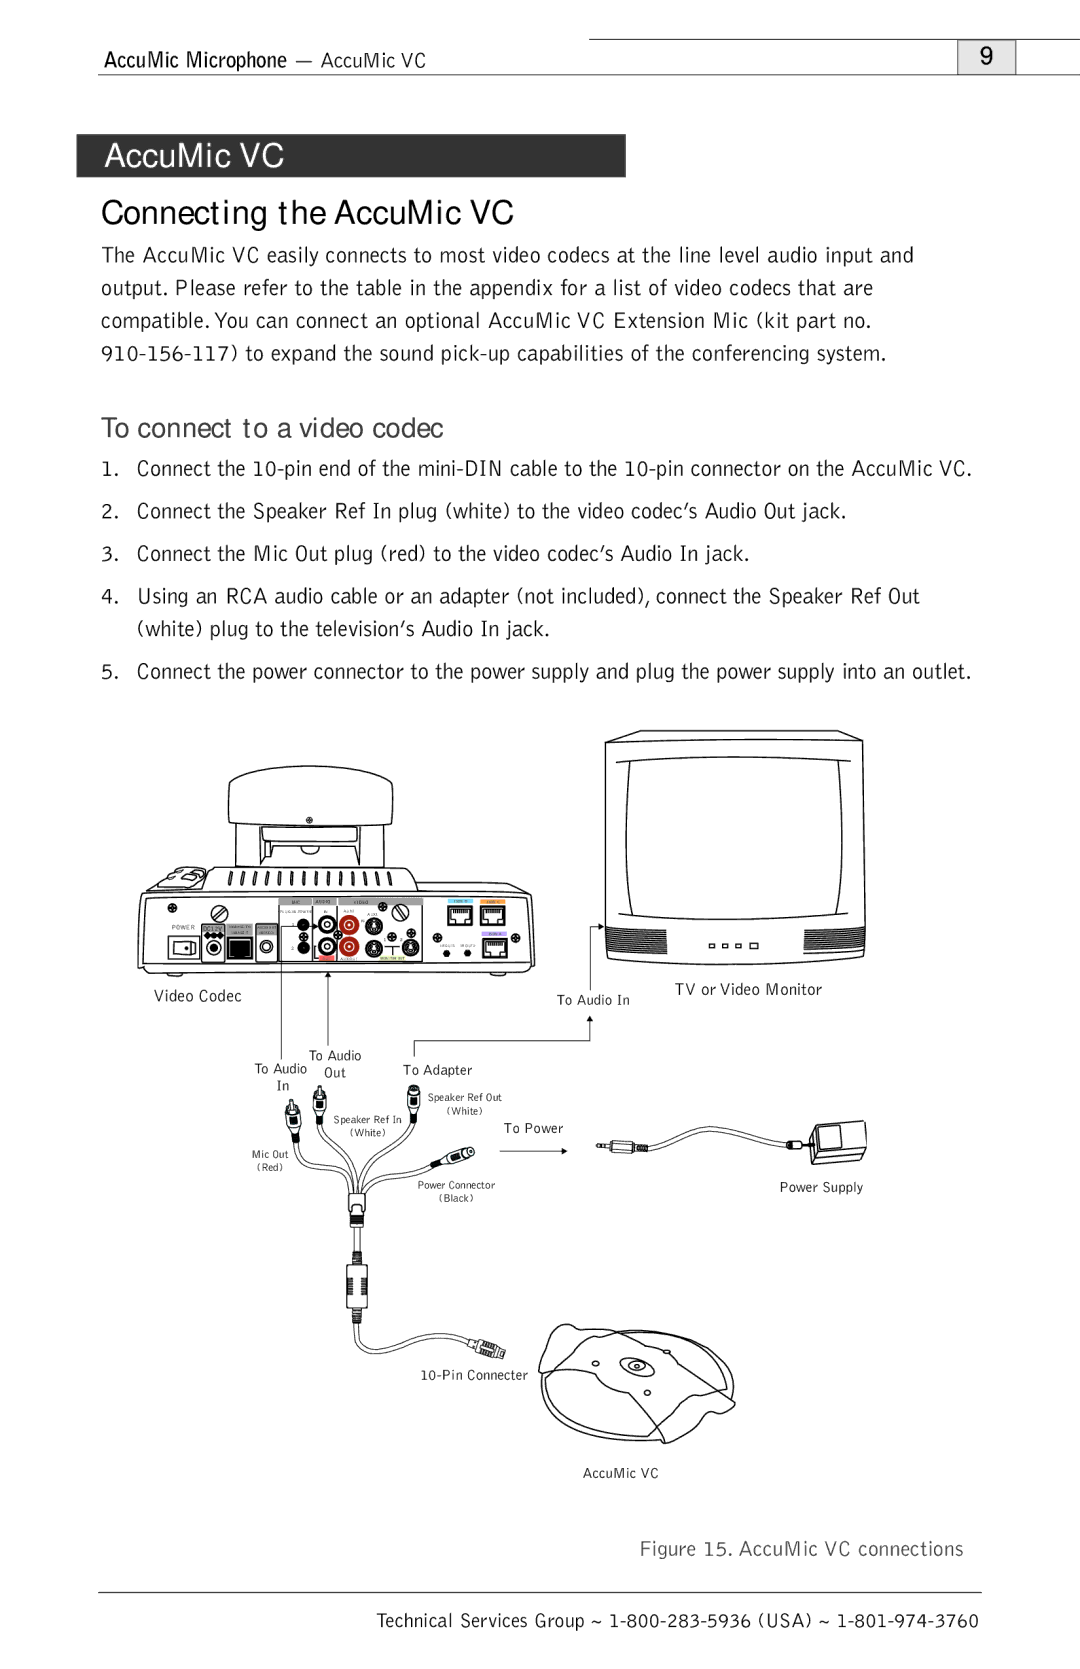
To connect to a video codec
1.Connect the
2.Connect the Speaker Ref In plug (white) to the video codec’s Audio Out jack.
3.Connect the Mic Out plug (red) to the video codec’s Audio In jack.
4.Using an RCA audio cable or an adapter (not included), connect the Speaker Ref Out (white) plug to the television’s Audio In jack.
5.Connect the power connector to the power supply and plug the power supply into an outlet.
POWER DC12V
Video Codec
| MIC | AUDIO | VIDEO |
| ISDN B | ISDN C |
|
| (PLUG IN POWER) | IN | AUX2 |
|
|
|
|
|
|
| AUX1 |
|
|
|
|
| 1 |
| IN |
|
|
|
|
AUDIO OUT |
|
|
|
|
|
| |
(MIXED) |
|
|
|
|
| ISDN A |
|
|
|
|
| 1 | 2 |
|
|
| 2 |
|
|
| IR OUT1 IR OUT2 |
|
|
|
| OUT | AUX OUT | MONITOR OUT |
|
| |
|
|
|
|
|
| To Audio In | TV or Video Monitor |
|
|
|
|
|
|
| |
| To Audio |
|
|
|
| ||
To Audio | Out |
| To Adapter |
|
| ||
| In |
|
|
|
|
|
|
Speaker Ref Out |
|
(White) |
|
Speaker Ref In | To Power |
(White) | |
Mic Out |
|
(Red) |
|
Power Connector | Power Supply |
(Black) |
|
AccuMic VC
Figure 15. AccuMic VC connections
Technical Services Group ~