33
7Check for secure installation. Pull front to back and left to right to check for secure installation (fig. d). Vehicle lap belt MUST stay tight.
If vehicle lap belt does not stay tight, see “Installation with Lap/Shoulder Belts” below.
8Recheck car seat recline. Verify line is in green striped zone of recline indicator.
9Carry handle should be kept in the carry position, (see “Carry Handle Operation” section).
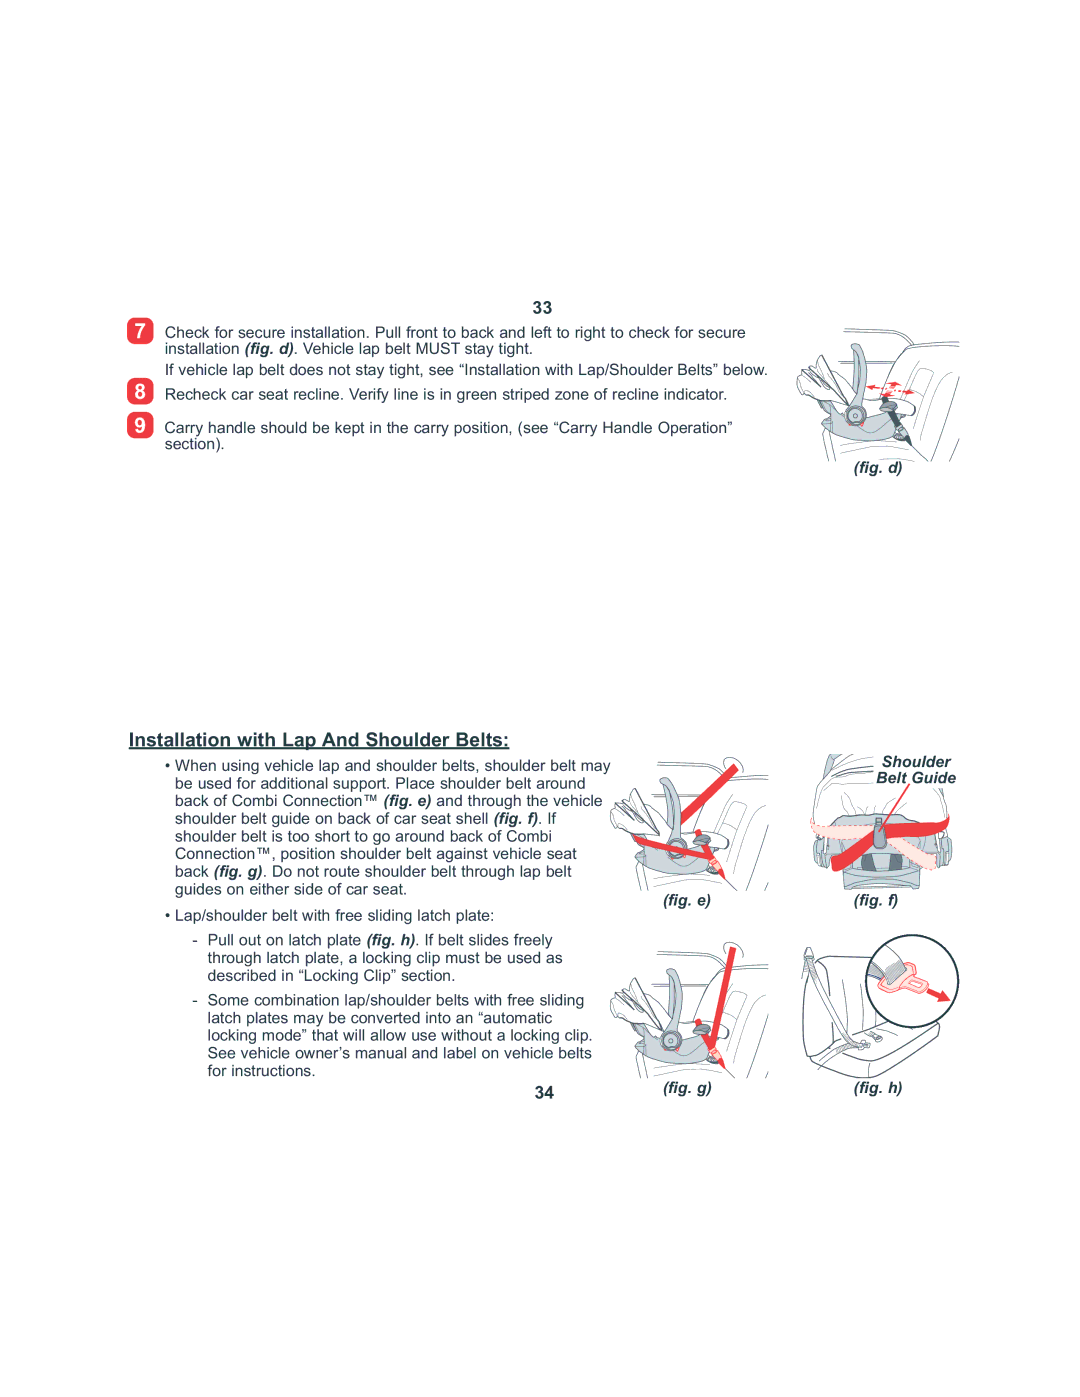
Installation with Lap And Shoulder Belts:
• When using vehicle lap and shoulder belts, shoulder belt may be used for additional support. Place shoulder belt around
back of Combi Connection™ (fig. e) and through the vehicle ![]()
![]() shoulder belt guide on back of car seat shell (fig. f). If
shoulder belt guide on back of car seat shell (fig. f). If ![]()
![]()
![]() shoulder belt is too short to go around back of Combi
shoulder belt is too short to go around back of Combi ![]()
![]()
![]() Connection™, position shoulder belt against vehicle seat
Connection™, position shoulder belt against vehicle seat ![]()
![]()
![]()
![]()
![]() back (fig. g). Do not route shoulder belt through lap belt
back (fig. g). Do not route shoulder belt through lap belt ![]()
![]()
guides on either side of car seat. (fig. e)
• Lap/shoulder belt with free sliding latch plate:
- Pull out on latch plate (fig. h). If belt slides freely through latch plate, a locking clip must be used as described in “Locking Clip” section.
- Some combination lap/shoulder belts with free sliding latch plates may be converted into an “automatic locking mode” that will allow use without a locking clip. See vehicle owner’s manual and label on vehicle belts for instructions.
34 | (fig. g) |