Chapter 1 - Network Installation | 2 |
Chapter 1 - Network Installation
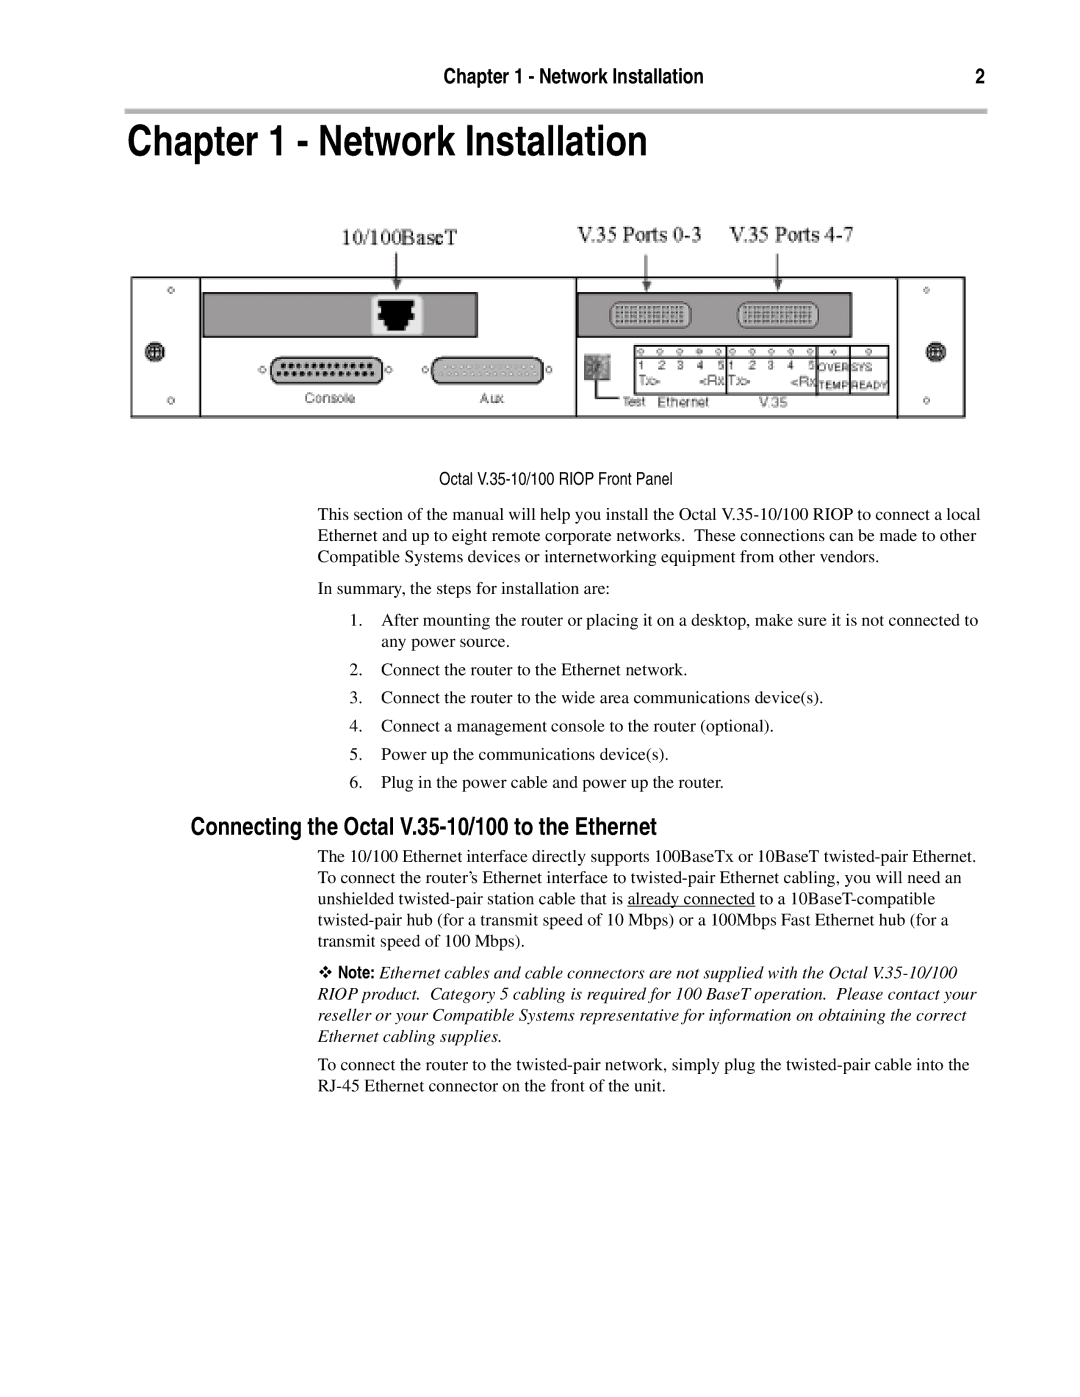
Octal V.35-10/100 RIOP Front Panel
This section of the manual will help you install the Octal
In summary, the steps for installation are:
1.After mounting the router or placing it on a desktop, make sure it is not connected to any power source.
2.Connect the router to the Ethernet network.
3.Connect the router to the wide area communications device(s).
4.Connect a management console to the router (optional).
5.Power up the communications device(s).
6.Plug in the power cable and power up the router.
Connecting the Octal V.35-10/100 to the Ethernet
The 10/100 Ethernet interface directly supports 100BaseTx or 10BaseT
ϖNote: Ethernet cables and cable connectors are not supplied with the Octal
RIOP product. Category 5 cabling is required for 100 BaseT operation. Please contact your reseller or your Compatible Systems representative for information on obtaining the correct Ethernet cabling supplies.
To connect the router to the