
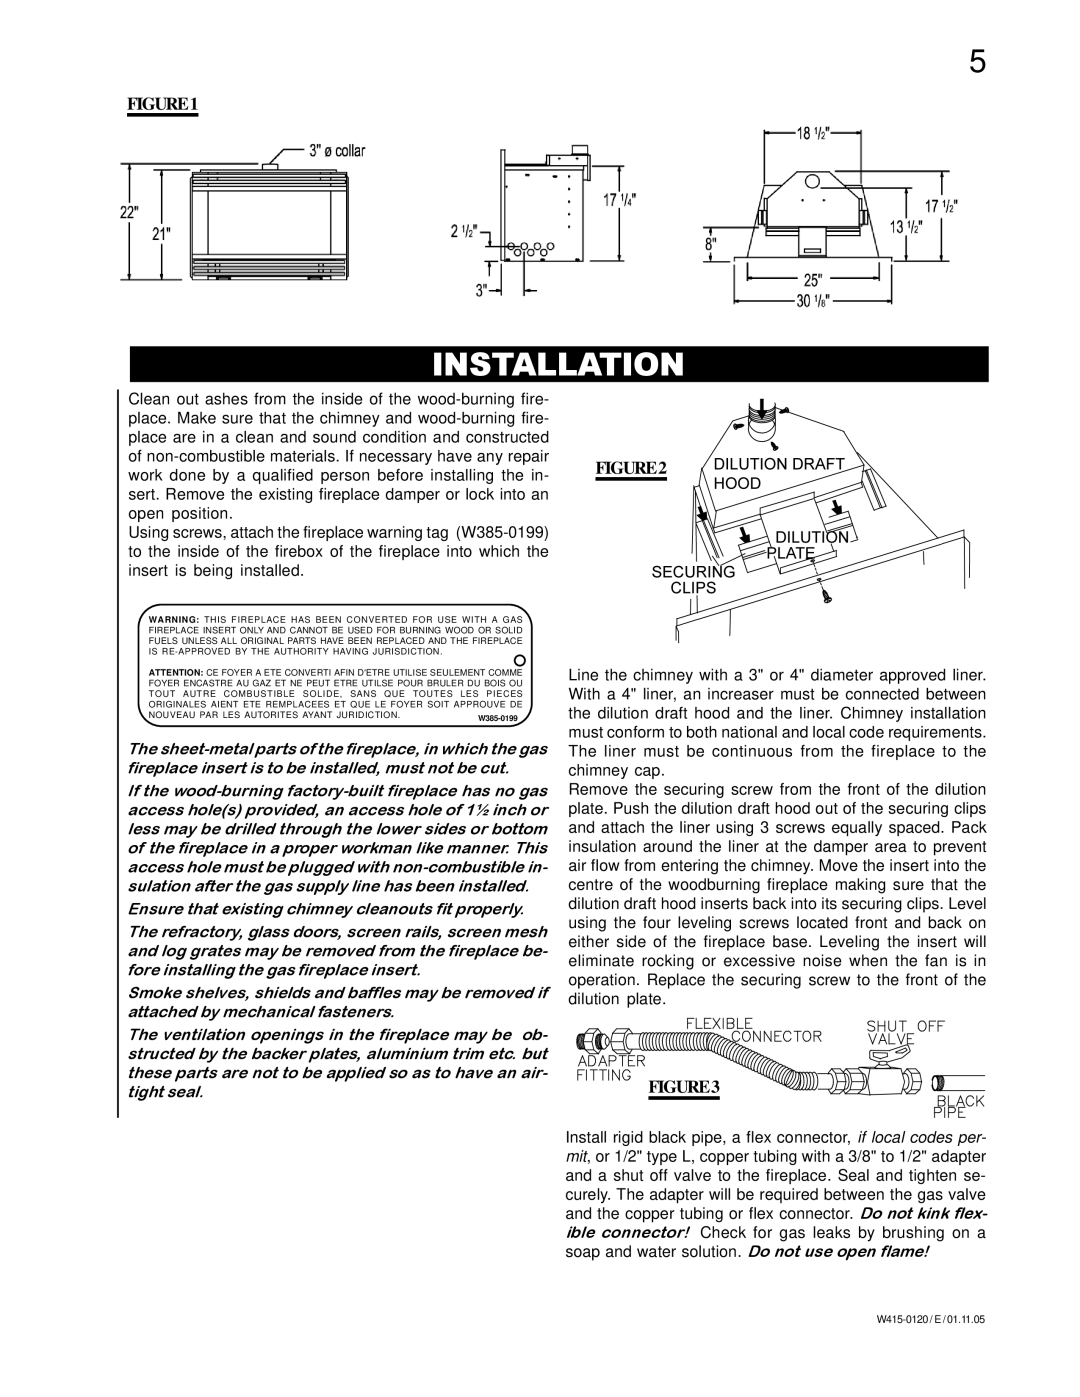
CBI 360-N, CBI 360-P specifications
The Continental CBI 360-N and CBI 360-P represent cutting-edge advancements in the realm of continental industrial solutions, designed specifically to meet the diverse needs of modern industries. These models stand out due to their innovative technologies, robust performance, and versatility, making them essential tools for various applications.One of the defining features of the CBI 360-N and CBI 360-P is their exceptional durability. Built with high-quality materials, these models are engineered to withstand tough industrial environments, ensuring longevity and consistent performance even under extreme conditions. The robust construction not only enhances their lifespan but also reduces maintenance costs, offering a cost-effective solution for users.
Another significant aspect is the advanced monitoring and diagnostic technologies integrated into these models. They come equipped with smart sensors that provide real-time data on operating conditions, allowing for proactive maintenance and troubleshooting. This feature not only optimizes performance but also enhances safety by minimizing the risk of unexpected breakdowns.
The CBI 360-N and CBI 360-P also boast energy-efficient designs. With a focus on reducing energy consumption, these models are equipped with high-performance motors and intelligent control systems that optimize power usage. This not only contributes to lower operational costs but also aligns with global sustainability goals, making them an environmentally friendly choice.
Versatility is another hallmark of the CBI 360 series. The CBI 360-N is particularly suited for standard applications, while the CBI 360-P offers enhanced power capabilities for more demanding tasks. This flexibility allows operators to select the appropriate model based on their specific requirements, making these machines suitable for a wide range of industrial sectors, including manufacturing, logistics, and more.
Furthermore, user-friendly interfaces and intuitive controls are central to the design of the CBI 360-N and CBI 360-P. Operators can easily configure settings and monitor performance through streamlined control panels, enhancing productivity and reducing the learning curve for new users.
In conclusion, the Continental CBI 360-N and CBI 360-P stand at the forefront of industrial innovation, offering a blend of durability, efficiency, and versatility. Their advanced technologies and practical features make them invaluable assets for businesses looking to improve operational efficiency and reliability in an ever-evolving industrial landscape. With these models, Continental continues to lead the way in providing high-quality, dependable industrial solutions.