Removing the Stone Guard Flap
![]() WARNING! Before performing any maintenance procedure, stop the engine and disconnect the spark plug wire.
WARNING! Before performing any maintenance procedure, stop the engine and disconnect the spark plug wire.
Note: We turned the trimmer on its side to take the photos in this section. To do so, we removed gas and oil from the machine.
You can access the underside of the trimmer without having to drain gas and oil by tilting back on its handlebar.
3
Tools needed: You will need a ⁄8″ wrench or socket to perform these steps.
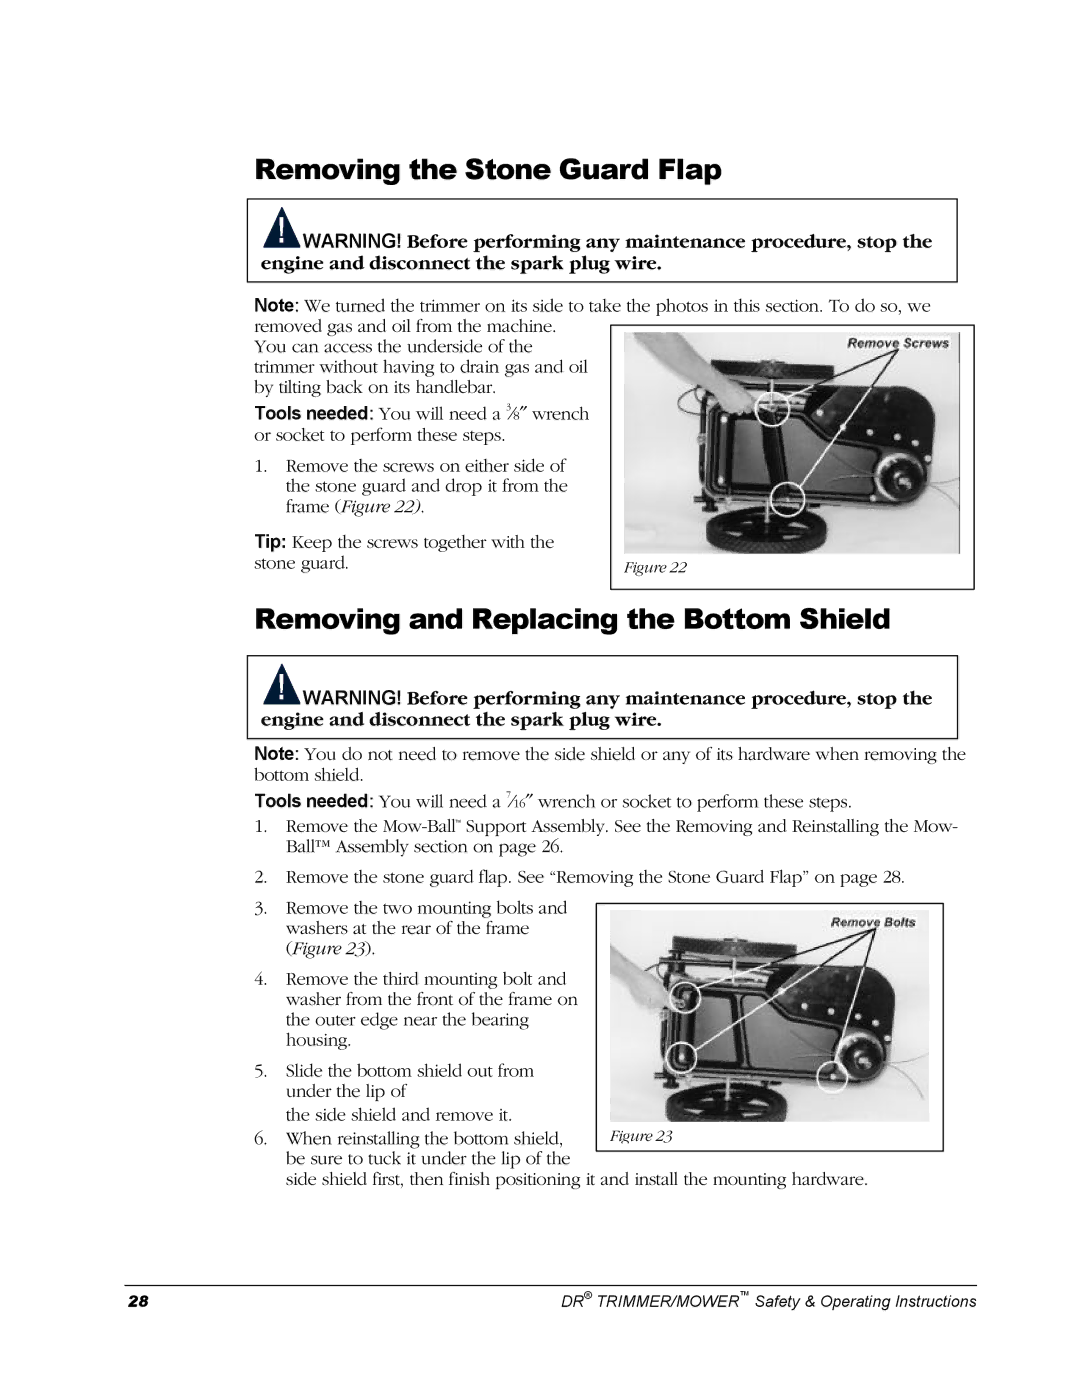
1.Remove the screws on either side of the stone guard and drop it from the frame (Figure 22).
Tip: Keep the screws together with the |
|
stone guard. | Figure 22 |
Removing and Replacing the Bottom Shield
![]() WARNING! Before performing any maintenance procedure, stop the engine and disconnect the spark plug wire.
WARNING! Before performing any maintenance procedure, stop the engine and disconnect the spark plug wire.
Note: You do not need to remove the side shield or any of its hardware when removing the bottom shield.
7
Tools needed: You will need a ⁄16″ wrench or socket to perform these steps.
1.Remove the
2.Remove the stone guard flap. See “Removing the Stone Guard Flap” on page 28.
3.Remove the two mounting bolts and washers at the rear of the frame (Figure 23).
4.Remove the third mounting bolt and washer from the front of the frame on the outer edge near the bearing housing.
5.Slide the bottom shield out from under the lip of
the side shield and remove it.
6. When reinstalling the bottom shield, be sure to tuck it under the lip of the
side shield first, then finish positioning it and install the mounting hardware.
28 | DR® TRIMMER/MOWER™ Safety & Operating Instructions |