To decrease the tension on the belt:
1.Repeat the steps for increasing the tension on the belt, but instead loosen the lower nut and tighten the upper nut.
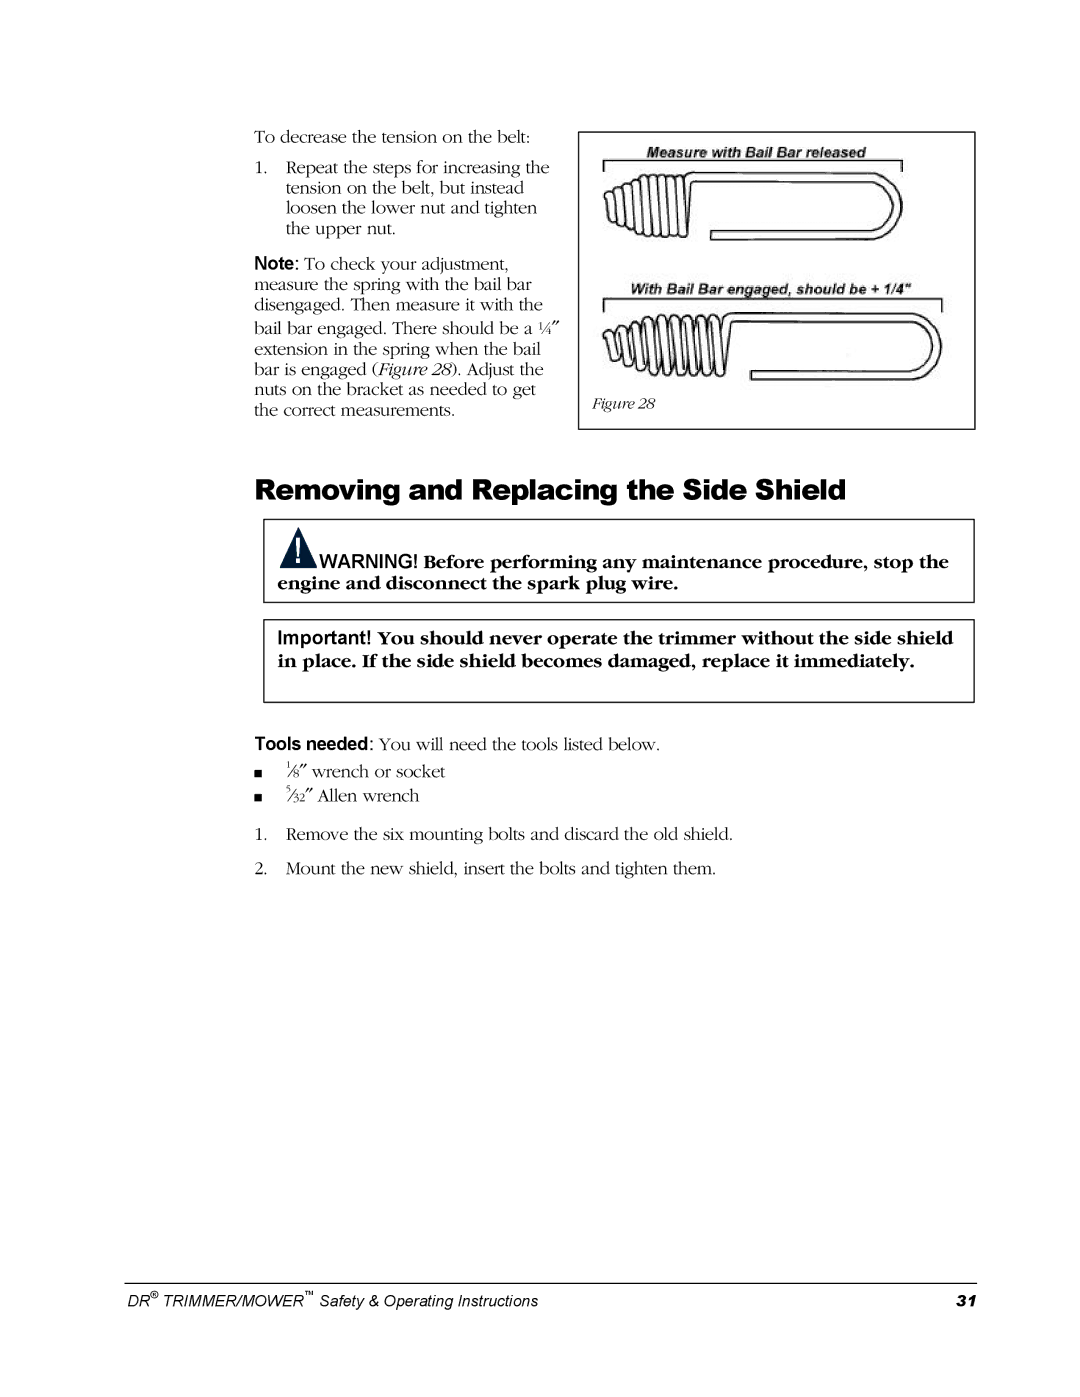
Note: To check your adjustment, measure the spring with the bail bar disengaged. Then measure it with the
bail bar engaged. There should be a ¼″ extension in the spring when the bail bar is engaged (Figure 28). Adjust the nuts on the bracket as needed to get the correct measurements.
Figure 28
Removing and Replacing the Side Shield
![]() WARNING! Before performing any maintenance procedure, stop the engine and disconnect the spark plug wire.
WARNING! Before performing any maintenance procedure, stop the engine and disconnect the spark plug wire.
Important! You should never operate the trimmer without the side shield in place. If the side shield becomes damaged, replace it immediately.
Tools needed: You will need the tools listed below.
1
■ ⁄8″ wrench or socket
5
■ ⁄32″ Allen wrench
1.Remove the six mounting bolts and discard the old shield.
2.Mount the new shield, insert the bolts and tighten them.
DR® TRIMMER/MOWER™ Safety & Operating Instructions | 31 |