Contents
ST Coll
Sears, Roebuck and Co., Hoffman Estates, JL 0179 U.S.A
Full ONE Year Warranty
RPM
12, Keep Protective Guards in Place and in Working Order
Keep Visitors and Children AWAY. do not
10, Always Wear Hearing Protection
16, Never Leave a Running Tool Unattended
21,EACHANDEVERYTmME,CHECK for DAM
Gujdeunes for Extension Cords
Shock
SPECiFiC Safety iNSTRUCTiONS
For Dust Collectors
Available Accessories
Stock Number
Contents Figure
Unpacking AN Checking
Band
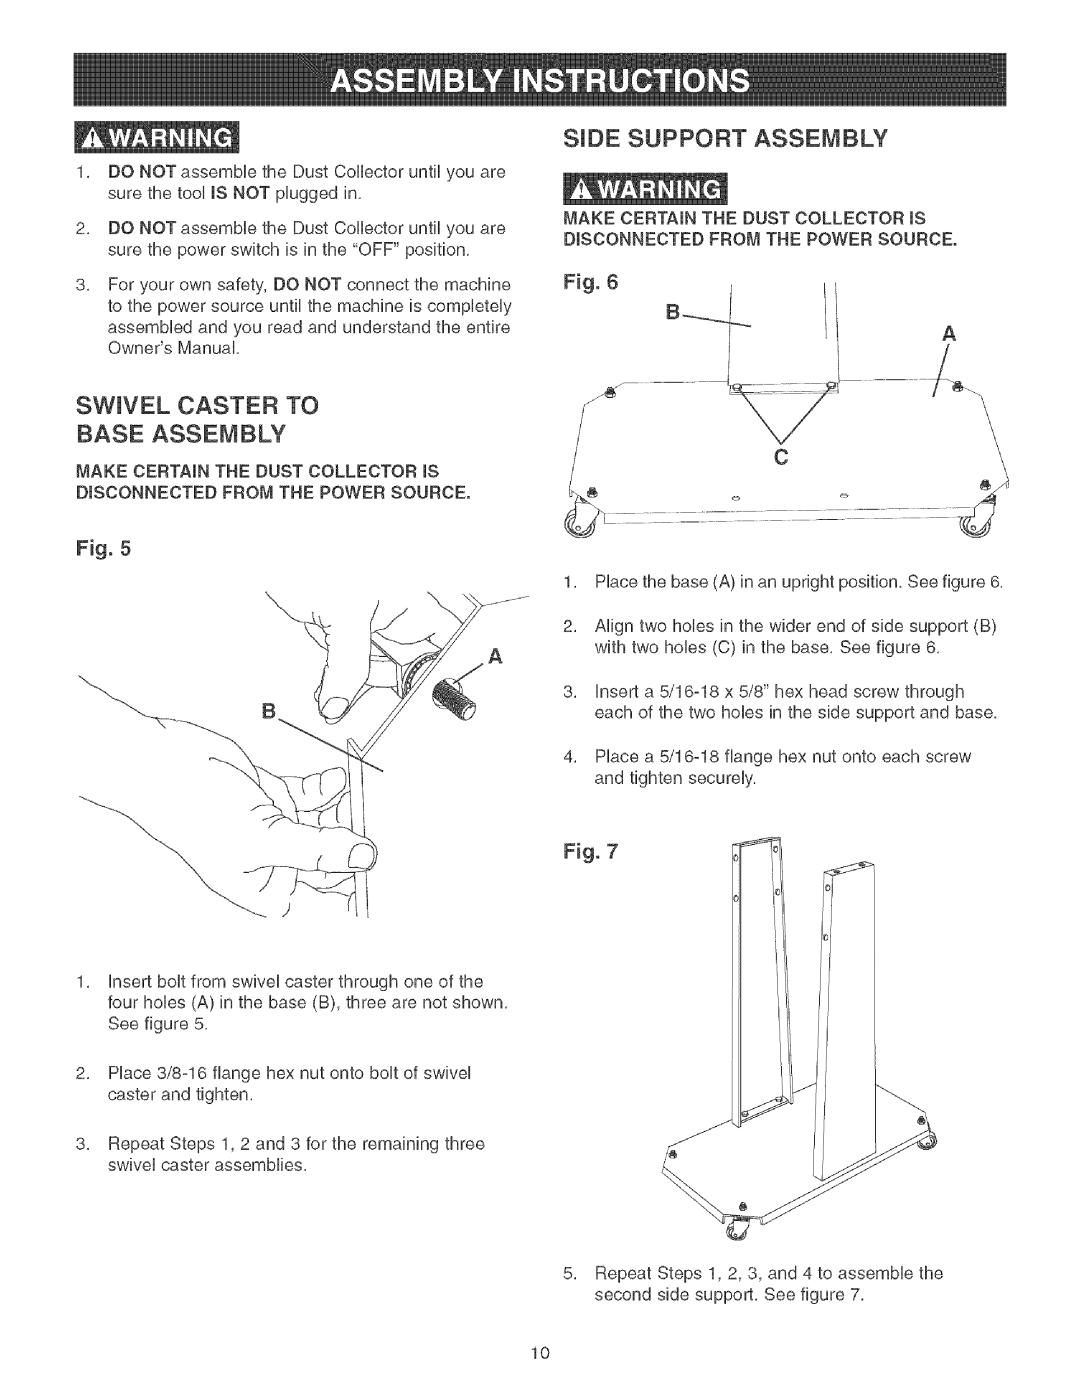
SiDE Support Assembly
Swivel Caster to Base Assembly
Motor and Blower To Base Assembly
Support Assembly
Filter and Collection BAG to Drum Assembly
INTAKE Port CAP and Hose Assembly
Locking Switch JN
Connecting Tool to Power Source
ON/OFF Switch
OFF POSiTiON
Helpfulhints
Thingstoconsider
WhatisthemaximumC,RM,requiredforeachtool
Theuseof a lowratedmicronfilterandcollection
Mrequirementsfortools
Static Pressure Fiequjfements for a Dust Collection System
VariousFittings
TurnthepowerswitchOFFandunplugthepower
Likely Causes Solution
PORTABLEDUSTCOLLECTORPARTSUSTMODELNO.152.213361
AlwaysorderbyPARTNUMBER,notbykeynumber
PORTABLEDUSTCOLLECTORPARTSLmSTMODELNO.152.213361
Page
Sears, Roebuck and Co., Hoffman Estates, JL 60179 U.S.A
Para SU Seguridad Personal
Seccion Pagina
Garantia Completa DE UN ANO
Instruccjones Generales DE Segurjdad
Revisesihaypiezasdanadasantesdecada
Tomacorrientes Macho de
Page
Accesofhos Djsponjbles
Numero DE Exstencja
Desempaque Y Verjfjcacjon DEL Contenjdo Figura
Page
Montaje be LOS Soportes
Montaje DE LAS Ruedas Pjvotantes a LA Base
Montaje OEL Motor Y DEL Soplador a LA Base
Montaje DEL Soporte
Montaje DEL Fjltro Y Bolsa DE Recoleccjon AL Tameor
Montaje DE LA Tapa Y LA Manguera DEL Puerto DE Admjsjon
Nterruptor DE ENCENDDO/APAGADO
PeligrosoNoutilicevestimentaholgadaniartfculosde
Conectando LA Herramenta a LA Fuente DE Energa
Fjando EL Nterruptor a LA Poscon DE Apagado
Cosas a Tomarse EN Cuenta
Sierradeingletes Mesaderecortadora Sierradecalar
Cuadro de Requisitos De Presi6n Estatica
Reductores
Problema Causa Probable Solucion
Califieado comuniquese con el servicio de Sears
Ensamblado DEL Motor Color Negro Empaquetadura
13 /--14 1217
Your
SU- HOG a FsM