
247.8819 specifications
The Craftsman 247.8819 is a highly versatile and robust lawn mower designed for homeowners seeking a reliable and efficient tool to maintain their lawns. This mower stands out due to its impressive features, advanced technologies, and thoughtful characteristics that cater to both novice and experienced users.One of the main features of the Craftsman 247.8819 is its powerful engine. Equipped with a reliable gas engine, it offers strong performance and the capability to tackle tough grass, ensuring a clean and precise cut every time. The high torque output allows this mower to handle various terrains with ease, making it a perfect choice for yards of different sizes and complexities.
Another remarkable feature is its variable speed transmission. This technology allows users to adjust the speed of the mower according to their comfort and specific mowing requirements. With the ability to operate at different speeds, users can maneuver through tight corners or open spaces more effectively, making for a more efficient mowing experience.
The cutting deck of the Craftsman 247.8819 is designed to provide optimal cutting performance. With a generous width, it enables users to cover more ground in less time. Additionally, it features multiple height adjustment settings, allowing for customized cutting heights to promote healthy grass growth. Whether users prefer a low cut for a manicured lawn or a higher cut for a more natural look, this mower can adapt accordingly.
Comfort and ease of use are also prioritized in the Craftsman 247.8819. Its ergonomic handles are designed to minimize strain during operation, and the mower's lightweight construction ensures easy maneuverability. Moreover, the mower is equipped with large, durable wheels that provide stability across varied terrains while ensuring smooth operation.
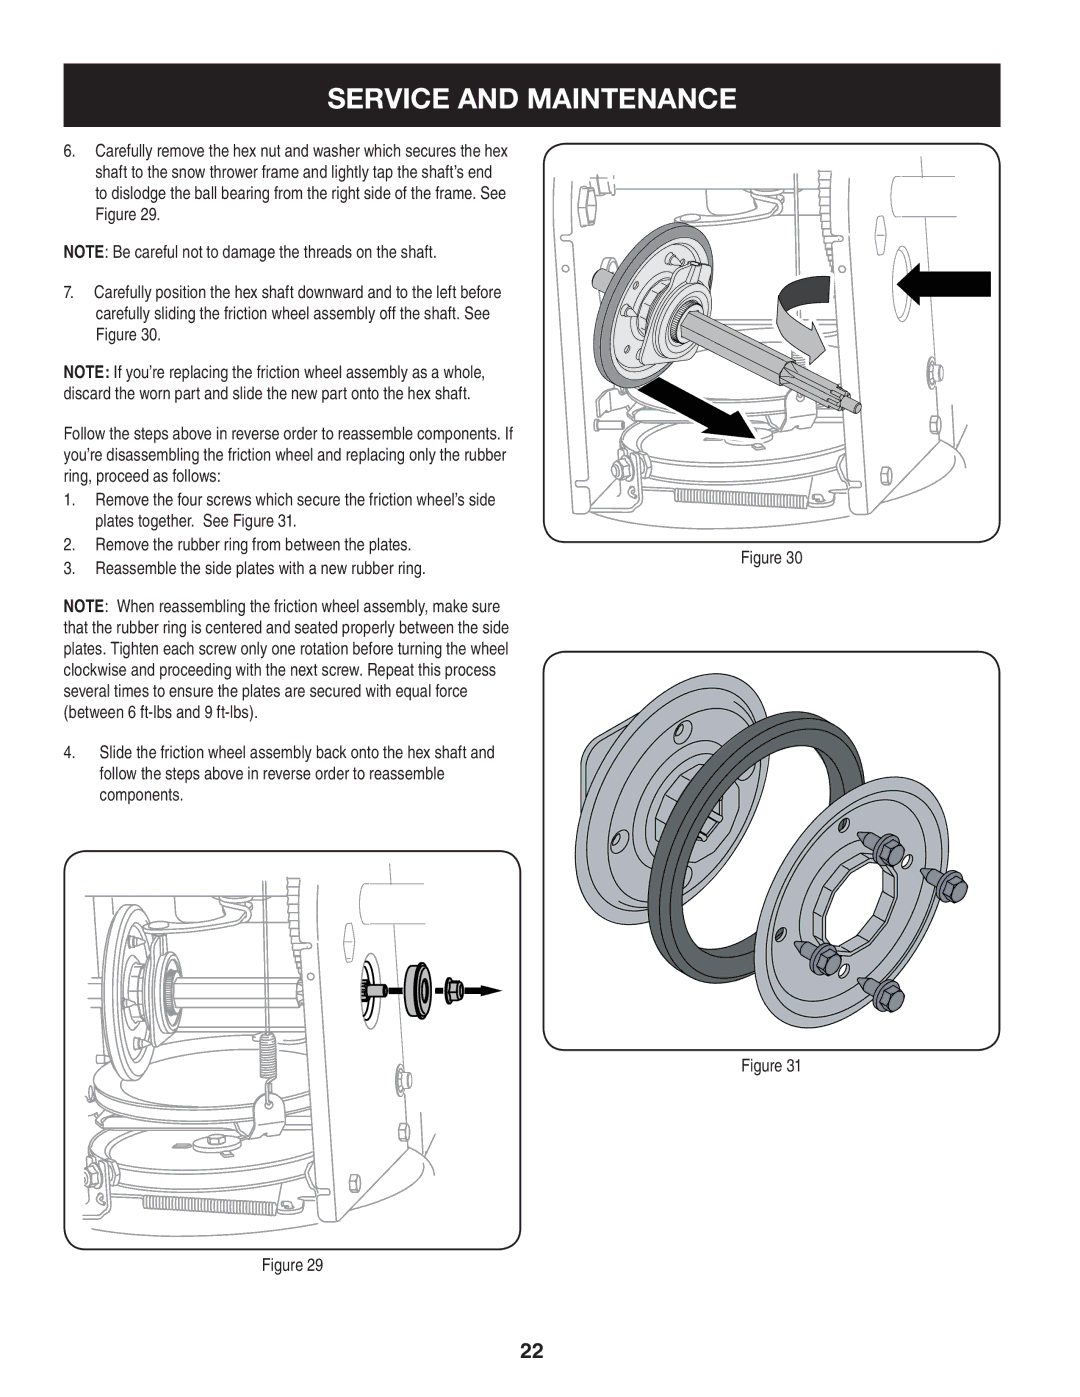
Maintenance is made simple with the Craftsman 247.8819. Its design promotes easy access to the engine and other components, allowing for straightforward maintenance tasks such as oil changes and blade sharpening. This ensures the mower remains in top condition and continues to perform efficiently over time.
In summary, the Craftsman 247.8819 offers a powerful engine, variable speed transmission, versatile cutting heights, and an ergonomic design, making it an excellent choice for homeowners. Its thoughtful features and ease of maintenance solidify its reputation as a dependable lawn mower for keeping lawns looking their best.