Maintenance & Service
General Recommendations
1.Always observe safety rules when performing any maintenance.
2.The warranty on this snow thrower does not cover items that have been subjected to operator abuse or negligence. To receive full value from the warranty, operator must maintain the snow thrower as instructed in this manual.
3.Periodically check all fasteners and hardware to make sure these are tight.
WARNING: Before servicing, repairing, lubricating or inspecting, disengage all controls and stop engine.
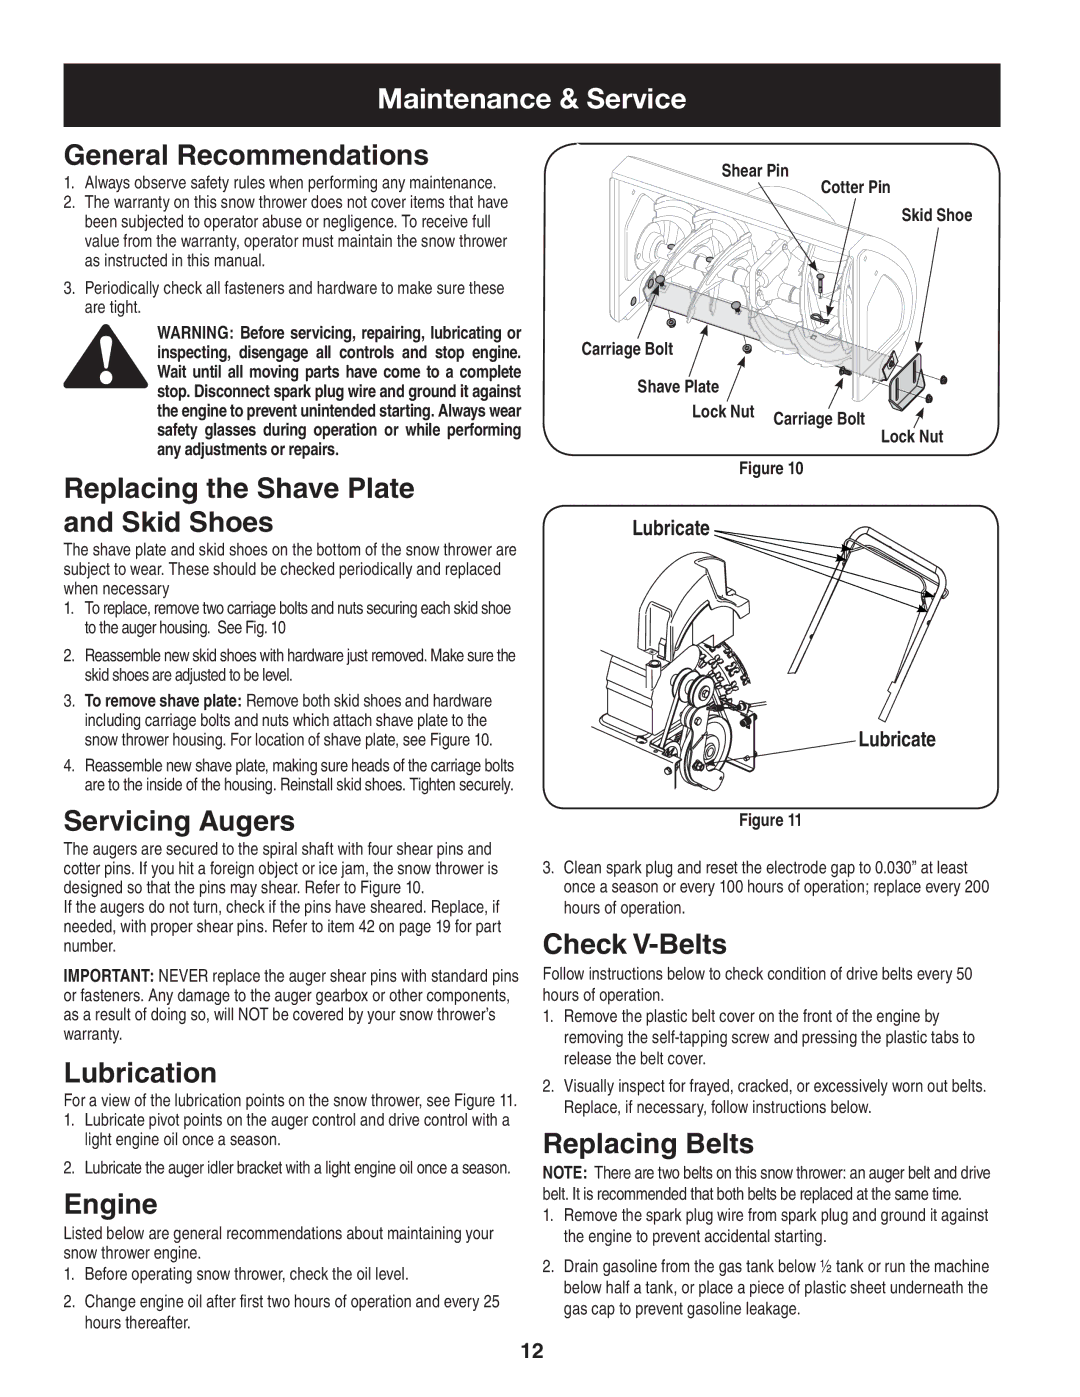
Shear Pin
Carriage Bolt
Cotter Pin
Skid Shoe
Wait until all moving parts have come to a complete stop. Disconnect spark plug wire and ground it against the engine to prevent unintended starting. Always wear safety glasses during operation or while performing any adjustments or repairs.
Replacing the Shave Plate and Skid Shoes
The shave plate and skid shoes on the bottom of the snow thrower are subject to wear. These should be checked periodically and replaced when necessary
1.To replace, remove two carriage bolts and nuts securing each skid shoe to the auger housing. See Fig. 10
2.Reassemble new skid shoes with hardware just removed. Make sure the skid shoes are adjusted to be level.
3.To remove shave plate: Remove both skid shoes and hardware including carriage bolts and nuts which attach shave plate to the snow thrower housing. For location of shave plate, see Figure 10.
4.Reassemble new shave plate, making sure heads of the carriage bolts are to the inside of the housing. Reinstall skid shoes. Tighten securely.
Servicing Augers
The augers are secured to the spiral shaft with four shear pins and cotter pins. If you hit a foreign object or ice jam, the snow thrower is designed so that the pins may shear. Refer to Figure 10.
If the augers do not turn, check if the pins have sheared. Replace, if needed, with proper shear pins. Refer to item 42 on page 19 for part number.
IMPORTANT: NEVER replace the auger shear pins with standard pins or fasteners. Any damage to the auger gearbox or other components, as a result of doing so, will NOT be covered by your snow thrower’s warranty.
Lubrication
For a view of the lubrication points on the snow thrower, see Figure 11.
1.Lubricate pivot points on the auger control and drive control with a light engine oil once a season.
2.Lubricate the auger idler bracket with a light engine oil once a season.
Engine
Listed below are general recommendations about maintaining your snow thrower engine.
1.Before operating snow thrower, check the oil level.
2.Change engine oil after first two hours of operation and every 25 hours thereafter.
Shave Plate |
|
Lock Nut | Carriage Bolt |
| |
| Lock Nut |
Figure 10 | |
Lubricate
Lubricate
Figure 11
3.Clean spark plug and reset the electrode gap to 0.030” at least once a season or every 100 hours of operation; replace every 200 hours of operation.
Check V-Belts
Follow instructions below to check condition of drive belts every 50 hours of operation.
1.Remove the plastic belt cover on the front of the engine by removing the
2.Visually inspect for frayed, cracked, or excessively worn out belts. Replace, if necessary, follow instructions below.
Replacing Belts
NOTE: There are two belts on this snow thrower: an auger belt and drive belt. It is recommended that both belts be replaced at the same time.
1.Remove the spark plug wire from spark plug and ground it against the engine to prevent accidental starting.
2.Drain gasoline from the gas tank below ½ tank or run the machine below half a tank, or place a piece of plastic sheet underneath the gas cap to prevent gasoline leakage.
12