Operation
6.As the snow thrower starts to move, maintain a firm hold on the handle, and guide the snow thrower along the path to be cleared.
7.Release the auger and drive controls to stop the snow throwing action and forward motion.
NOTE: Your unit is equipped with a clutch in the transmission. If the wheels stop turning while trying to discharge large volumes of snow, immediately disengage the drive control and allow the rotating augers to discharge snow from the housing. Reduce the clearing width and continue operation.
8.On each succeeding pass, readjust the chute assembly to the desired position and slightly overlap the previously cleared path.
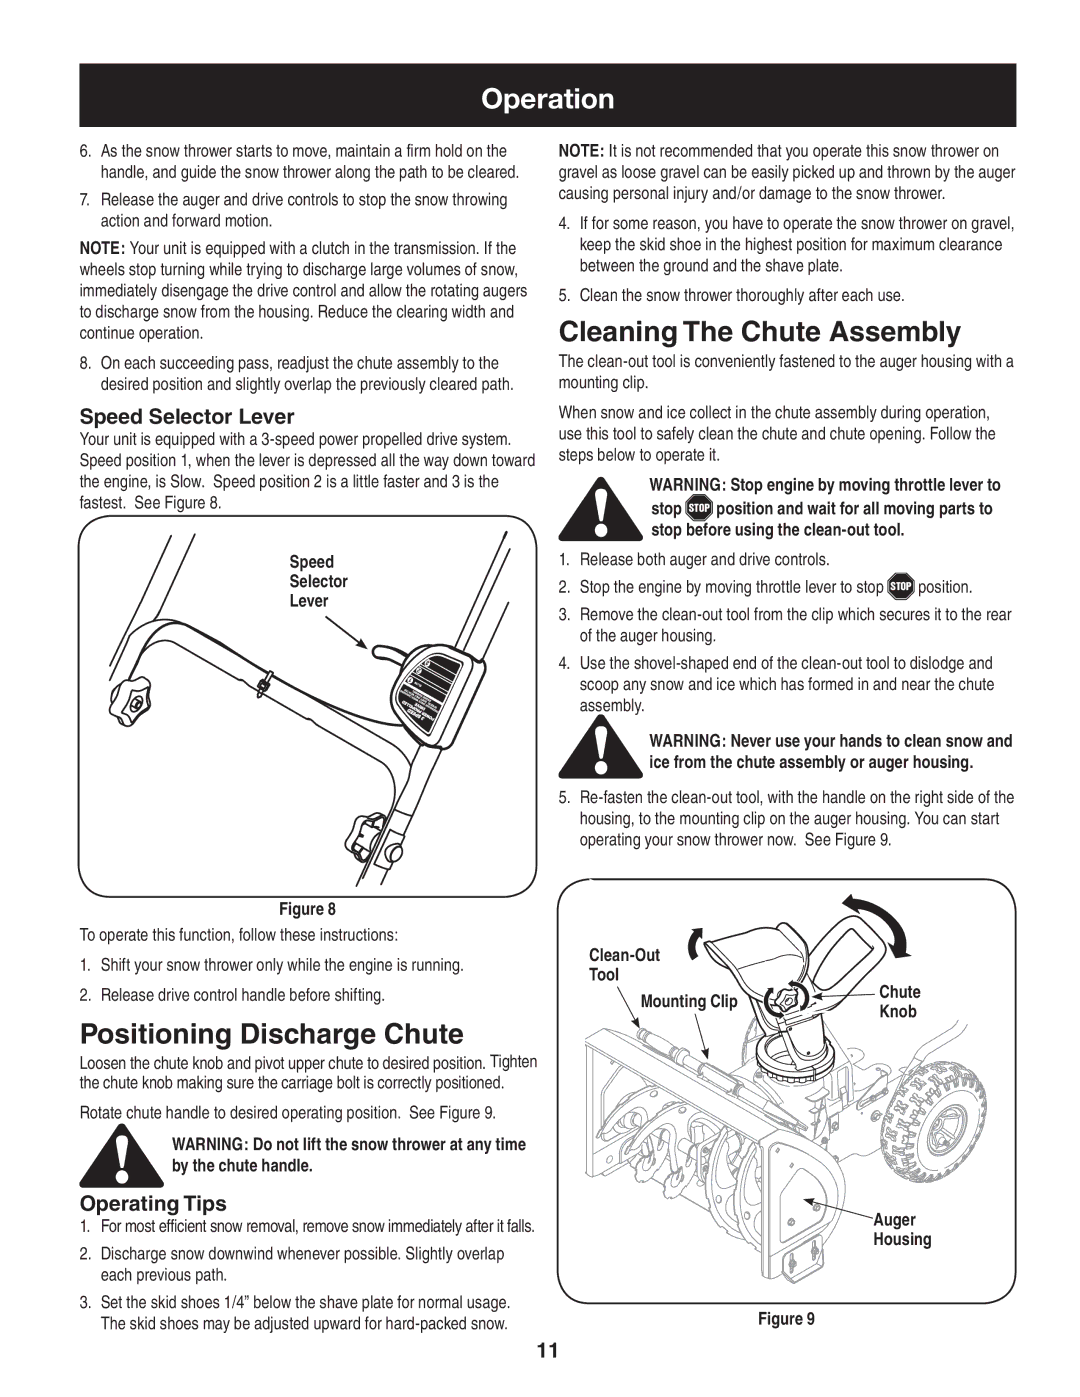
Speed Selector Lever
Your unit is equipped with a
Speed
Selector
Lever
NOTE: It is not recommended that you operate this snow thrower on gravel as loose gravel can be easily picked up and thrown by the auger causing personal injury and/or damage to the snow thrower.
4.If for some reason, you have to operate the snow thrower on gravel, keep the skid shoe in the highest position for maximum clearance between the ground and the shave plate.
5.Clean the snow thrower thoroughly after each use.
Cleaning The Chute Assembly
The
When snow and ice collect in the chute assembly during operation, use this tool to safely clean the chute and chute opening. Follow the steps below to operate it.
WARNING: Stop engine by moving throttle lever to
stop STOP position and wait for all moving parts to stop before using the
1.Release both auger and drive controls.
2.Stop the engine by moving throttle lever to stop STOP position.
3.Remove the
4.Use the
WARNING: Never use your hands to clean snow and ice from the chute assembly or auger housing.
5.
Figure 8
To operate this function, follow these instructions:
1.Shift your snow thrower only while the engine is running.
2.Release drive control handle before shifting.
Positioning Discharge Chute
Loosen the chute knob and pivot upper chute to desired position. Tighten the chute knob making sure the carriage bolt is correctly positioned.
Rotate chute handle to desired operating position. See Figure 9.
WARNING: Do not lift the snow thrower at any time by the chute handle.
Operating Tips
1.For most efficient snow removal, remove snow immediately after it falls.
2.Discharge snow downwind whenever possible. Slightly overlap each previous path.
3.Set the skid shoes 1/4” below the shave plate for normal usage. The skid shoes may be adjusted upward for
Tool
Mounting Clip | Chute | |
Knob | ||
|
![]() Auger
Auger
Housing
Figure 9
11
