Maintenance & Service
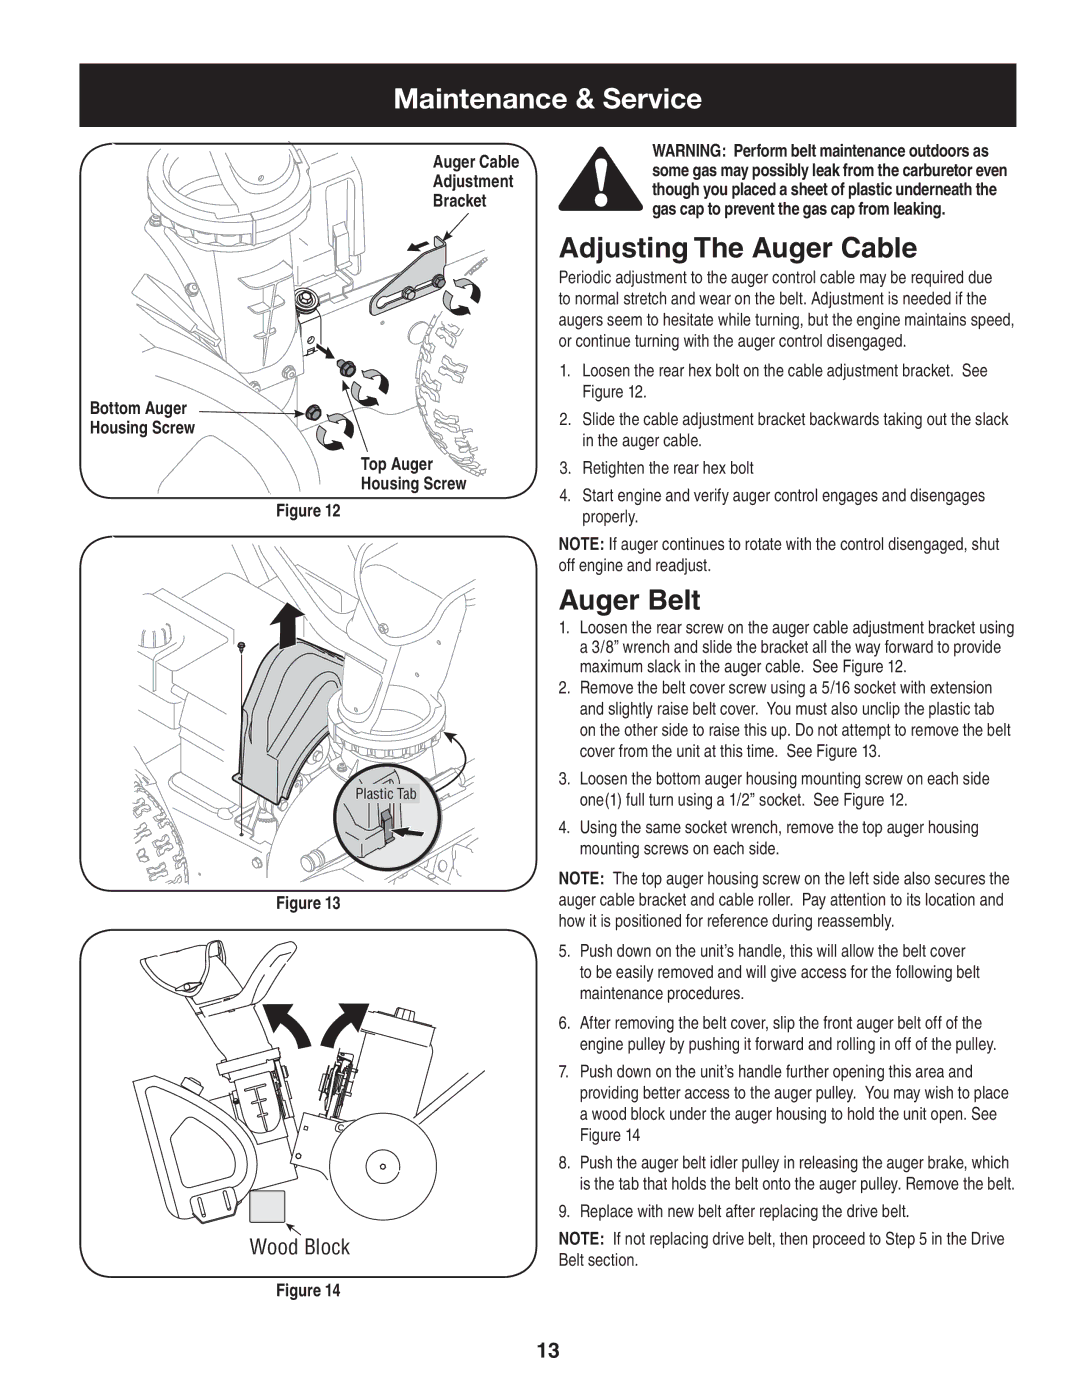
Bottom Auger Housing Screw
Auger Cable
Adjustment
Bracket
Top Auger
Housing Screw 


Figure 12
WARNING: Perform belt maintenance outdoors as some gas may possibly leak from the carburetor even though you placed a sheet of plastic underneath the gas cap to prevent the gas cap from leaking.
Adjusting The Auger Cable
Periodic adjustment to the auger control cable may be required due to normal stretch and wear on the belt. Adjustment is needed if the augers seem to hesitate while turning, but the engine maintains speed, or continue turning with the auger control disengaged.
1.Loosen the rear hex bolt on the cable adjustment bracket. See Figure 12.
2.Slide the cable adjustment bracket backwards taking out the slack in the auger cable.
3.Retighten the rear hex bolt
4.Start engine and verify auger control engages and disengages properly.
NOTE: If auger continues to rotate with the control disengaged, shut off engine and readjust.
Auger Belt
0LASTICS4AB
Figure 13
7OODO"LOCK
Figure 14
1.Loosen the rear screw on the auger cable adjustment bracket using a 3/8” wrench and slide the bracket all the way forward to provide maximum slack in the auger cable. See Figure 12.
2.Remove the belt cover screw using a 5/16 socket with extension and slightly raise belt cover. You must also unclip the plastic tab on the other side to raise this up. Do not attempt to remove the belt cover from the unit at this time. See Figure 13.
3.Loosen the bottom auger housing mounting screw on each side one(1) full turn using a 1/2” socket. See Figure 12.
4.Using the same socket wrench, remove the top auger housing mounting screws on each side.
NOTE: The top auger housing screw on the left side also secures the auger cable bracket and cable roller. Pay attention to its location and how it is positioned for reference during reassembly.
5.Push down on the unit’s handle, this will allow the belt cover to be easily removed and will give access for the following belt maintenance procedures.
6.After removing the belt cover, slip the front auger belt off of the engine pulley by pushing it forward and rolling in off of the pulley.
7.Push down on the unit’s handle further opening this area and providing better access to the auger pulley. You may wish to place a wood block under the auger housing to hold the unit open. See Figure 14
8.Push the auger belt idler pulley in releasing the auger brake, which is the tab that holds the belt onto the auger pulley. Remove the belt.
9.Replace with new belt after replacing the drive belt.
NOTE: If not replacing drive belt, then proceed to Step 5 in the Drive Belt section.
13
