The battery pack and charger are not included with this worklight. They are both sold separately. If you decide to purchase a battery pack and charger, use battery pack item number 9 11034
CHARGING BAI-rERY PACK
The battery pack for this tool has been shipped in a tow charge condition to prevent possible problems. Therefore, you should charge it until light on front of charger changes from red to green.
Note: Batteries will not reach full charge the first time they are charged. Allow several cycles (operating worklight followed by recharging) for batteries to become fully charged.
TO CHARGE
•Charge battery pack only with the recommended charger.
•Make sure power supply is normal house voltage, 120 volts, 60 Hz, AC only,
•Connect charger to power supply,
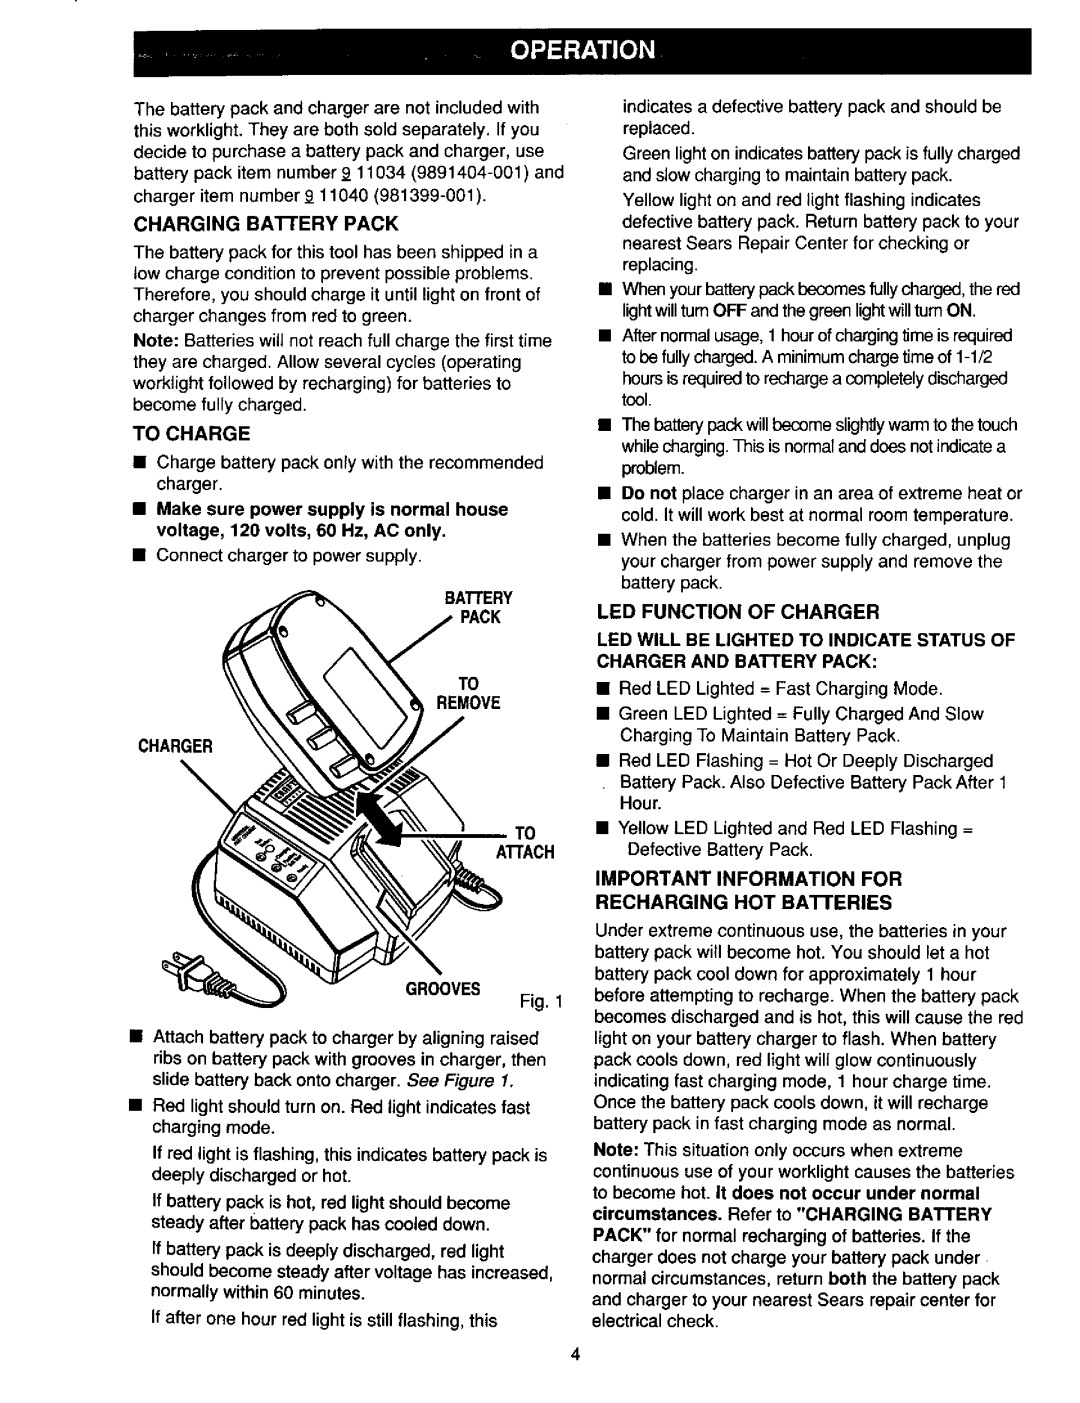
BATTERY
TO
REMOVE
CHARGER
TO
AI"rACH
GROOVES
Fig. 1
•Attach battery pack to charger by aligning raised ribs on battery pack with grooves in charger, then slide battery back onto charger. See Figure 1.
•Red light should turn on. Red light indicates fast charging mode.
If red light is flashing, this indicates battery pack is deeply discharged or hot.
If battery pack is hot, red light should become steady after battery pack has cooled down.
If battery pack is deeply discharged, red light should become steady after voltage has increased, normally within 60 minutes.
If after one hour red light is still flashing, this
indicates a defective battery pack and should be replaced.
Green light on indicates battery pack is fully charged and slow charging to maintain battery pack.
Yellow light on and red light flashing indicates defective battery pack. Return battery pack to your nearest Sears Repair Center for checking or replacing.
•When your battery pack becomes fully charged, the red light will tum OFF and the green light will turn ON.
•After normal usage, 1 hour of charging time is required to be fully charged. A minimum charge time of
hours is required to recharge a completely discharged tool.
•The battery pack willbecome slightly warm to the touch whilecharging. This is normal and does not indicate a problem.
•Do not place charger in an area of extreme heat or cold. It will work best at normal room temperature.
•When the batteries become fully charged, unplug your charger from power supply and remove the battery pack.
LED FUNCTION OF CHARGER
LED WILL BE LIGHTED TO INDICATE STATUS OF
CHARGER AND BATTERY PACK:
•Red LED Lighted = Fast Charging Mode.
•Green LED Lighted = Fully Charged And Slow Charging To Maintain Battery Pack.
•Red LED Flashing = Hot Or Deeply Discharged
•Battery Pack. Also Defective Battery Pack After 1 Hour.
•Yellow LED Lighted and Red LED Flashing = Defective Battery Pack.
IMPORTANT INFORMATION FOR
RECHARGING HOT BA'n'ERIES
Under extreme continuous use, the batteries in your battery pack will become hot. You should let a hot battery pack cool down for approximately 1 hour before attempting to recharge. When the battery pack becomes discharged and is hot, this will cause the red light on your battery charger to flash. When battery pack cools down, red light will glow continuously indicating fast charging mode, 1 hour charge time. Once the battery pack cools down, it will recharge battery pack in fast charging mode as normal.
Note: This situation only occurs when extreme continuous use of your worklight causes the batteries to become hot. It does not occur under normal circumstances. Refer to "CHARGING BATTERY PACK" for normal recharging of batteries. If the charger does not charge your battery pack under normal circumstances, return both the battery pack
and charger to your nearest Sears repair center for electrical check.