2.Push the small end of the elbow tube through the small opening in
the bag. Elbow
Tube
Small Opening
Zipper
OpeningRib
NOTE: Make sure edge of the smaIt
opening is flush against the flared area of the elbow tube, and the rib on the
eIbow tube is on the bottom.
3.Close the zipper on the bag. Make sure the zipper is closed complete- ly.
4.Remove blower tube from engine.
i]_Rib
Groove
5._vtube into the blow- er outlet. Make sure elbow tube is aligned with the bIower outlet groove.
6.Turn clamp knob clockwise to tight- en.
7.Secure the ends of the shoulder
strap by routing the strap through the buckle as shown.
VACUUM TUBE ASSEMBLY
1.Align the lower vacuum tube as shown. Push lower vacuum tube
into upper vacuum tube. Upper
Vacuum Tube
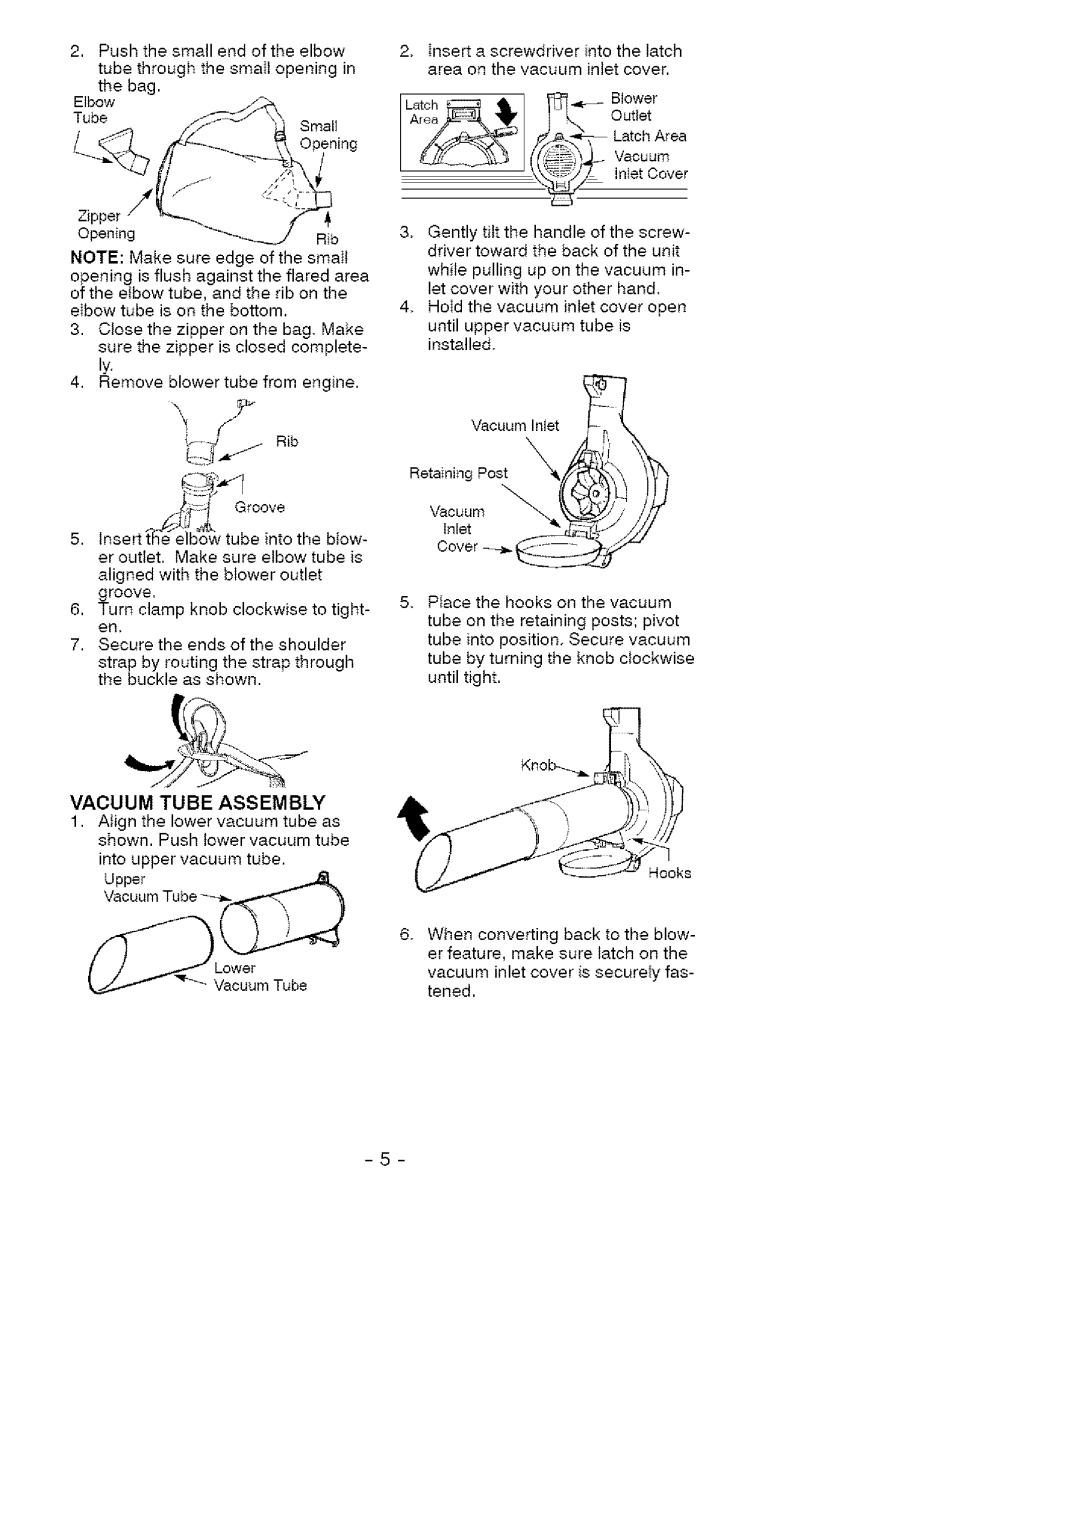
2.insert a screwdriver into the latch area on the vacuum inlet cover.
Latch Area
A_Outlet
Vacuum
Latch_Blowerinlet Cover
3.Gently titt the handle of the screw- driver toward the back of the unit
while pulling up on the vacuum in- let cover with your other hand.
4.Hold the vacuum inlet cover open
until upper vacuum tube is installed.
Vacuum Inlet
Retaining Post
Vacuum
Inlet
5.Place the hooks on the vacuum tube on the retaining posts; pivot tube into position. Secure vacuum tube by turning the knob clockwise until tight.
Hooks
Lower
Vacuum Tube
6.When converting back to the blow- er feature, make sure latch on the
vacuum inlet cover is securely fas- tened.