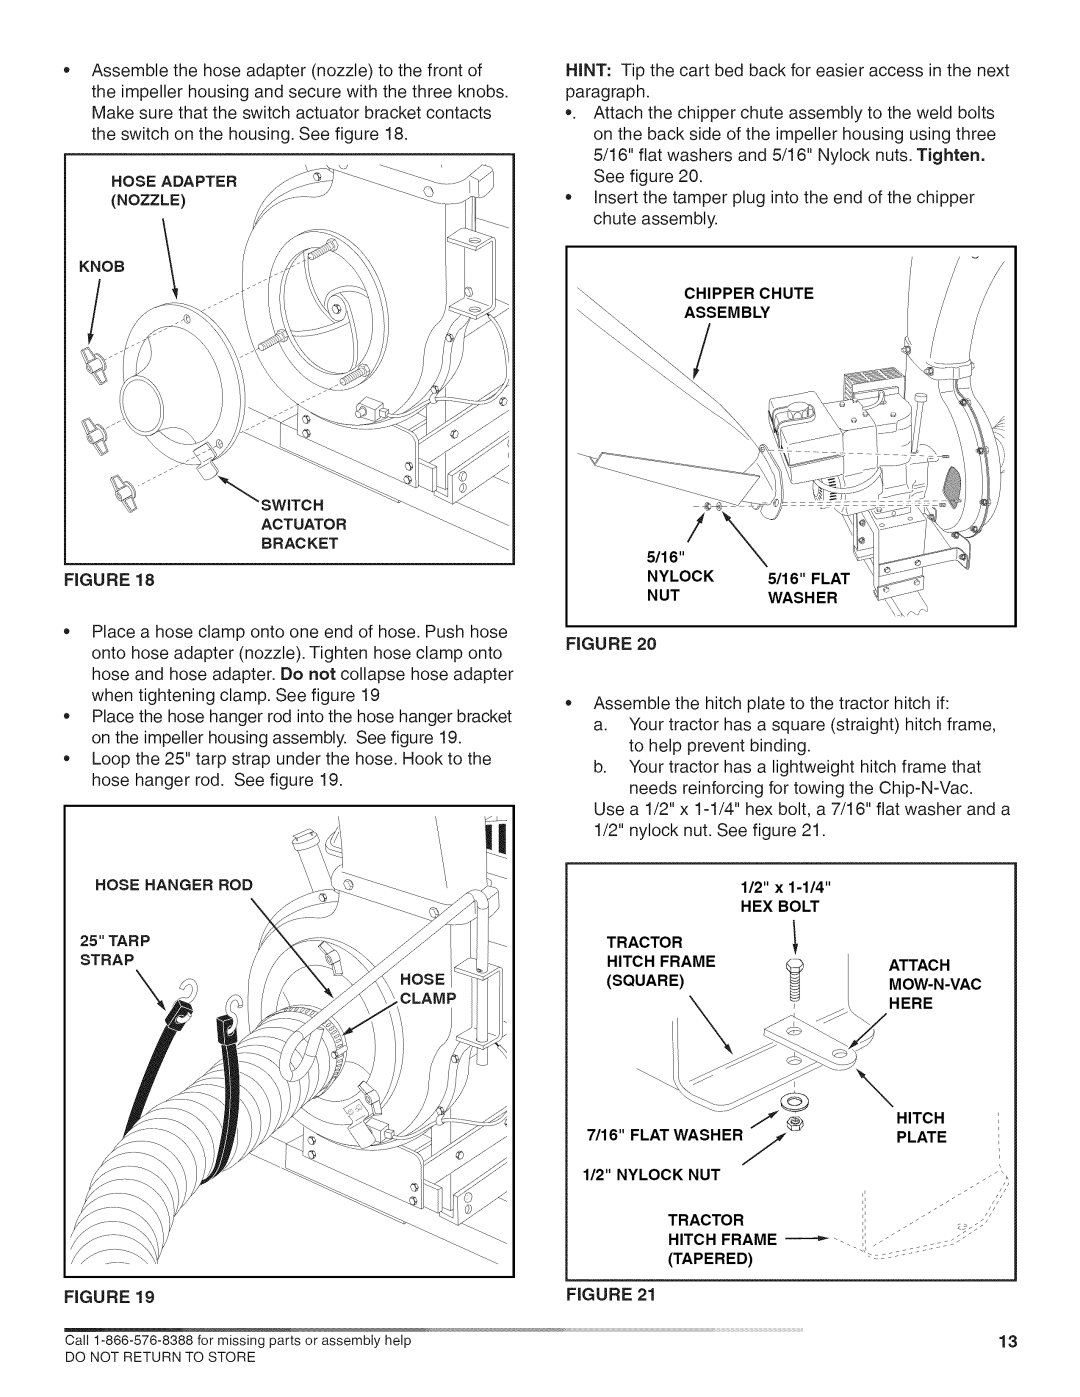
Assemble the hose adapter (nozzle) to the front of
the impeller housing and secure with the three knobs. Make sure that the switch actuator bracket contacts
the switch on the housing. See figure 18.
HOSE ADAPTER
(NOZZLE)
KNOB 1
SWITCH
ACTUATOR
BRACKET
FIGURE 18
•Place a hose clamp onto one end of hose. Push hose onto hose adapter (nozzle). Tighten hose clamp onto hose and hose adapter. Do not collapse hose adapter when tightening clamp. See figure 19
Place the hose hanger rod into the hose hanger bracket on the impeller housing assembly. See figure 19.
Loop the 25" tarp strap under the hose. Hook to the hose hanger rod. See figure 19.
HOSE HANGER ROD
25" TARP
STRAP
HINT: Tip the cart bed back for easier access in the next paragraph.
*. Attach the chipper chute assembly to the weld bolts on the back side of the impeller housing using three 5/16" flat washers and 5/16" Nylock nuts. Tighten.
See figure 20.
Insert the tamper plug into the end of the chipper chute assembly.
CHIPPER CHUTE
ASSEMBLY
/
/
5/16"
NYLOCK 5/16" FLAT
NUTWASHER\
FIGURE 20
Assemble the hitch plate to the tractor hitch if:
a.Your tractor has a square (straight) hitch frame, to help prevent binding.
b.Your tractor has a lightweight hitch frame that needs reinforcing for towing the
Use a 1/2" x
| 1/2" x |
| HEX BOLT |
TRACTOR |
|
HITCH FRAME | ATTACH |
(SQUARE) | |
| HERE |
| @ | HITCH |
| ® | |
| 7/16" FLAT WASHERf | PLATE |
|
| |
| 1/2" NYLOCK NUT |
|
| TRACTOR | ,i |
| " | |
| HITCH FRAME | : .. |
| (TAPERED) |
|
FIGURE 19 | FIGURE 21 |
|
Call | 13 |
DO NOT RETURN TO STORE |
|