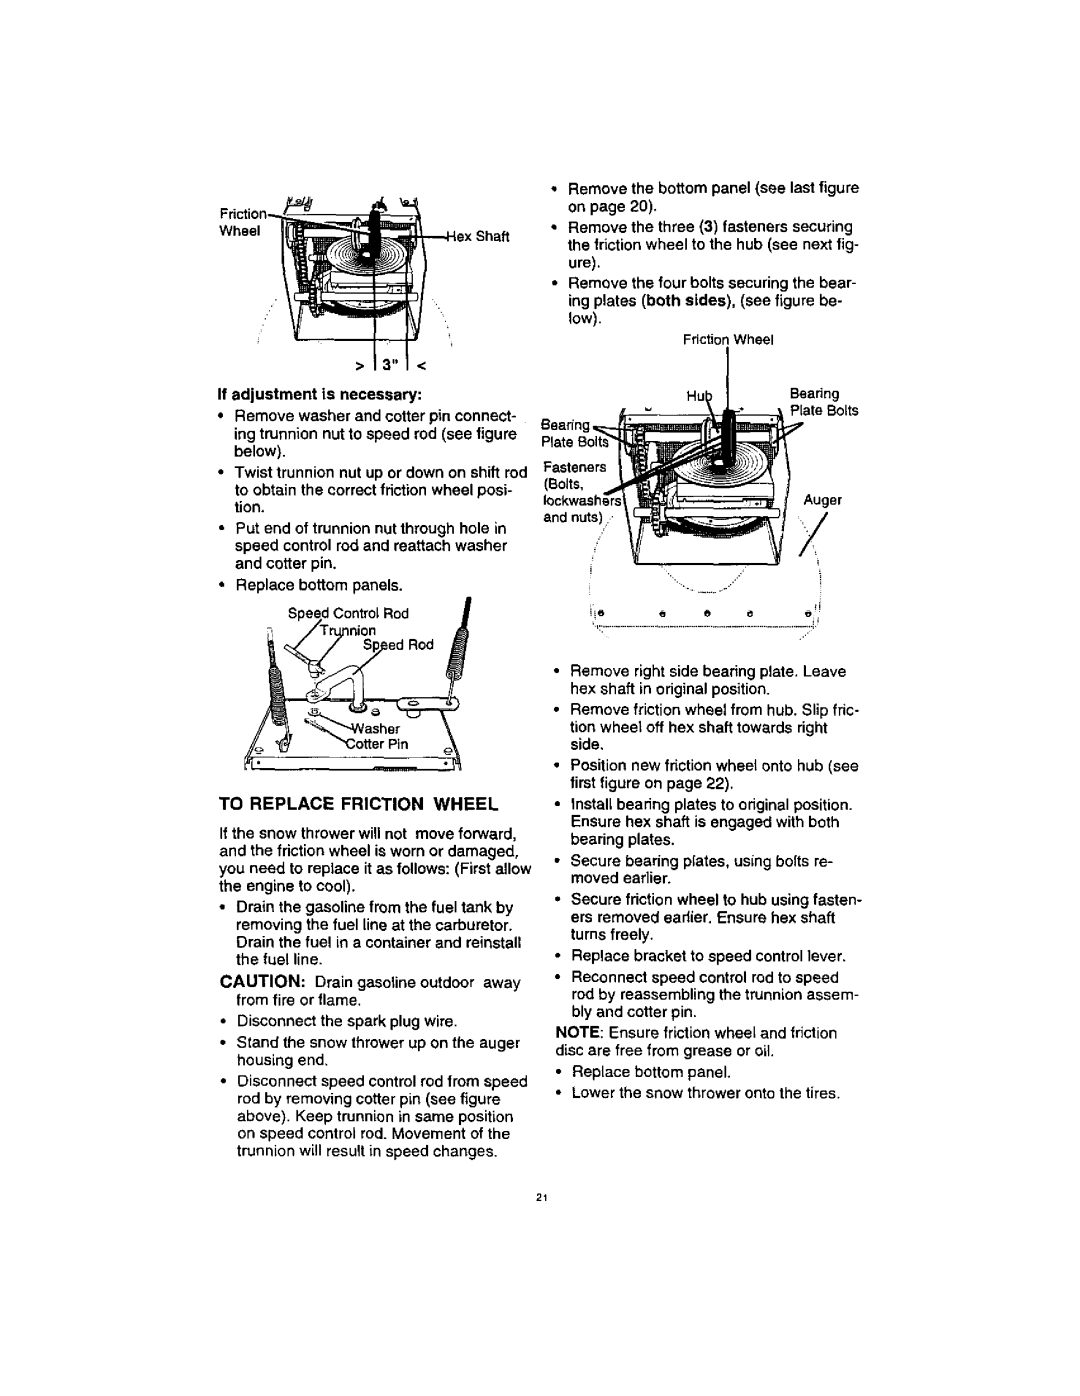
536.88123 specifications
The Craftsman 536.88123 is a powerful and versatile snow blower designed to tackle the toughest winter weather conditions. With its robust construction and advanced features, this machine is engineered for homeowners who desire efficiency and reliability in snow removal.One of the standout features of the Craftsman 536.88123 is its impressive 27-inch clearing width. This wide path allows users to cover large areas quickly, making it suitable for both residential driveways and sidewalks. The snow blower is equipped with a strong and efficient 2-stage auger system that not only breaks up compact snow but also throws it far away from the cleared area. This ensures that snow is efficiently removed without simply pushing it aside, which can cause buildup over time.
Another significant characteristic of this model is its powerful 357cc engine, delivering substantial torque and performance. This engine is designed to handle heavy, wet snow with ease, providing users with the confidence to tackle even the most challenging conditions. The electric start feature adds convenience for those cold, winter mornings, allowing for easy ignition without the need for strenuous pulling.
The Craftsman 536.88123 is also designed for user comfort and ease of operation. The adjustable handle ensures a comfortable grip, and it can be modified to fit the user’s height. This snow blower features six forward and two reverse speeds, giving users full control over their snow clearing experience. The durable, rubber-edged auger not only provides efficient snow removal but also protects surfaces underneath, minimizing the risk of damage.
Additionally, the snow blower comes with a remote chute control system, allowing users to easily direct the snow discharge without having to manually adjust the chute. This feature is particularly beneficial for users who need to navigate around obstacles while working.
In terms of durability, the Craftsman 536.88123 is built with high-quality materials designed to withstand harsh conditions, ensuring longevity and dependable performance year after year.
With its combination of power, efficiency, and user-friendly design, the Craftsman 536.88123 is a top choice for those looking for a reliable solution to winter snow challenges. Whether you're clearing your driveway, sidewalk, or patio, this snow blower promises to make your winter maintenance tasks manageable and less labor-intensive.