
917.375010 specifications
The Craftsman 917.375010 is a riding lawn mower that combines efficiency, durability, and ease of use, making it an ideal choice for homeowners with medium to large-sized lawns. Engineered for performance, this mower is equipped with impressive features that set it apart from other competitive models.One of the standout characteristics of the Craftsman 917.375010 is its powerful engine. It comes fitted with a Briggs & Stratton engine that delivers strong performance and reliable starting. The engine's multi-speed transmission provides enhanced control while mowing, allowing users to tailor the speed to their specific lawn needs. This feature is essential for achieving an even cut in various terrains.
Another key aspect of this riding mower is its cutting deck. The 42-inch cutting deck is designed for optimum maneuverability and efficiency, making it suitable for getting into tight spaces and around obstacles. Additionally, the adjustable cutting height allows users to select from multiple positions, enabling customization based on grass type and seasonal growth.
The Craftsman 917.375010 also integrates advanced technologies that contribute to its ease of use. The electric start feature eliminates the hassle of manual cranking, ensuring that users can start the mower with just the turn of a key. Moreover, the mower is equipped with an automatic transmission that allows for seamless shifting, making it user-friendly even for those unfamiliar with operating riding mowers.
Comfort is another notable characteristic of the Craftsman 917.375010. It comes with an ergonomic seat designed for extended use, and the steering system is tailored for easy handling. The foot-controlled operation further enhances comfort and reduces fatigue during mowing sessions, allowing homeowners to tackle their lawn care chores with ease.
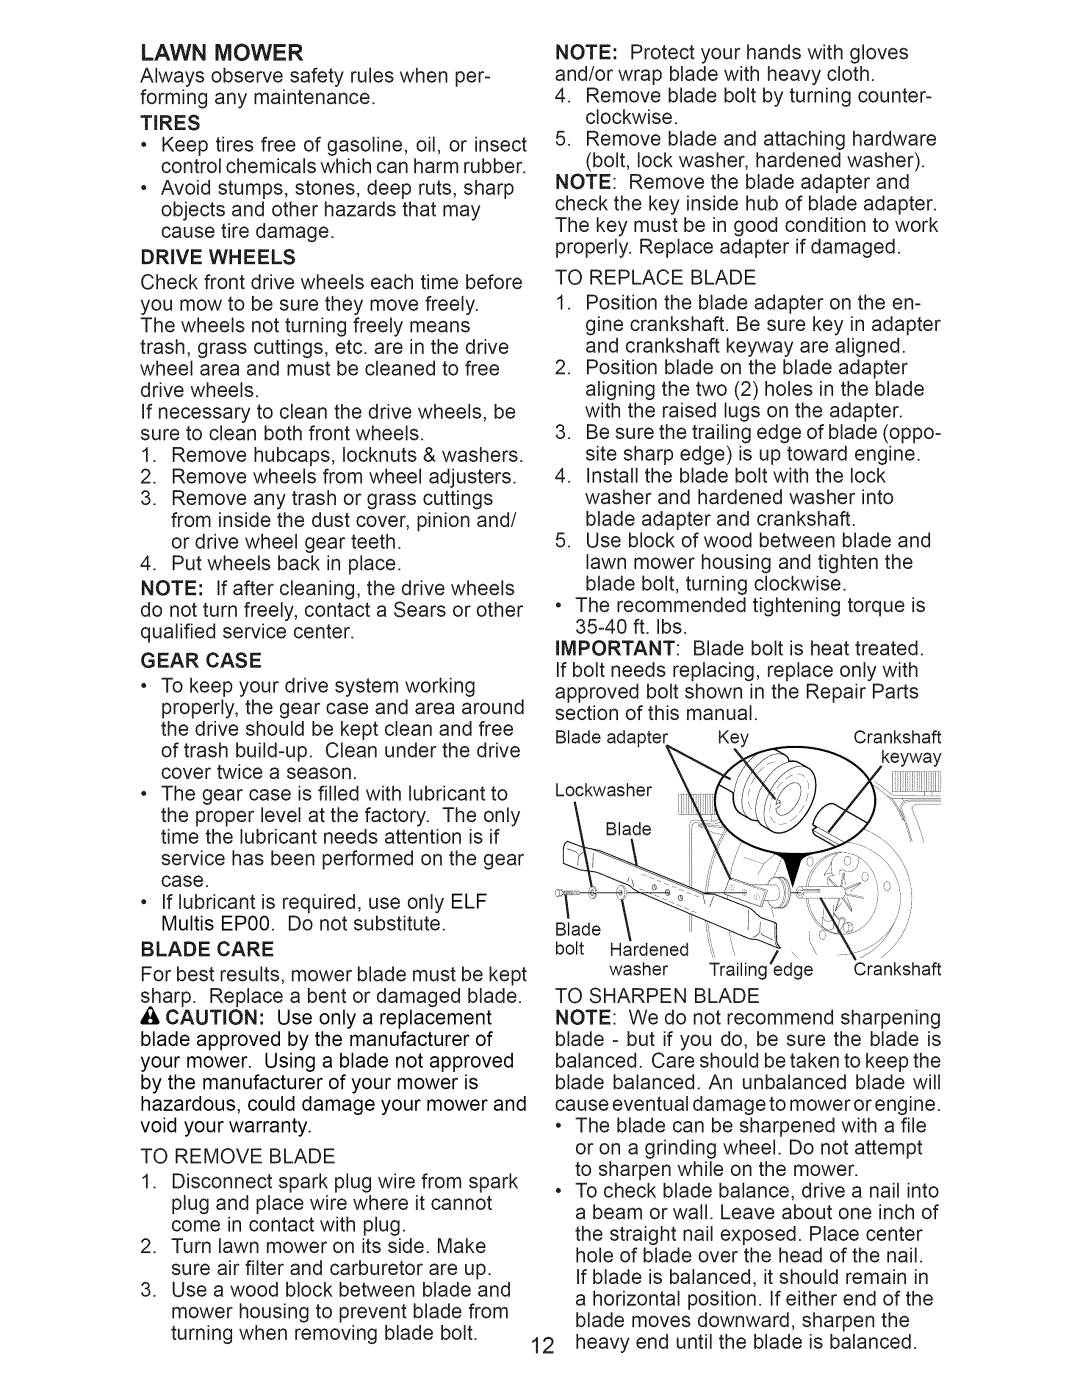
Maintenance of the Craftsman 917.375010 is made more manageable thanks to its built-in features. The mower comes with easy-access points for oil changes and blade adjustments, making it less of a chore for owners to keep their equipment in top shape.
In summary, the Craftsman 917.375010 is a formidable riding lawn mower that boasts a powerful engine, adjustable cutting deck, and user-friendly features. Its integration of comfort and advanced technology makes lawn care a breeze, ensuring that homeowners can maintain their outdoor spaces with precision and efficiency. Whether you have a sprawling yard or a more compact area, this mower is equipped to handle the job with ease.