10103101 WED 13:46 | FAX 864 964 3314 RYOBI CUSTOMER SERVICE | [_011/015 |
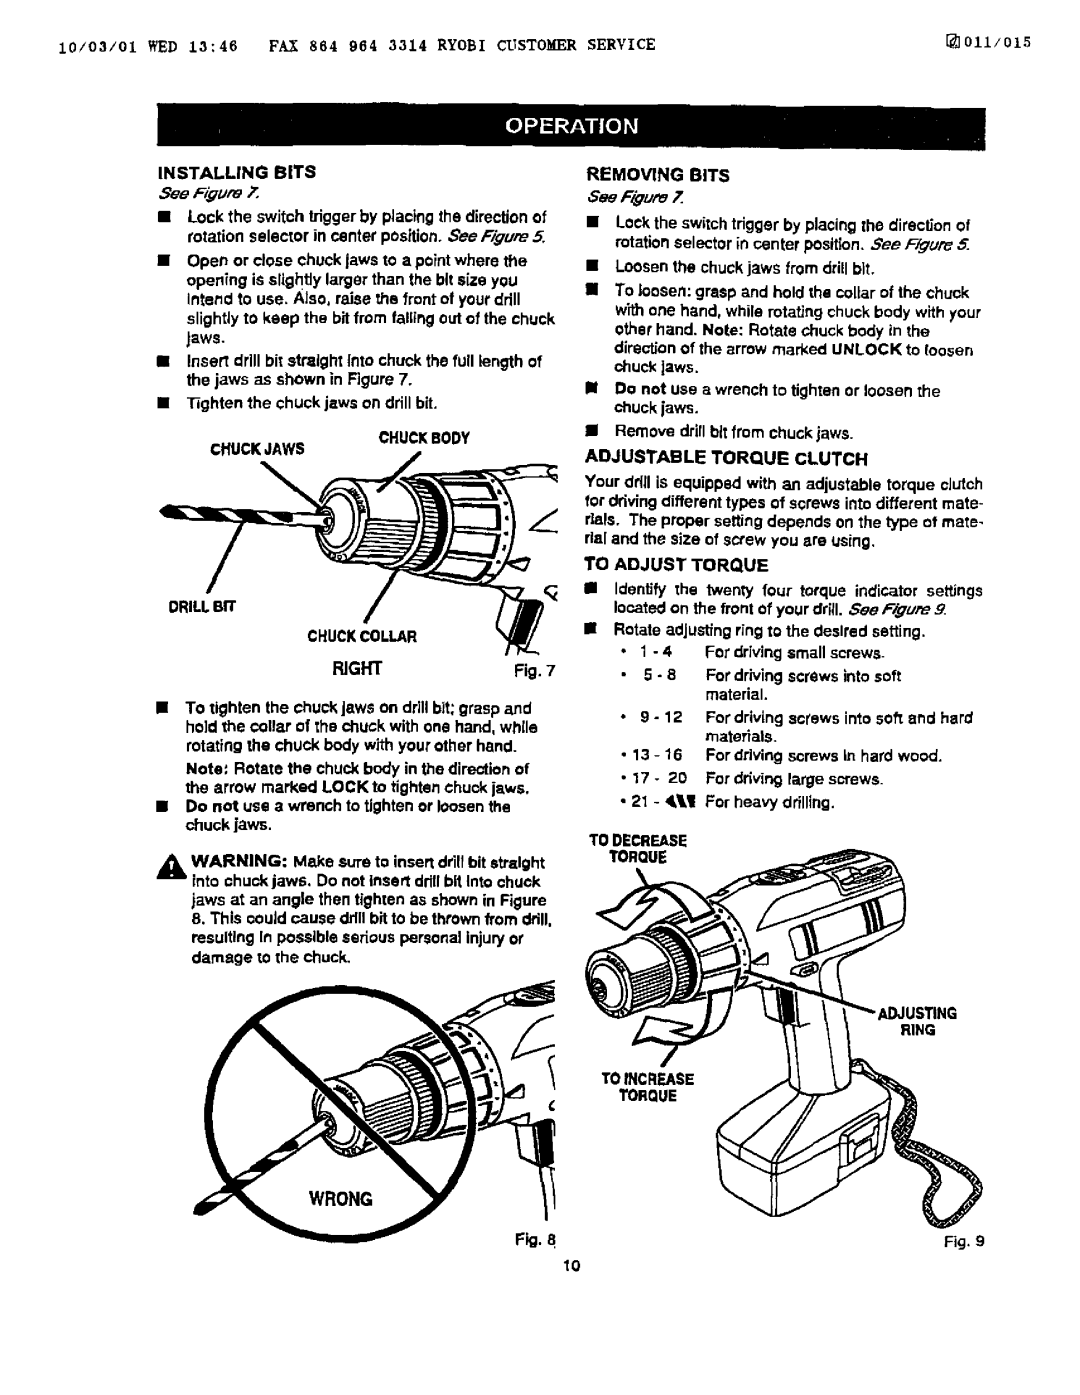
INSTALLING BITS
See FTgure7..
•Lock the switch triggerby placingthe directionof rotation selector in center position.See Figure 5.
•Open or close chuck jaws to a pointwhere the opening is slightly larger than the bit size you Intend to use. Also, raise the front of your drill slightly to keep the bit from faiUngout of the chuck Jaws.
•Insert drill bit straight Into chuck the full length of the jaws as shown in Figure 7.
•Tighten the chuck jaws on drillbit.
CHUCKBODY
CHUCKJAWS
DRILL BIT
CHUCKCOLLAR
PJGHT | Fig. 7 |
IN To tighten the chuck Jawson drillbit; grasp and hold the collar of the chuck with one hand, while rotating the chuck body with your other hand.
Note= Rotate the chuck body in the directionof the arrow marked LOCK to tighten chuck jaws,
•Do not use a wrench to tighten or loosenthe chuck jaws.
jaws at an angle then tighten as shown in Figure 8, This could cause drillbit tO be thrownfrom ddn. resulting In possibleserious personalinjuryor damage to the chuck.
REMOVING BITS
See Fi#ure Z
•Lock the switch trigger by placingthe directionof rotationselector in center position.See F/gur_ 5.
•Loosenthe chuckjaws from drillbit.
II To loosen:grasp and hold the collar of the chuck
with one hand, while rotatingchuck body with your other hand. Note: Rotate chuck body in the directionof the arrow marked UNLOCK to loosen
chuck Jaws.
11Do not use a wrench to tighten or loosen the chuck jaws.
IIRemove drillbit frem chuck jaws.
ADJUSTABLE TORQUE CLUTCH
Your ddll is equipped with an adjustable torque oJutoh for driving different types of sorews intodifferent mate- dais. The proper settingdepends on the type of mate- dal and the size of screw you are using,
TO ADJUST TORQUE
•Identify the twenty four torque indicator settings locatedon the front of your drill. See Figure 9.
•Rotate adjusting ring to the desired setting,
•1 - 4 For driving small screws.
•5 - 8 For driving screws into soft material.
•9 - 12 For driving screws intosoft and hard materials.
•13 - 16 For driving screws in hard wood.
•17 - 20 For ddving large screws.
•21 - 4,_1,¶For heavy drill(rig.
TO DECREASE
TORQUE
_LDJUSTING
RING
TOINCREASE
TORQUE