10/03!01 | WED 13:47 | FAX 864 964 3314 RYOBI CUSTOMER SERVICE | [_013/015 |
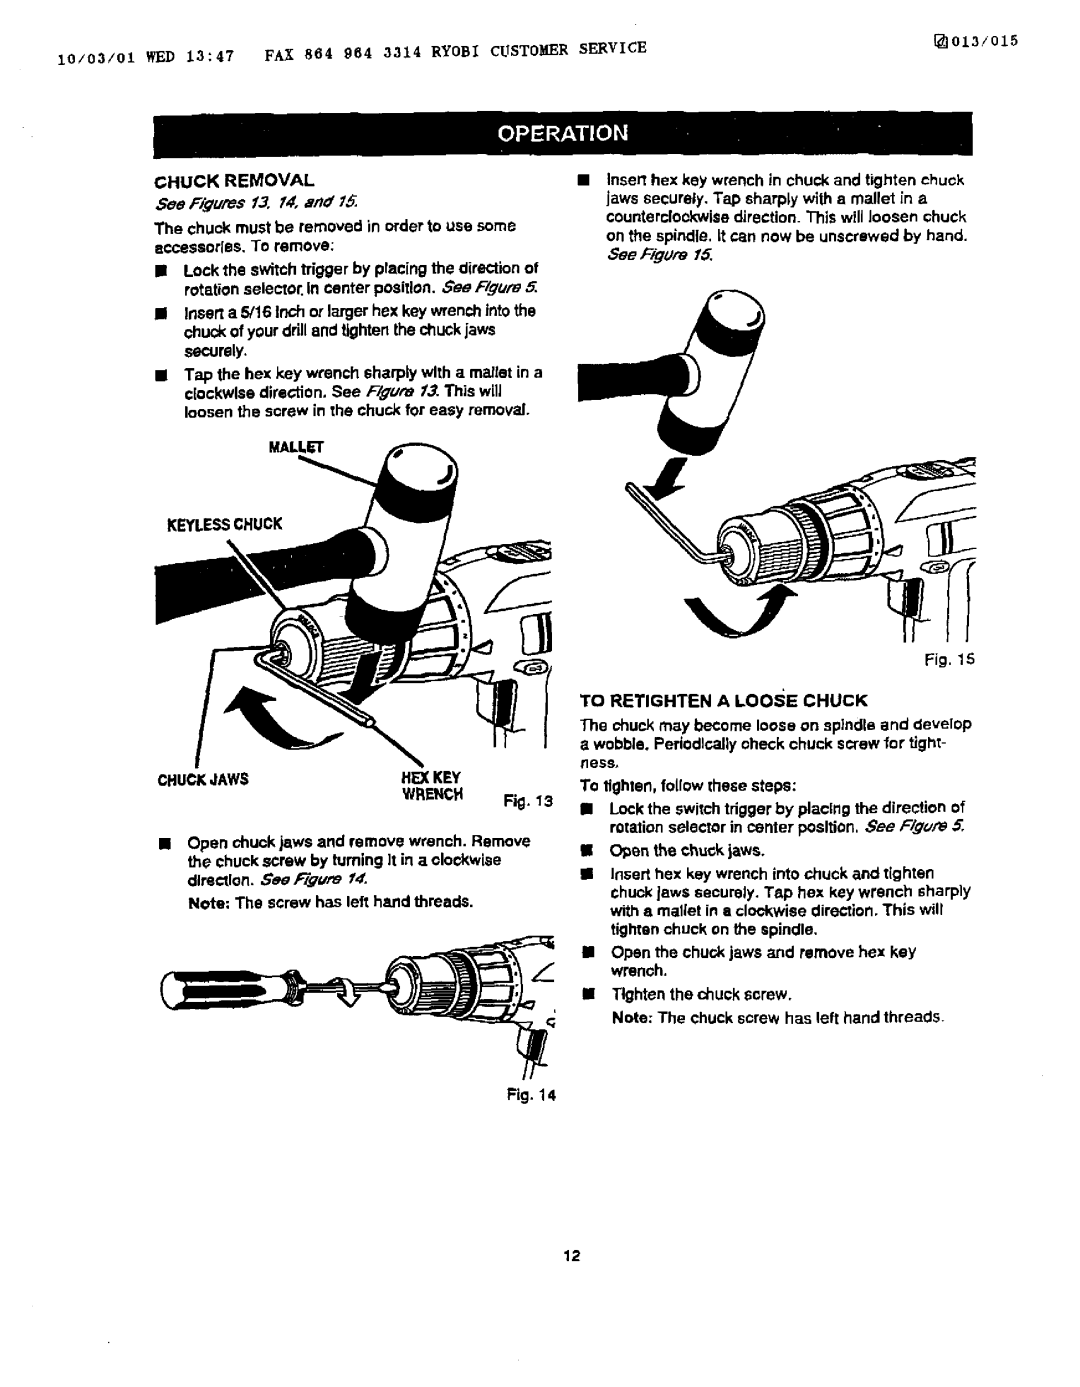
CHUCK REMOVAL
Gee Figures f3, 14, and 15.
The chuck must be removed in order to use some accessories, To remove:
IILock the switch trigger by placing the directionof rotationselector,in center position. See F/gum 5.
El Inserta 5/16 Inch or larger hex key wrenchintothe chuck of yourdrilland tightenthe chuck jaws securely.
•Tap the hex key wrench sharply with a mallet in a clockwisedirection. See F/gut's 13.This will loosen the screw in the chuck for easy removal.
MALLET
KEYLESSCHUCK
Insert hex key wrench in chuck and tighten chuck jaws securely. Tap sharply with a mallet in a counterclockwise direction. This will loosen chuck on the spindle, It can now be unscrewed by hand. ,.SeeF_gure 15.
Fig. 15
CHUCK,JAWSHEXKEY
WRENGH
Fig. 13
•Open chuck jaws and remove wrench. Remove the chuck screw by turning It in a olockwise direction. See F/gu,_a11,
Note: The screw has left harld threads.
TO RETIGHTEN A LOOSE CHUCK
The chuck may become loose on sp]ndla and develop wobble. Periodicallycheck chuck screw for tight-
hess,
To tighten, follow these steps:
•Lock the switch triggerby placing the direction of rotationselector in center position, See F/gure 5.
II O_en the chuck jaws.
•Inserthex key wrenchinto chuck and tighten
chuckJaws securely. Tap hex key wrench sharply with a mallet in a clookwise direction.This will
tightenchuck on the spindle.
•Open the chuck jaws and remove hex key wrenoh.
IITighten the chuck screw.
Note: The chuck screw has left hand threads.
Fig. 14
12