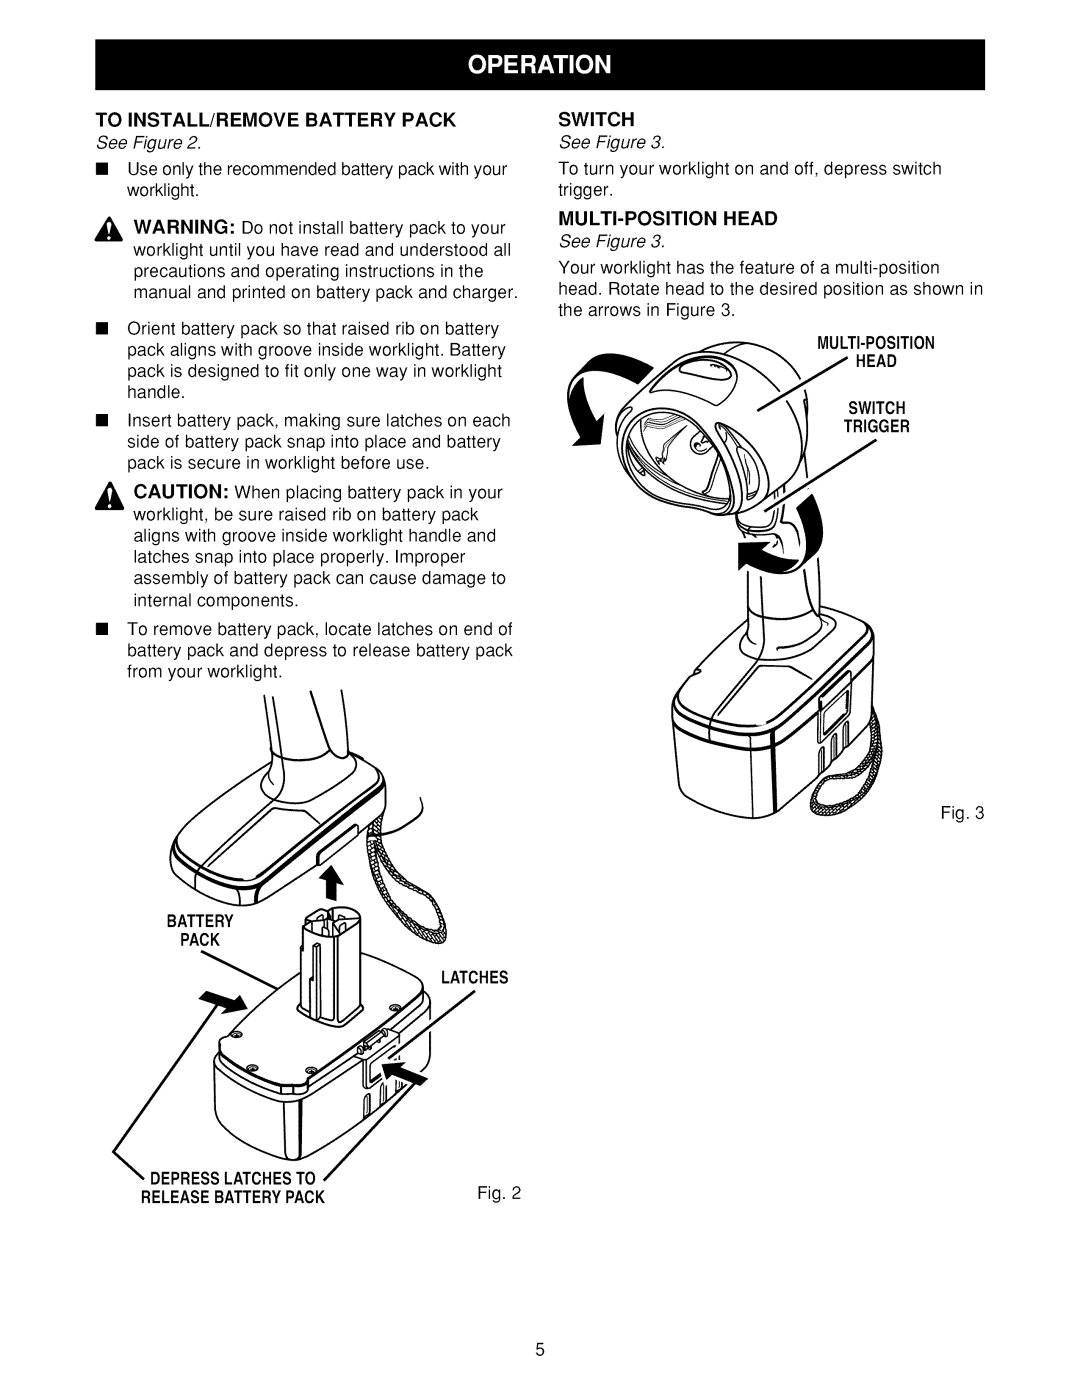
TO INSTALL/REMOVE BATTERY PACK
See Figure 2.
•Use only the recommended battery pack with your worklight.
_, WARNING: | Do not install | battery pack to your |
u |
|
|
worklight until you have read and understood all | ||
precautions | and operating | instructions in the |
manual and | printed on battery pack and charger. | |
Orient battery pack so that raised rib on battery pack aligns with groove inside worklight. Battery pack is designed to fit only one way in worklight handle.
•Insert battery pack, making sure latches on each side of battery pack snap into place and battery pack is secure in worklight before use.
_k AUTION: When placing battery pack in your worklight, be sure raised rib on battery pack
aligns with groove inside worklight handle and latches snap into place properly. Improper assembly of battery pack can cause damage to internal components.
•To remove battery pack, locate latches on end of battery pack and depress to release battery pack from your worklight.
BATTERY
PACK
LATCHES
SWITCH
See Figure 3.
To turn your worklight on and off, depress switch trigger.
See Figure 3.
Your worklight has the feature of a
head. Rotate head to the desired position as shown in the arrows in Figure 3.
MULTI-POSITION
HEAD
SWITCH
TRIGGER
Fig. 3
DEPRESSLATCHESTO | Fig. 2 |
RELEASEBATTERYPACK |
