LH Mast
Front Mount
Receiver
Mounting
Pin
LH Mount
 Lynch Pin
Loader Hitch | Support |
Bracket | Plate |
| Figure 11 |
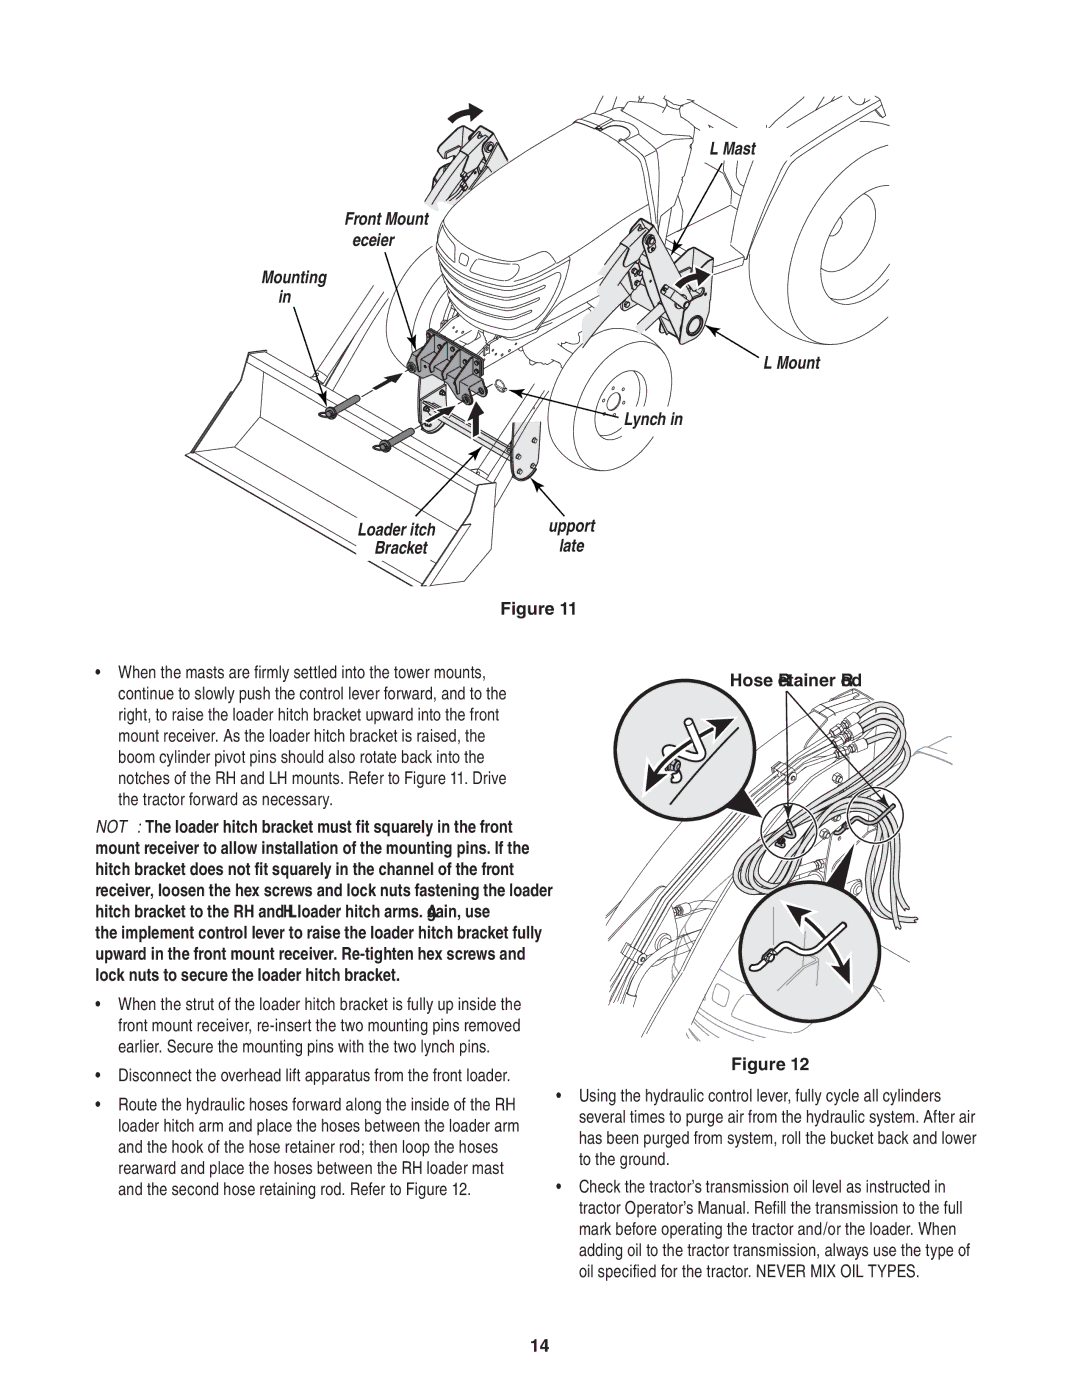
•When the masts are firmly settled into the tower mounts, continue to slowly push the control lever forward, and to the right, to raise the loader hitch bracket upward into the front mount receiver. As the loader hitch bracket is raised, the boom cylinder pivot pins should also rotate back into the notches of the RH and LH mounts. Refer to Figure 11. Drive the tractor forward as necessary.
NOTE: The loader hitch bracket must fit squarely in the front mount receiver to allow installation of the mounting pins. If the hitch bracket does not fit squarely in the channel of the front receiver, loosen the hex screws and lock nuts fastening the loader hitch bracket to the RH and LH loader hitch arms. Again, use the implement control lever to raise the loader hitch bracket fully upward in the front mount receiver.
•When the strut of the loader hitch bracket is fully up inside the front mount receiver,
•Disconnect the overhead lift apparatus from the front loader.
•Route the hydraulic hoses forward along the inside of the RH loader hitch arm and place the hoses between the loader arm and the hook of the hose retainer rod; then loop the hoses rearward and place the hoses between the RH loader mast and the second hose retaining rod. Refer to Figure 12.
Hose Retainer Rod
Figure 12
•Using the hydraulic control lever, fully cycle all cylinders several times to purge air from the hydraulic system. After air has been purged from system, roll the bucket back and lower to the ground.
•Check the tractor’s transmission oil level as instructed in tractor Operator’s Manual. Refill the transmission to the full mark before operating the tractor and/or the loader. When adding oil to the tractor transmission, always use the type of oil specified for the tractor. NEVER MIX OIL TYPES.
14
