3
Setting Up
Your Snow
Thrower
NOTE: All references in this manual to the left or right side of the snow thrower is from the operating position only. Exceptions, if any, will be specified.
IMPORTANT
This unit is shipped with the engine full of oil. After assembly, refer to the Tecumseh Engines manual packed separately with your snow thrower for fuel and oil
Specifications are subject to change without notification or obligation. Images may not reflect your exact model and are for reference purposes only.
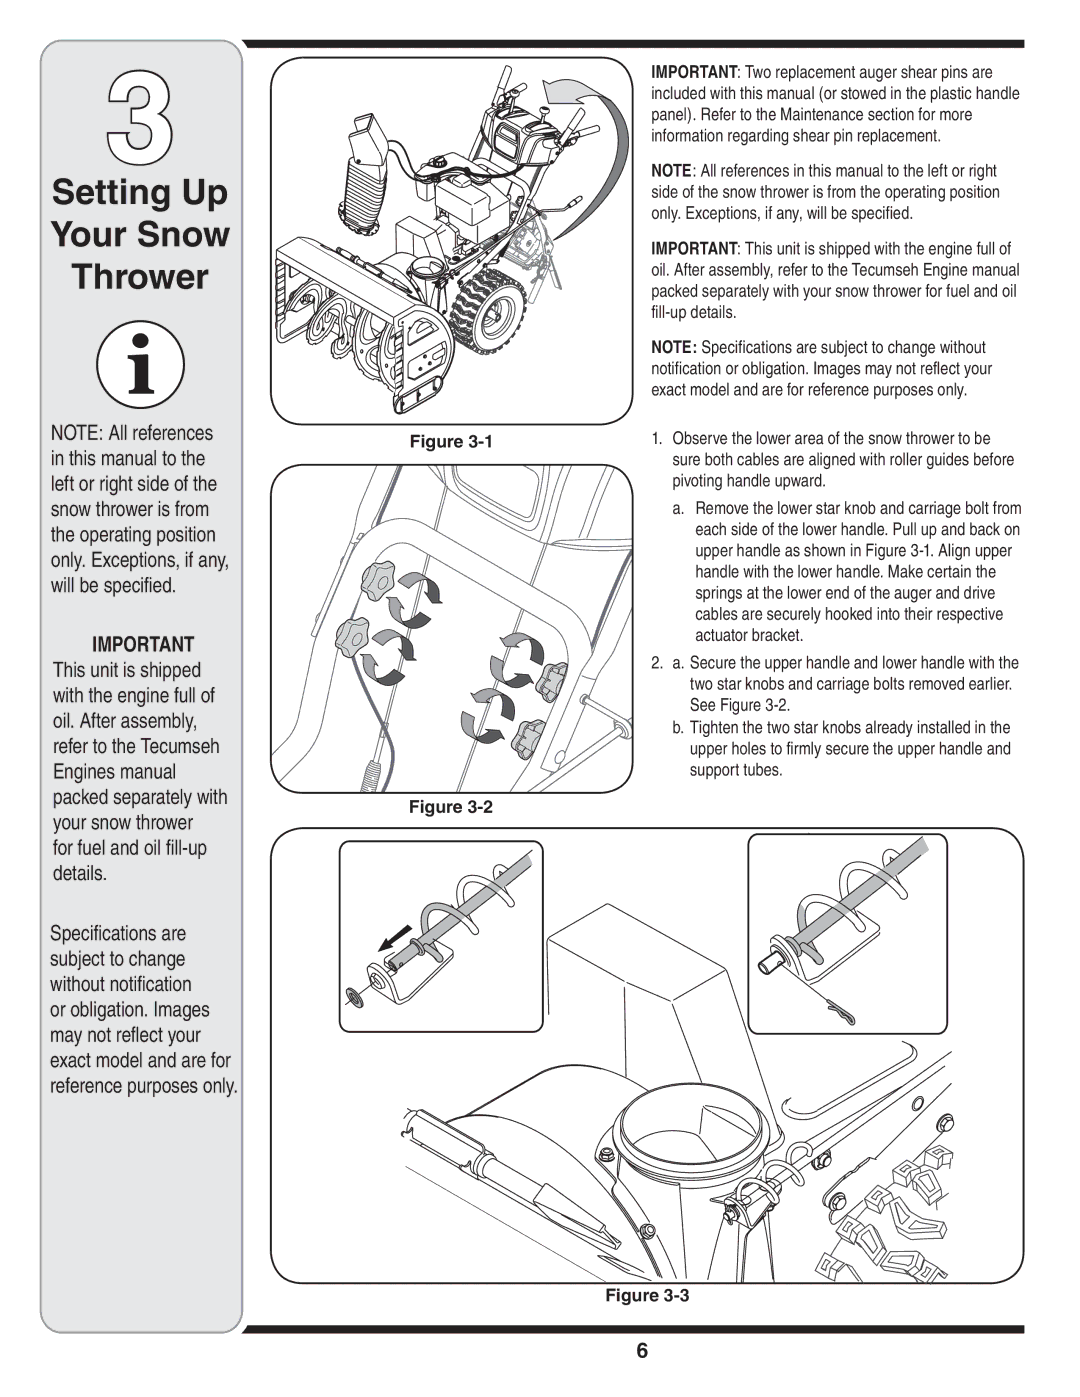
Figure
Figure
IMPORTANT: Two replacement auger shear pins are included with this manual (or stowed in the plastic handle panel). Refer to the Maintenance section for more information regarding shear pin replacement.
NOTE: All references in this manual to the left or right side of the snow thrower is from the operating position only. Exceptions, if any, will be specified.
IMPORTANT: This unit is shipped with the engine full of oil. After assembly, refer to the Tecumseh Engine manual packed separately with your snow thrower for fuel and oil
NOTE: Specifications are subject to change without notification or obligation. Images may not reflect your exact model and are for reference purposes only.
1.Observe the lower area of the snow thrower to be sure both cables are aligned with roller guides before pivoting handle upward.
a.Remove the lower star knob and carriage bolt from each side of the lower handle. Pull up and back on upper handle as shown in Figure
actuator bracket.
2. a. Secure the upper handle and lower handle with the two star knobs and carriage bolts removed earlier. See Figure
b. Tighten the two star knobs already installed in the upper holes to firmly secure the upper handle and support tubes.
Figure