Adjusting Drive and Auger Controls
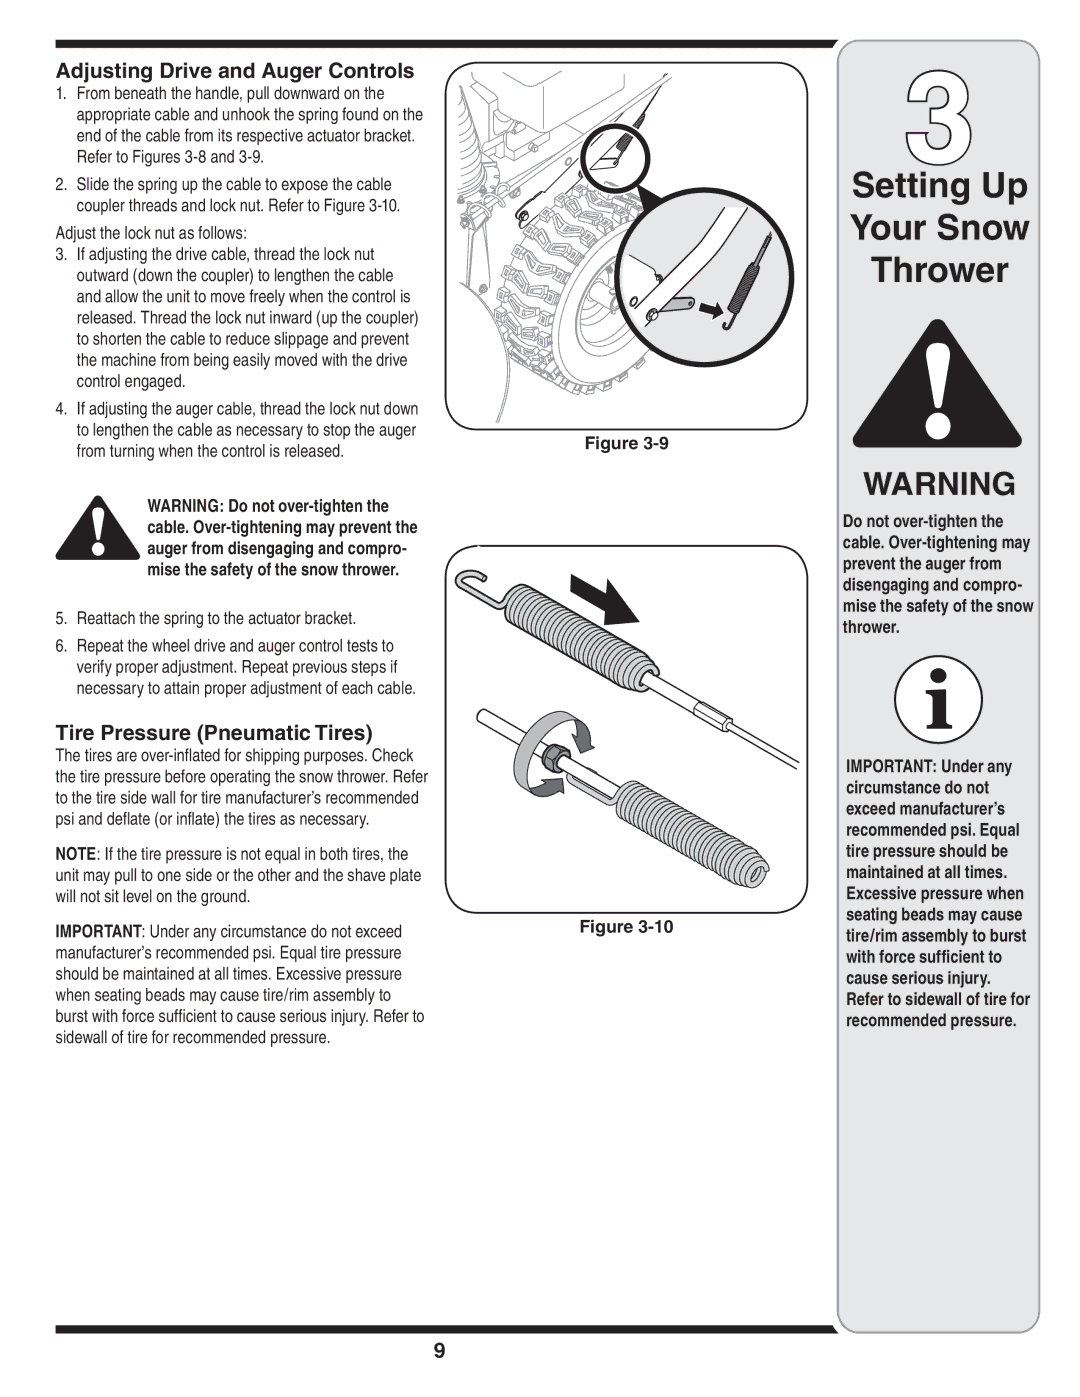
1.From beneath the handle, pull downward on the appropriate cable and unhook the spring found on the end of the cable from its respective actuator bracket. Refer to Figures
2.Slide the spring up the cable to expose the cable coupler threads and lock nut. Refer to Figure
Adjust the lock nut as follows:
3.If adjusting the drive cable, thread the lock nut outward (down the coupler) to lengthen the cable and allow the unit to move freely when the control is released. Thread the lock nut inward (up the coupler) to shorten the cable to reduce slippage and prevent the machine from being easily moved with the drive control engaged.
4.If adjusting the auger cable, thread the lock nut down to lengthen the cable as necessary to stop the auger from turning when the control is released.
WARNING: Do not
5.Reattach the spring to the actuator bracket.
6.Repeat the wheel drive and auger control tests to verify proper adjustment. Repeat previous steps if necessary to attain proper adjustment of each cable.
Tire Pressure (Pneumatic Tires)
The tires are
NOTE: If the tire pressure is not equal in both tires, the unit may pull to one side or the other and the shave plate will not sit level on the ground.
IMPORTANT: Under any circumstance do not exceed manufacturer’s recommended psi. Equal tire pressure should be maintained at all times. Excessive pressure when seating beads may cause tire/rim assembly to burst with force sufficient to cause serious injury. Refer to sidewall of tire for recommended pressure.
Figure
Figure
3
Setting Up
Your Snow
Thrower
WARNING
Do not
IMPORTANT: Under any circumstance do not exceed manufacturer’s recommended psi. Equal tire pressure should be maintained at all times. Excessive pressure when seating beads may cause tire/rim assembly to burst with force sufficient to cause serious injury. Refer to sidewall of tire for recommended pressure.
