Integrator Mode
2)Adjusting the WHITE BALANCE
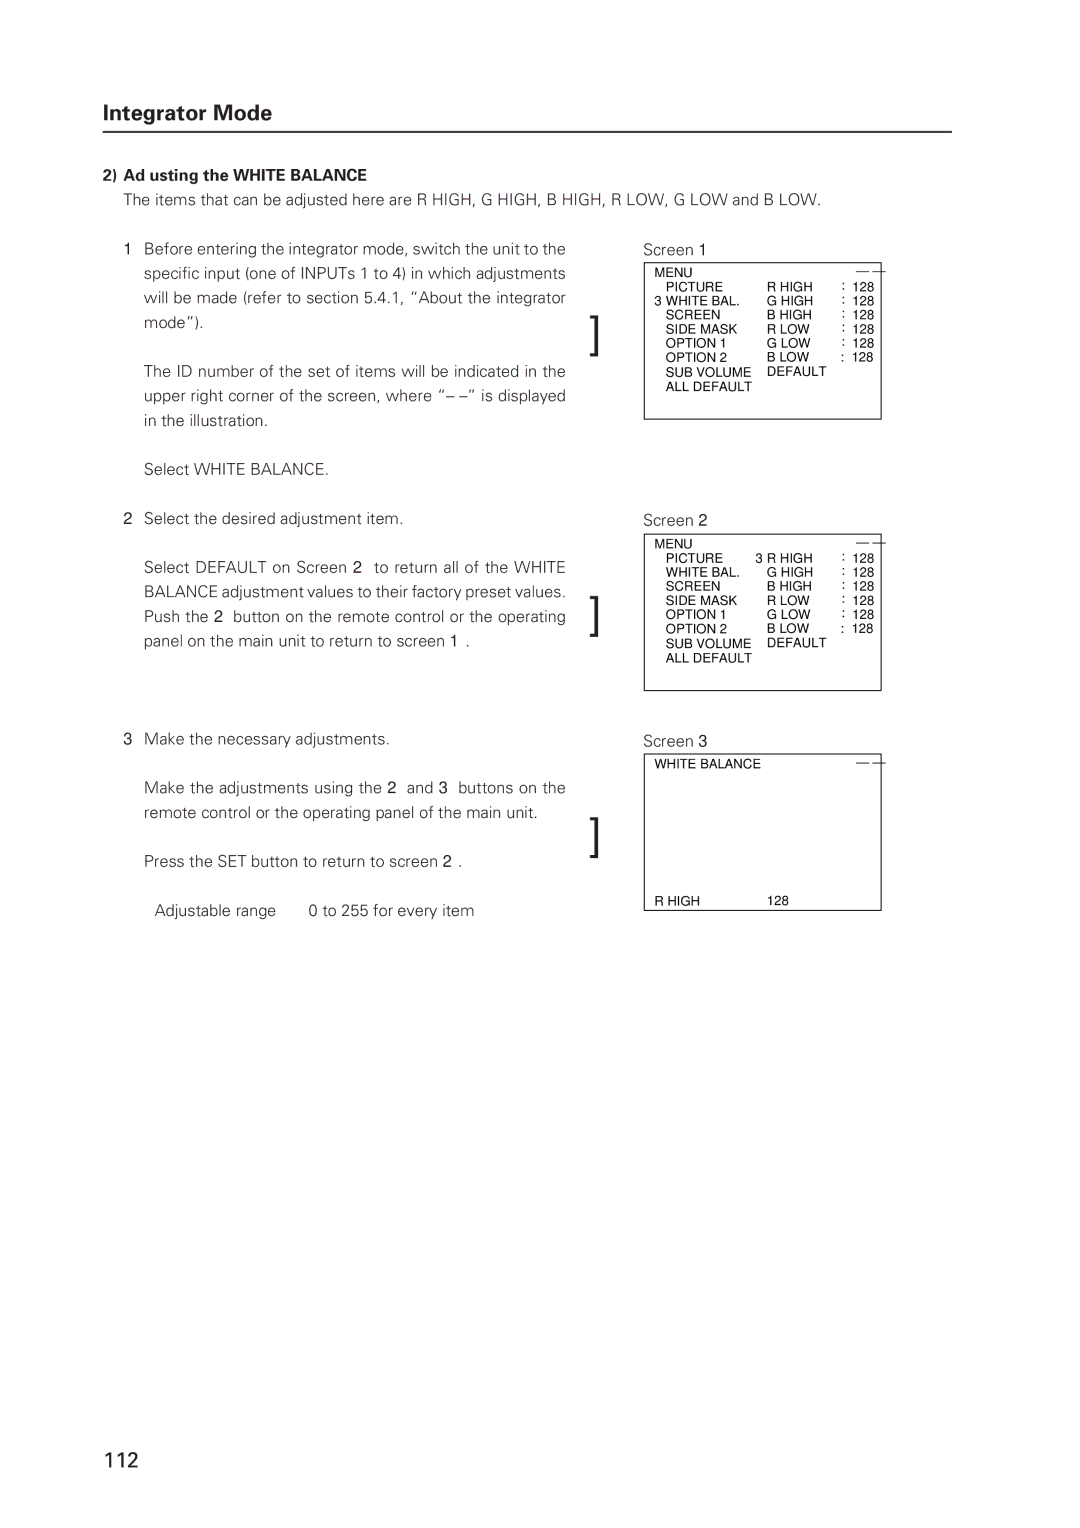
The items that can be adjusted here are R HIGH, G HIGH, B HIGH, R LOW, G LOW and B LOW.
1Before entering the integrator mode, switch the unit to the specific input (one of INPUTs 1 to 4) in which adjustments will be made (refer to section 5.4.1, “About the integrator mode”).
The ID number of the set of items will be indicated in the upper right corner of the screen, where “–
Select WHITE BALANCE.
2Select the desired adjustment item.
Select DEFAULT on Screen 2 to return all of the WHITE BALANCE adjustment values to their factory preset values. Push the 2 button on the remote control or the operating panel on the main unit to return to screen 1.
]
]
Screen 1
MENU |
| – – |
PICTURE | R HIGH | : 128 |
3WHITE BAL. | G HIGH | : 128 |
SCREEN | B HIGH | : 128 |
SIDE MASK | R LOW | : 128 |
OPTION 1 | G LOW | : 128 |
OPTION 2 | B LOW | : 128 |
SUB VOLUME | DEFAULT |
|
ALL DEFAULT |
|
|
|
|
|
Screen 2
MENU | 3R HIGH | – – |
PICTURE | : 128 | |
WHITE BAL. | G HIGH | : 128 |
SCREEN | B HIGH | : 128 |
SIDE MASK | R LOW | : 128 |
OPTION 1 | G LOW | : 128 |
OPTION 2 | B LOW | : 128 |
SUB VOLUME | DEFAULT |
|
ALL DEFAULT |
|
|
|
|
|
3Make the necessary adjustments.
Make the adjustments using the 2 and 3 buttons on the remote control or the operating panel of the main unit.
Press the SET button to return to screen 2.
<Adjustable range> 0 to 255 for every item
Screen 3
| WHITE BALANCE |
|
| – – | |
| PICTURE | 3CONTRAST : 128 | |||
| WHITE BAL. |
| BRIGHT | : 128 | |
] | SCREEN |
| COLOR | : | 132 |
SIDE MASK |
| TINT | : | 132 | |
OPTION 1 |
| SHARP | : | 128 | |
OPTION 2 |
| DETAIL | : 128 | ||
| SUB VOLUME |
| RESET |
|
|
| DEFAULT |
|
|
|
|
| MENU : MENU OFF |
|
| ||
| R HIGH |
| 128 |
|
|
112