Plasma Display Ceiling Suspension Hardware
4.5.3 Assembling and Installing the mounting hardware and mounting the plasma display
1) Preparations
You will need the following tools. Make sure you have them at hand before beginning work.
•Wrench or spanner (subtense 12 mm)
•Hexagonal wrench (subtense 4 mm, for M5 bolts)
•Hexagonal wrench (subtense 5 mm, for M6 bolts)
•Hexagonal wrench (subtense 6 mm, for M8 bolts)
•Hexagonal wrench (subtense 8 mm, for M10 bolts)
You'll also need tools for ceiling work.
2) Assembling and installing the mounting software
1Confirm that the monitor brackets (left and right) are firmly mounted to the monitor frame. Insert the center rod through the monitor frame, and the spacer into the post COMP. Secure the post COMP and the center rod with two
hexagonal socket head bolts (M8 × 75).
2Tighten the
3Select the installation site, then apply the supplied pattern to the ceiling, drill the suitable holes, and mount the ceiling flange COMP. The appropriate types of screws and other display/mounting hardware will depend on the strength
and composition of the particular ceiling.
4Insert the post COMP into the ceiling flange COMP and secure the two with two hexagonal socket head bolts (M10
×85).
5Tighten the
•Firmly tight all bolts.
•After mounting the mounting hardware but before mounting the plasma display, confirm the strength of the mount portion of the ceiling.
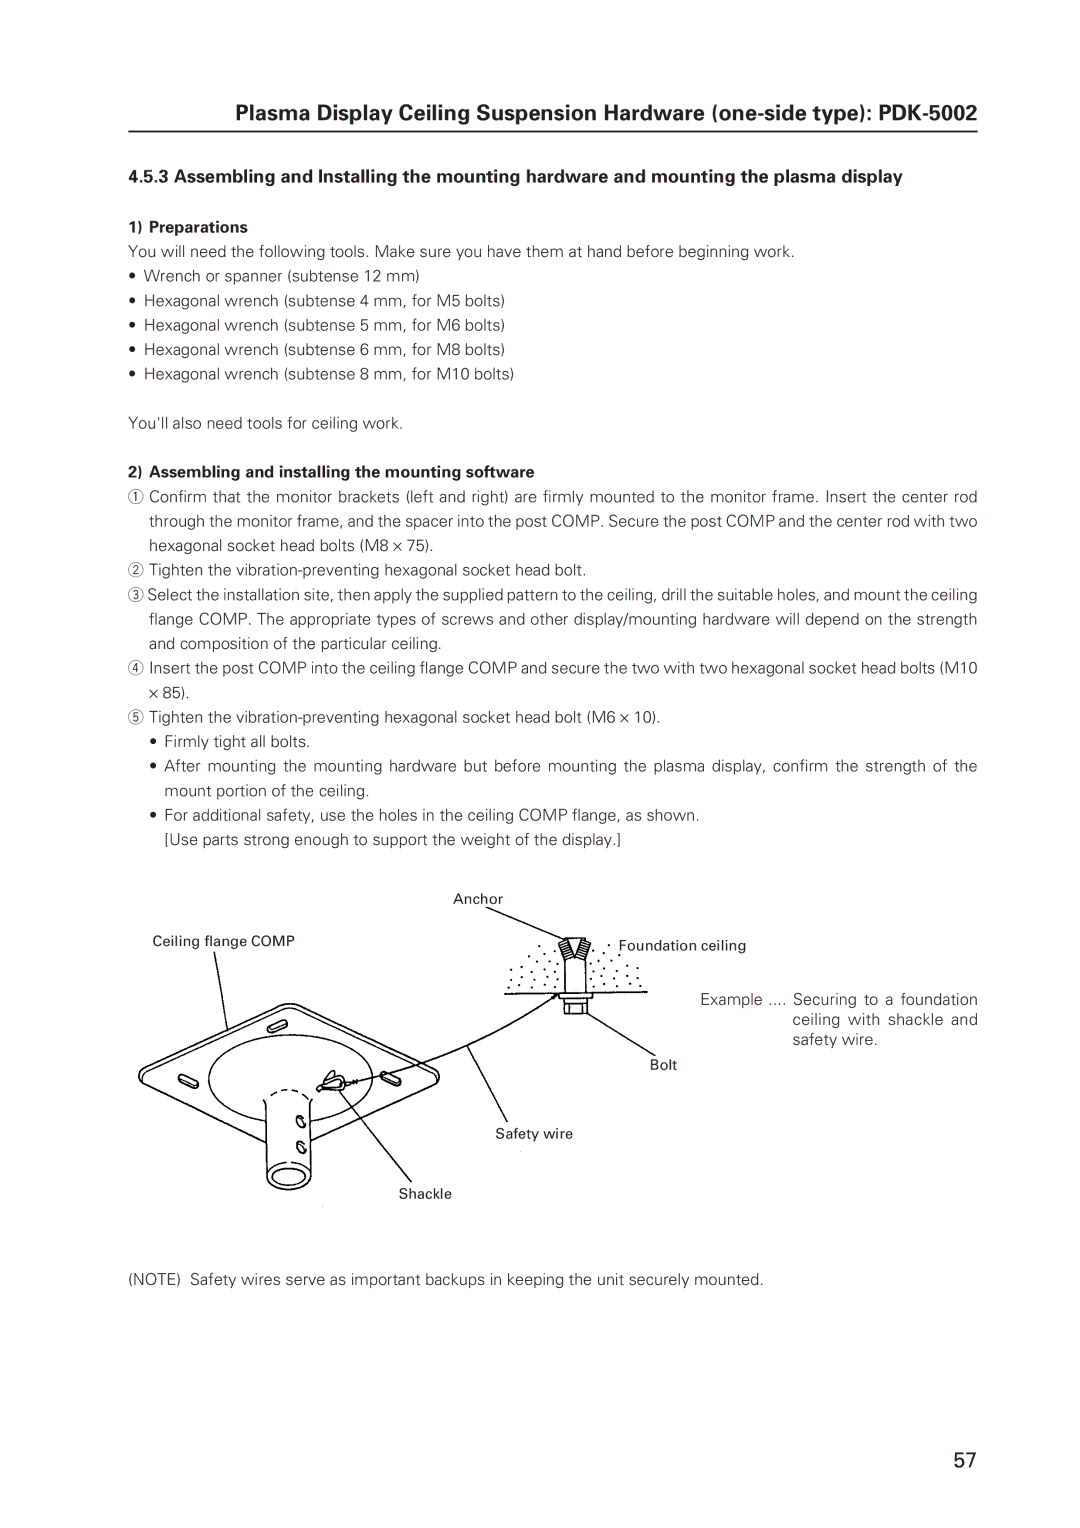
•For additional safety, use the holes in the ceiling COMP flange, as shown. [Use parts strong enough to support the weight of the display.]
Anchor
Ceiling flange COMP
Foundation ceiling
Example .... Securing to a foundation
ceiling with shackle and safety wire.
Bolt
Safety wire
Shackle
(NOTE) Safety wires serve as important backups in keeping the unit securely mounted.
57