Table-top Stand: PDK-5001
4.4.5 Mounting to the main unit
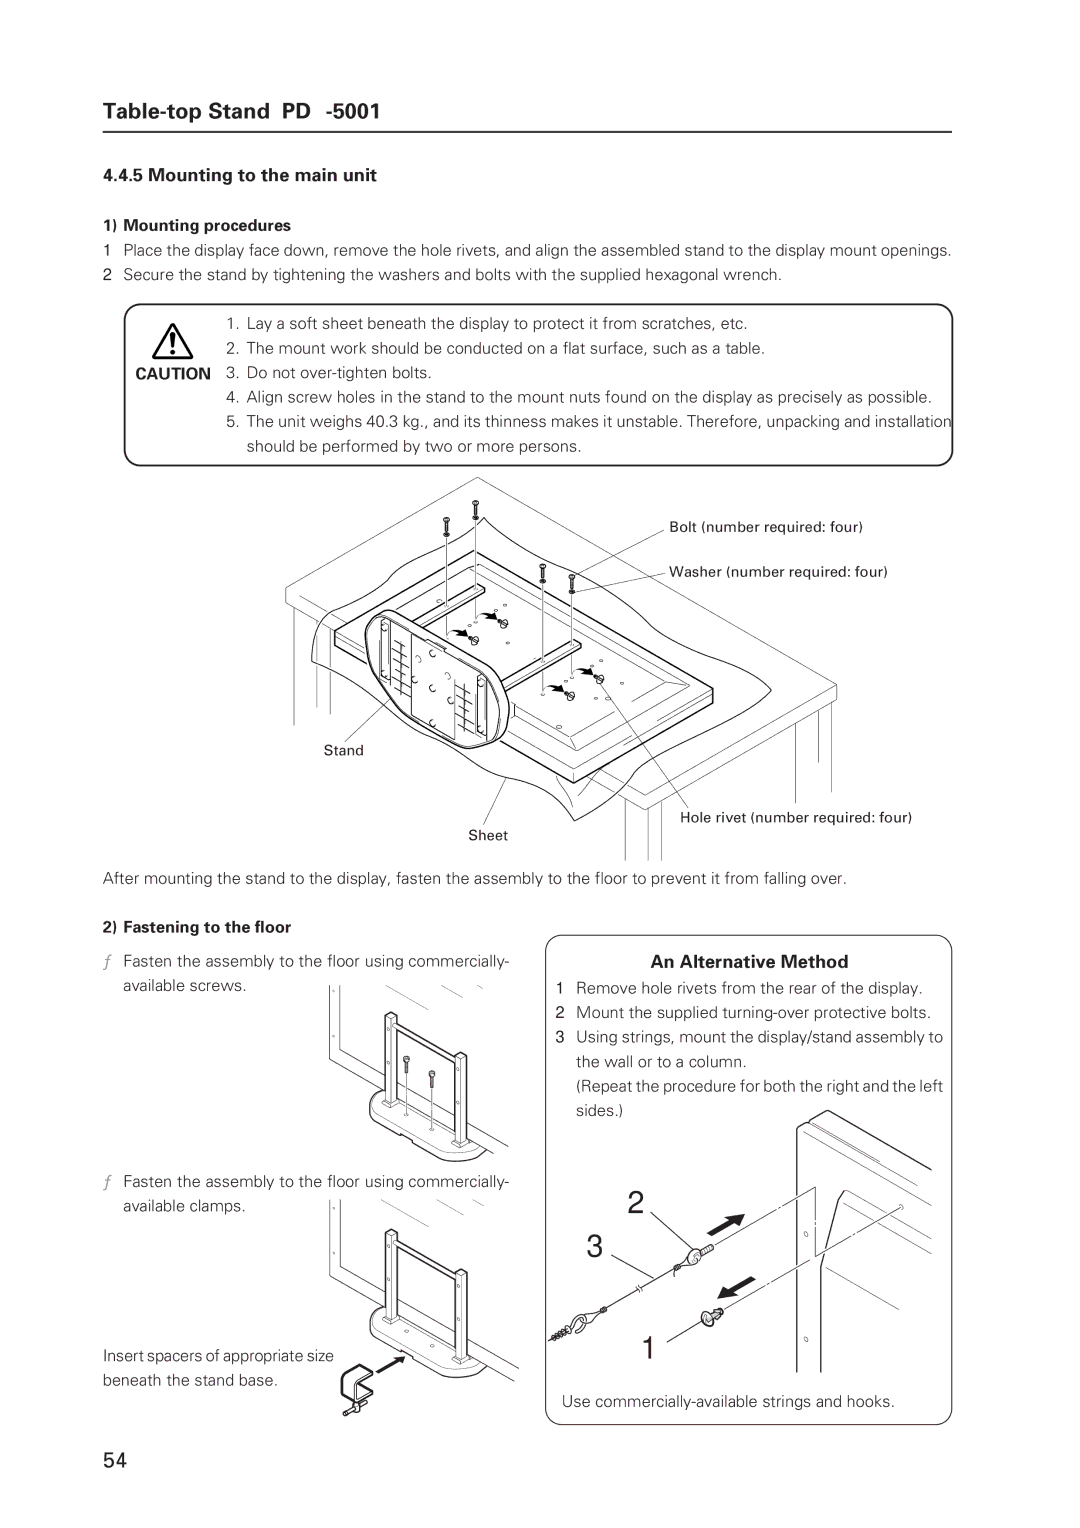
1) Mounting procedures
1Place the display face down, remove the hole rivets, and align the assembled stand to the display mount openings.
2Secure the stand by tightening the washers and bolts with the supplied hexagonal wrench.
1. Lay a soft sheet beneath the display to protect it from scratches, etc.
2. The mount work should be conducted on a flat surface, such as a table.
CAUTION 3. Do not
4.Align screw holes in the stand to the mount nuts found on the display as precisely as possible.
5.The unit weighs 40.3 kg., and its thinness makes it unstable. Therefore, unpacking and installation should be performed by two or more persons.
Bolt (number required: four)
Washer (number required: four)
Stand
Hole rivet (number required: four)
Sheet
After mounting the stand to the display, fasten the assembly to the floor to prevent it from falling over.
2) Fastening to the floor
¶Fasten the assembly to the floor using commercially- available screws.
An Alternative Method
1Remove hole rivets from the rear of the display.
2Mount the supplied
3Using strings, mount the display/stand assembly to the wall or to a column.
(Repeat the procedure for both the right and the left sides.)
¶Fasten the assembly to the floor using commercially- available clamps.
Insert spacers of appropriate size beneath the stand base.
2
3
1
Use
54