Carriable Stand: PDK-5008
4.8.3 Mounting procedures
For the sake of safety, this operation should be performed by two or more persons.
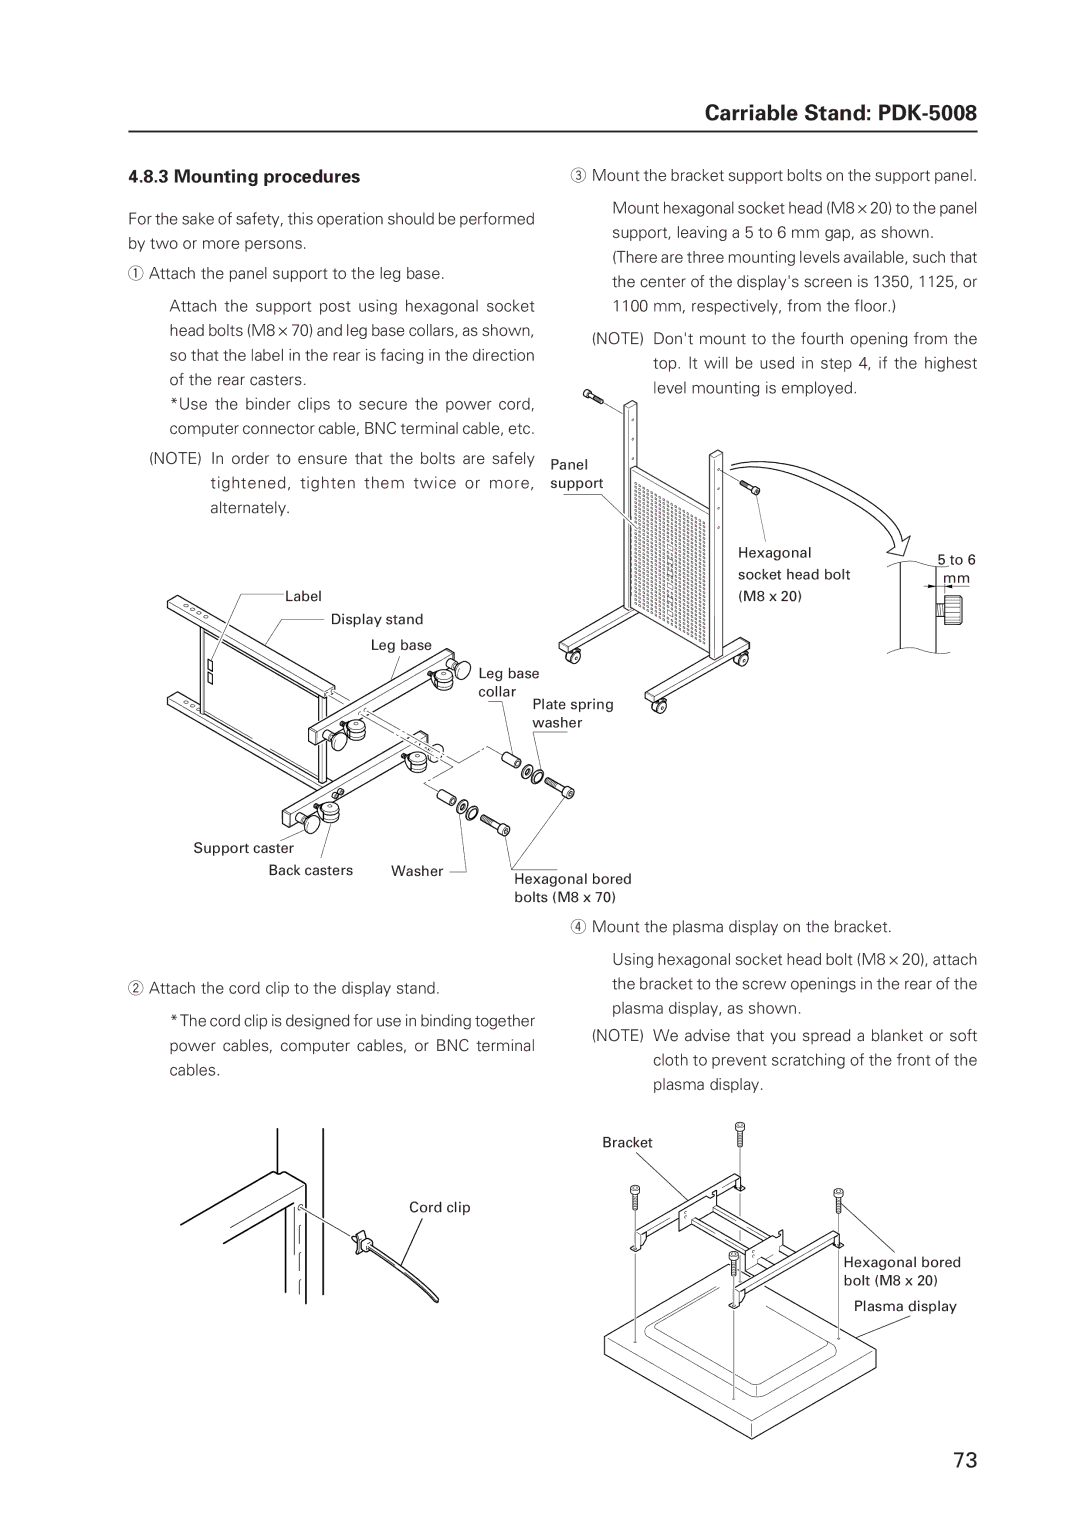
1Attach the panel support to the leg base.
Attach the support post using hexagonal socket head bolts (M8 × 70) and leg base collars, as shown, so that the label in the rear is facing in the direction of the rear casters.
*Use the binder clips to secure the power cord, computer connector cable, BNC terminal cable, etc.
3Mount the bracket support bolts on the support panel.
Mount hexagonal socket head (M8 × 20) to the panel support, leaving a 5 to 6 mm gap, as shown. (There are three mounting levels available, such that the center of the display's screen is 1350, 1125, or 1100 mm, respectively, from the floor.)
(NOTE) Don't mount to the fourth opening from the top. It will be used in step 4, if the highest level mounting is employed.
(NOTE) In order to ensure that the bolts are safely Panel tightened, tighten them twice or more, support
alternately.
Hexagonal
socket head bolt
Label | (M8 x 20) |
Display stand
Leg base
![]()
![]()
![]() Leg base collar
Leg base collar
Plate spring washer
5 to 6
mm
Support caster |
|
|
|
Back casters | W | asher | Hexagonal bored |
|
|
| |
|
|
| bolts (M8 x 70) |
2Attach the cord clip to the display stand.
*The cord clip is designed for use in binding together power cables, computer cables, or BNC terminal cables.
Cord clip
4Mount the plasma display on the bracket.
Using hexagonal socket head bolt (M8 × 20), attach the bracket to the screw openings in the rear of the plasma display, as shown.
(NOTE) We advise that you spread a blanket or soft cloth to prevent scratching of the front of the plasma display.
Bracket
Hexagonal bored bolt (M8 x 20)
Plasma display
73