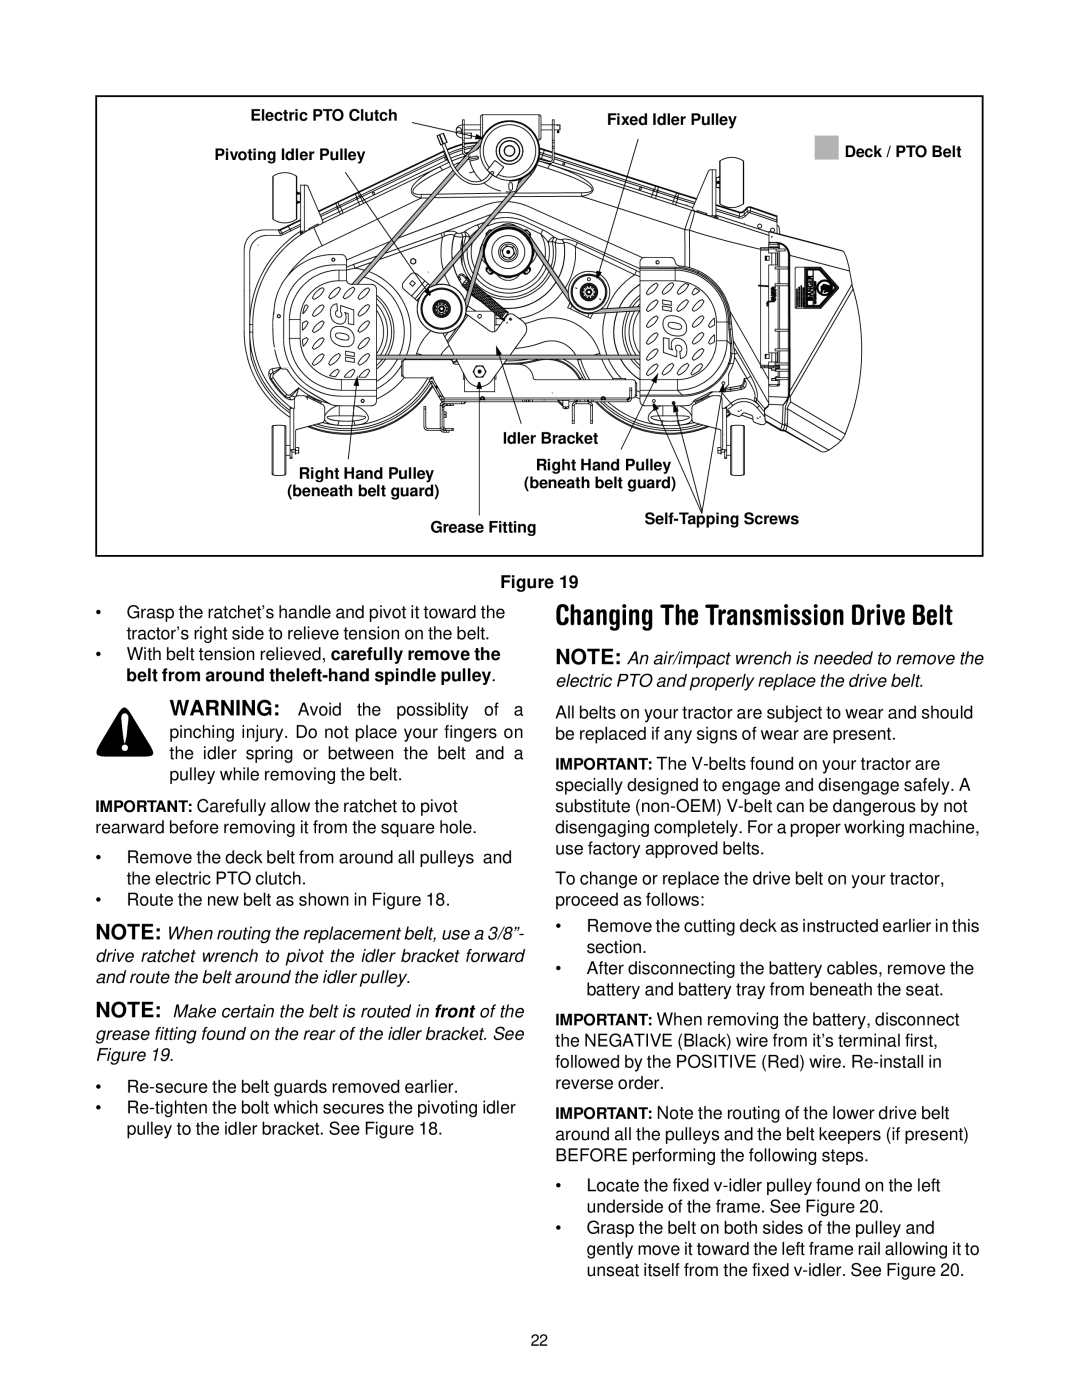
Electric PTO Clutch |
| Fixed Idler Pulley | |
Pivoting Idler Pulley |
| Deck / PTO Belt | |
| Idler Bracket |
| |
Right Hand Pulley | Right Hand Pulley | ||
(beneath belt guard) | |||
(beneath belt guard) | |||
|
| ||
Grease Fitting | |||
| |||
Figure 19
•Grasp the ratchet’s handle and pivot it toward the tractor’s right side to relieve tension on the belt.
•With belt tension relieved, carefully remove the belt from around
WARNING: Avoid the possiblity of a pinching injury. Do not place your fingers on the idler spring or between the belt and a pulley while removing the belt.
IMPORTANT: Carefully allow the ratchet to pivot rearward before removing it from the square hole.
•Remove the deck belt from around all pulleys and the electric PTO clutch.
•Route the new belt as shown in Figure 18.
NOTE: When routing the replacement belt, use a 3/8”- drive ratchet wrench to pivot the idler bracket forward and route the belt around the idler pulley.
NOTE: Make certain the belt is routed in front of the grease fitting found on the rear of the idler bracket. See Figure 19.
•
•
Changing The Transmission Drive Belt
NOTE: An air/impact wrench is needed to remove the electric PTO and properly replace the drive belt.
All belts on your tractor are subject to wear and should be replaced if any signs of wear are present.
IMPORTANT: The
To change or replace the drive belt on your tractor, proceed as follows:
•Remove the cutting deck as instructed earlier in this section.
•After disconnecting the battery cables, remove the battery and battery tray from beneath the seat.
IMPORTANT: When removing the battery, disconnect the NEGATIVE (Black) wire from it’s terminal first, followed by the POSITIVE (Red) wire.
IMPORTANT: Note the routing of the lower drive belt around all the pulleys and the belt keepers (if present) BEFORE performing the following steps.
•Locate the fixed
•Grasp the belt on both sides of the pulley and gently move it toward the left frame rail allowing it to unseat itself from the fixed
22