Bijzondere kenmerken

LCD-scherm

Automatische en handmatige zoom van 24-28-35-50-70-85 mm

Rode lichtstraal als focushulp voor de instelling van de AF bij weinig licht

TTL-meting

Automatische snelheidsinstelling voor de sluiter

5 energieniveaus, verhoudingen 1/1, 1/2, 1/4, 1/8 en 1/16

"Flitser gereed"-indicator in de zoeker

Synchronisatie van de voor- en achtergrondbelichting

Vermindering van het rode-ogeneffect (voor Nikon en Olympus)

Ingebouwde slavefunctie

Ingebouwde reflectieplaat en diffusor

Energiespaarfunctie

Batterijen plaatsen

Verzeker u ervan dat de hoofdschakelaar in de stand "OFF" staat. Schuif het deksel van het batterijvak naar voren en kantel het naar boven. Leg de batterijen volgens de gemarkeerde symbolen voor "+/-" in het vak.

Sluit het deksel van het batterijvak en schuif het weer op zijn plaats, tot het inklikt. Verzeker u ervan dat alle batterijen van hetzelfde type zijn en in gelijke mate geladen zijn. Gebruik bij voorkeur NiCd- of NiMh-accu's.

De flitser op de camera monteren


Schakel de flitser en camera uit.


Draai de gekartelde schroef van de flitser naar

NIE

boven, in de richting van de flitser. Schuif de

flitser in de accessoireschoen van de camera.


Draai de gekartelde schroef van de flitser in de


richting van de camera; op die manier wordt de


flitser op de camera vastgeklemd.


Voor type M: steek de montagevoet van de


flitser in de accessoireschoen van de camera; de


flitser klikt dan in.


Voor type O: steek de montagevoet van de flitser


in de accessoireschoen van de camera en druk


op "LOCK", om de flitser te laten inklikken.

De flitser van de camera afnemen

Schakel de flitser en camera uit.

Draai de gekartelde schroef naar boven, in de richting van de flitser. Neem de flitser uit de accessoireschoen van de camera.

Voor type M: druk de knop die de accessoireschoen ontgrendelt in en trek de flitser er naar achteren uit.

Voor type O: schuif de beide zijkanten van de ver- /ontgrendelknop in de aangeduide richtingen en trek de flitser naar achteren uit de accessoireschoen.

Gebruik van de ON/OFF-schakelaar en uitvoering van de flitsertest

Om de flitser in te schakelen, schuift u de hoofdschakelaar in de stand "ON". De indicator "READY" licht op, van zodra de flitser gereed is. Druk op de testknop, om u ervan te verzekeren dat de flitser correct functioneert. Als de flitser is afgegaan, wacht u tot de indicator "READY" weer brandt.

Om de flitser uit te schakelen, schuift u de hoofdschakelaar in de stand "OFF".

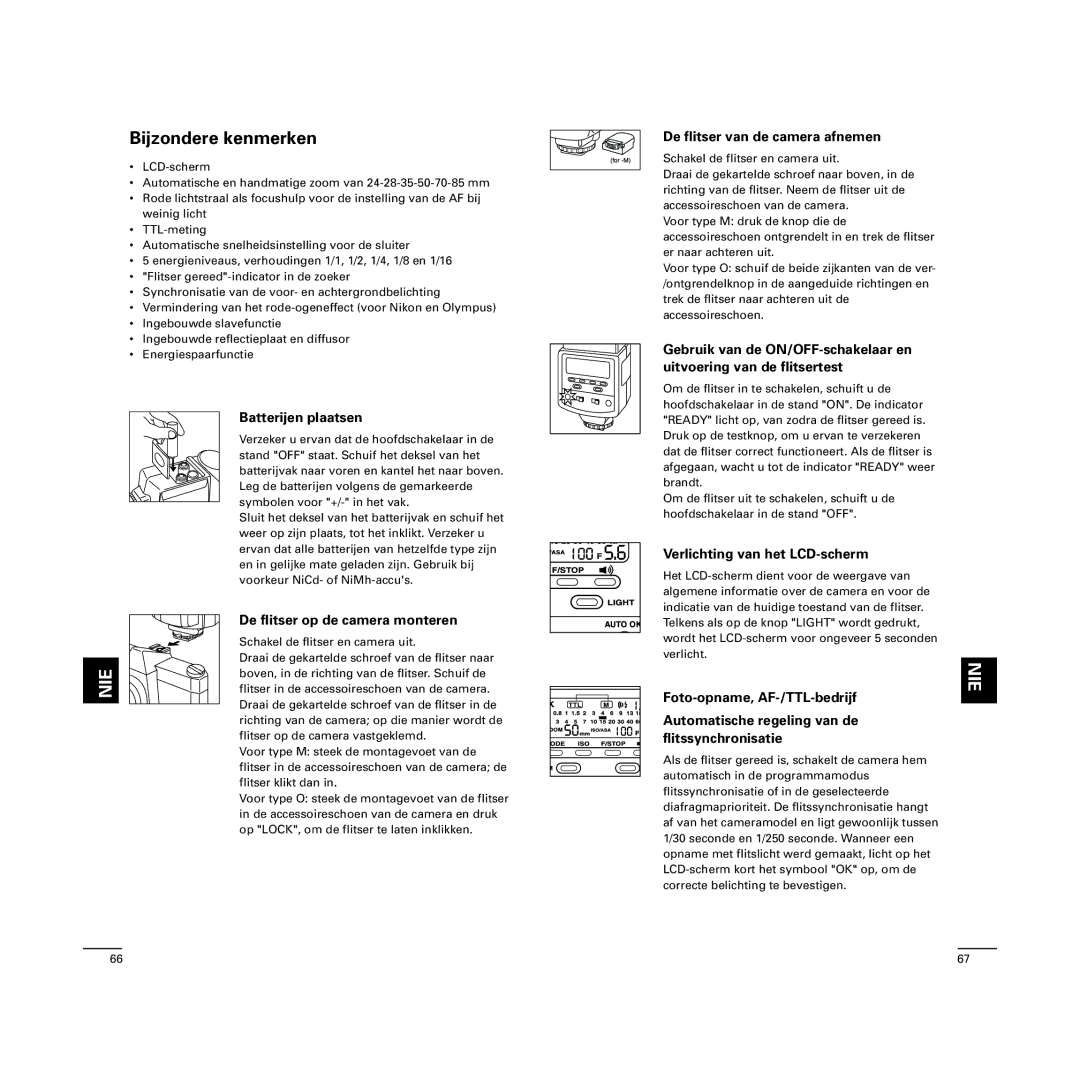
Verlichting van het LCD-scherm

Het LCD-scherm dient voor de weergave van algemene informatie over de camera en voor de indicatie van de huidige toestand van de flitser. Telkens als op de knop "LIGHT" wordt gedrukt, wordt het LCD-scherm voor ongeveer 5 seconden verlicht.

NIE

Foto-opname, AF-/TTL-bedrijf

Automatische regeling van de flitssynchronisatie

Als de flitser gereed is, schakelt de camera hem automatisch in de programmamodus flitssynchronisatie of in de geselecteerde diafragmaprioriteit. De flitssynchronisatie hangt af van het cameramodel en ligt gewoonlijk tussen 1/30 seconde en 1/250 seconde. Wanneer een opname met flitslicht werd gemaakt, licht op het LCD-scherm kort het symbool "OK" op, om de correcte belichting te bevestigen.

66

67

Page 34
Image 34
Cullmann D4500 Bijzondere kenmerken, Batterijen plaatsen, De flitser op de camera monteren, Verlichting van het LCD-scherm

D4500 specifications

The Cullmann D4500 tripod is designed to cater to the needs of both amateur and professional photographers, providing a blend of stability, versatility, and ease of use. One of the standout features of the D4500 is its robust construction, crafted from high-quality aluminum that ensures durability while remaining lightweight. Weighing in at just 1.56 kilograms, it is an ideal companion for travel as it easily fits into a bag without adding excessive weight.

One of the key characteristics of the Cullmann D4500 is its adjustable height. The tripod can extend from a minimum height of approximately 45 centimeters up to a maximum of about 150 centimeters. This range allows photographers to capture images from various angles, whether shooting landscapes or portraits. The three-section legs feature a quick-release locking mechanism, enabling swift setup and breakdown while maintaining a secure hold.

The D4500 is equipped with a 3-way pan-and-tilt head that facilitates precise adjustments, making it a great choice for videography as well as photography. The head supports a wide range of camera models, providing versatility for DSLRs, mirrorless cameras, and compact systems. Its built-in bubble level ensures that the camera is perfectly aligned, which is crucial for achieving well-composed shots.

In terms of stability, the Cullmann D4500 features rubber feet that provide excellent traction on various surfaces. For added stability, particularly on uneven terrain, the tripod’s legs are also equipped with a spiked foot option, allowing photographers to firmly plant their setup regardless of the environment.

The D4500 also includes a convenient quick-release plate that allows for rapid camera attachment and detachment. This feature is particularly beneficial for photographers who alternate between hand-held shooting and tripod use, as it minimizes downtime and maximizes shooting efficiency.

In summary, the Cullmann D4500 tripod stands out with its combination of sturdiness, portability, and user-friendly features. Its adjustable height, versatile head mechanism, and stability options make it a great choice for photographers seeking a reliable tool to enhance their creative photography experience. Whether capturing awe-inspiring landscapes or crisp portrait shots, the D4500 provides the essential support needed for remarkable image quality.