10.Click on Start, point to Settings, and then click Control Panel.
11.Double-click on Add / Remove Programs.
12.Click the Install Button, and follow the
13.When the installation is completed, remove the floppy disk.
For Windows XP (Home and Professional)
1.Click on Start, and then click on Control Panel.
2.
3.Set the manufacturer to None.
4.Exit to the desktop and then shutdown your computer.
5.Connect the serial interface cable to serial port on the UPS and an open serial port on the back of the computer. (Note: You must use the serial cable that was supplied with the unit).
6.Plug the UPS into an AC outlet, turn the UPS on and then start your computer.
7.Insert the PowerPanel™ disk into the floppy drive.
8.Click on Start, and then click Control Panel.
9.
10.Click on Add New Programs, and then click the CD or Floppy Button.
11.Follow the
12.When the installation is completed, remove the floppy disk.
When the installation is completed, the PowerPanel™ software will appear on your screen for a few seconds, and then minimize. It will appear as a blue and white battery icon located in the system tray, near the clock.
Oprating Instruction
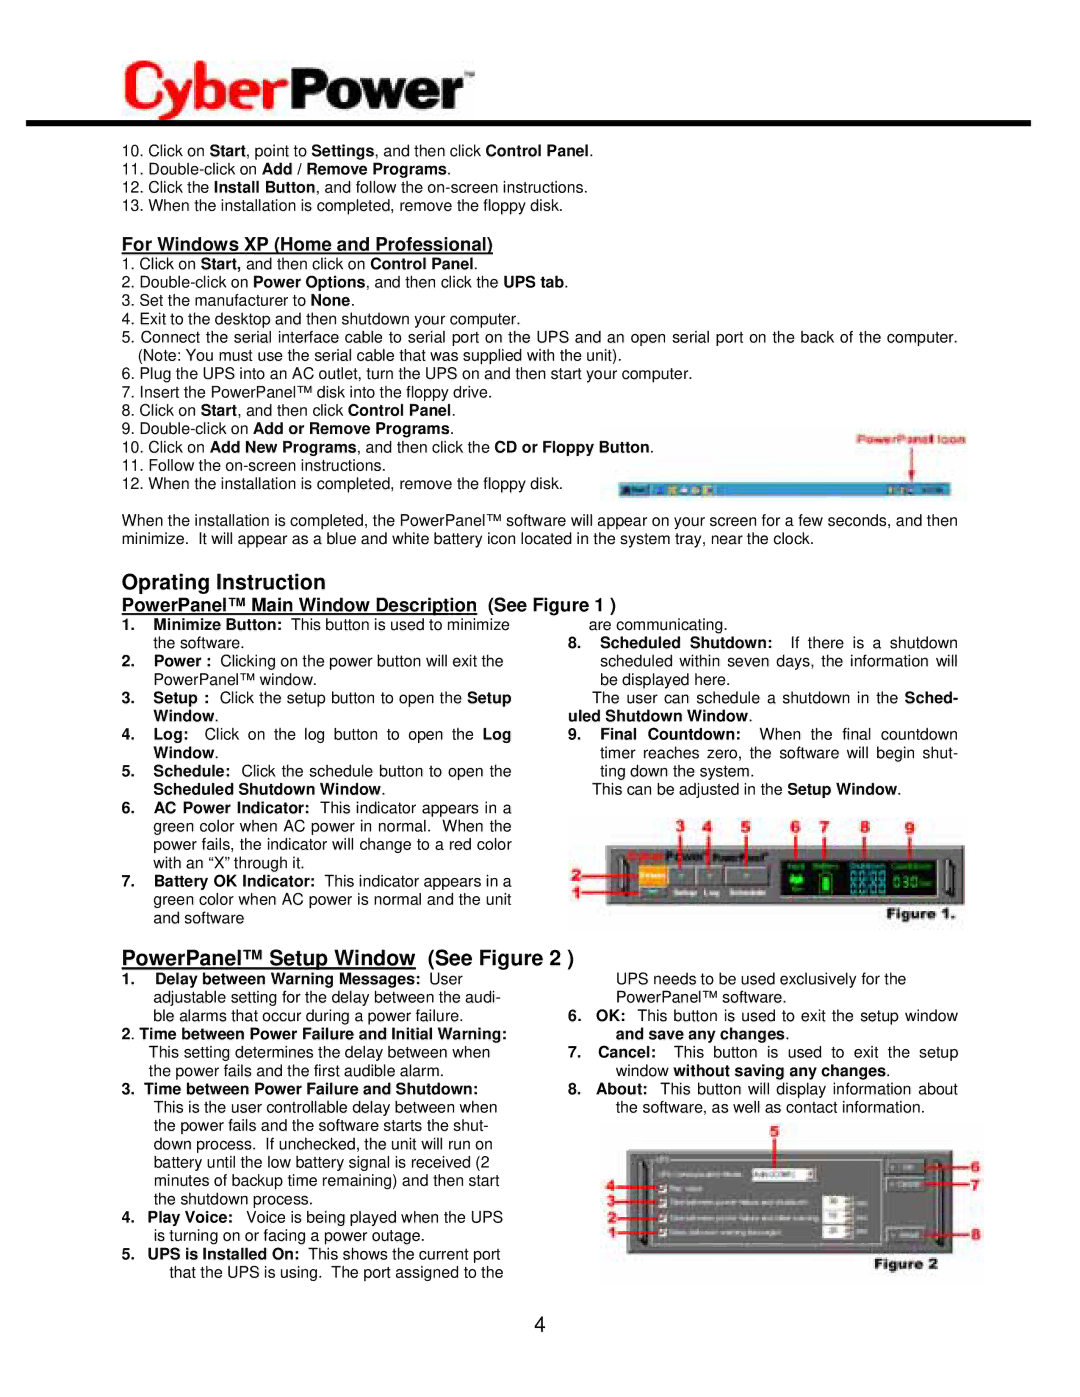
PowerPanel™ Main Window Description (See Figure 1 )
1.Minimize Button: This button is used to minimize the software.
2.Power : Clicking on the power button will exit the PowerPanel™ window.
3.Setup : Click the setup button to open the Setup Window.
4.Log: Click on the log button to open the Log Window.
5.Schedule: Click the schedule button to open the Scheduled Shutdown Window.
6.AC Power Indicator: This indicator appears in a green color when AC power in normal. When the power fails, the indicator will change to a red color with an “X” through it.
7.Battery OK Indicator: This indicator appears in a green color when AC power is normal and the unit and software
are communicating.
8.Scheduled Shutdown: If there is a shutdown scheduled within seven days, the information will
be displayed here.
The user can schedule a shutdown in the Sched- uled Shutdown Window.
9.Final Countdown: When the final countdown
timer reaches zero, the software will begin shut- ting down the system.
This can be adjusted in the Setup Window.
PowerPanel™ Setup Window (See Figure 2 )
1.Delay between Warning Messages: User adjustable setting for the delay between the audi-
ble alarms that occur during a power failure.
2. Time between Power Failure and Initial Warning: This setting determines the delay between when the power fails and the first audible alarm.
3.Time between Power Failure and Shutdown: This is the user controllable delay between when the power fails and the software starts the shut- down process. If unchecked, the unit will run on battery until the low battery signal is received (2 minutes of backup time remaining) and then start the shutdown process.
4.Play Voice: Voice is being played when the UPS is turning on or facing a power outage.
5.UPS is Installed On: This shows the current port that the UPS is using. The port assigned to the
UPS needs to be used exclusively for the
PowerPanel™ software.
6.OK: This button is used to exit the setup window and save any changes.
7.Cancel: This button is used to exit the setup window without saving any changes.
8.About: This button will display information about the software, as well as contact information.
4