D-Link DFL-200 Set up built-in Dhcp server, Configure helper servers, Setup Wizard Complete

Models: DFL-200

1 12
Download 12 pages 24 Kb
Page 8
Image 8

Using The Setup Wizard (continued)

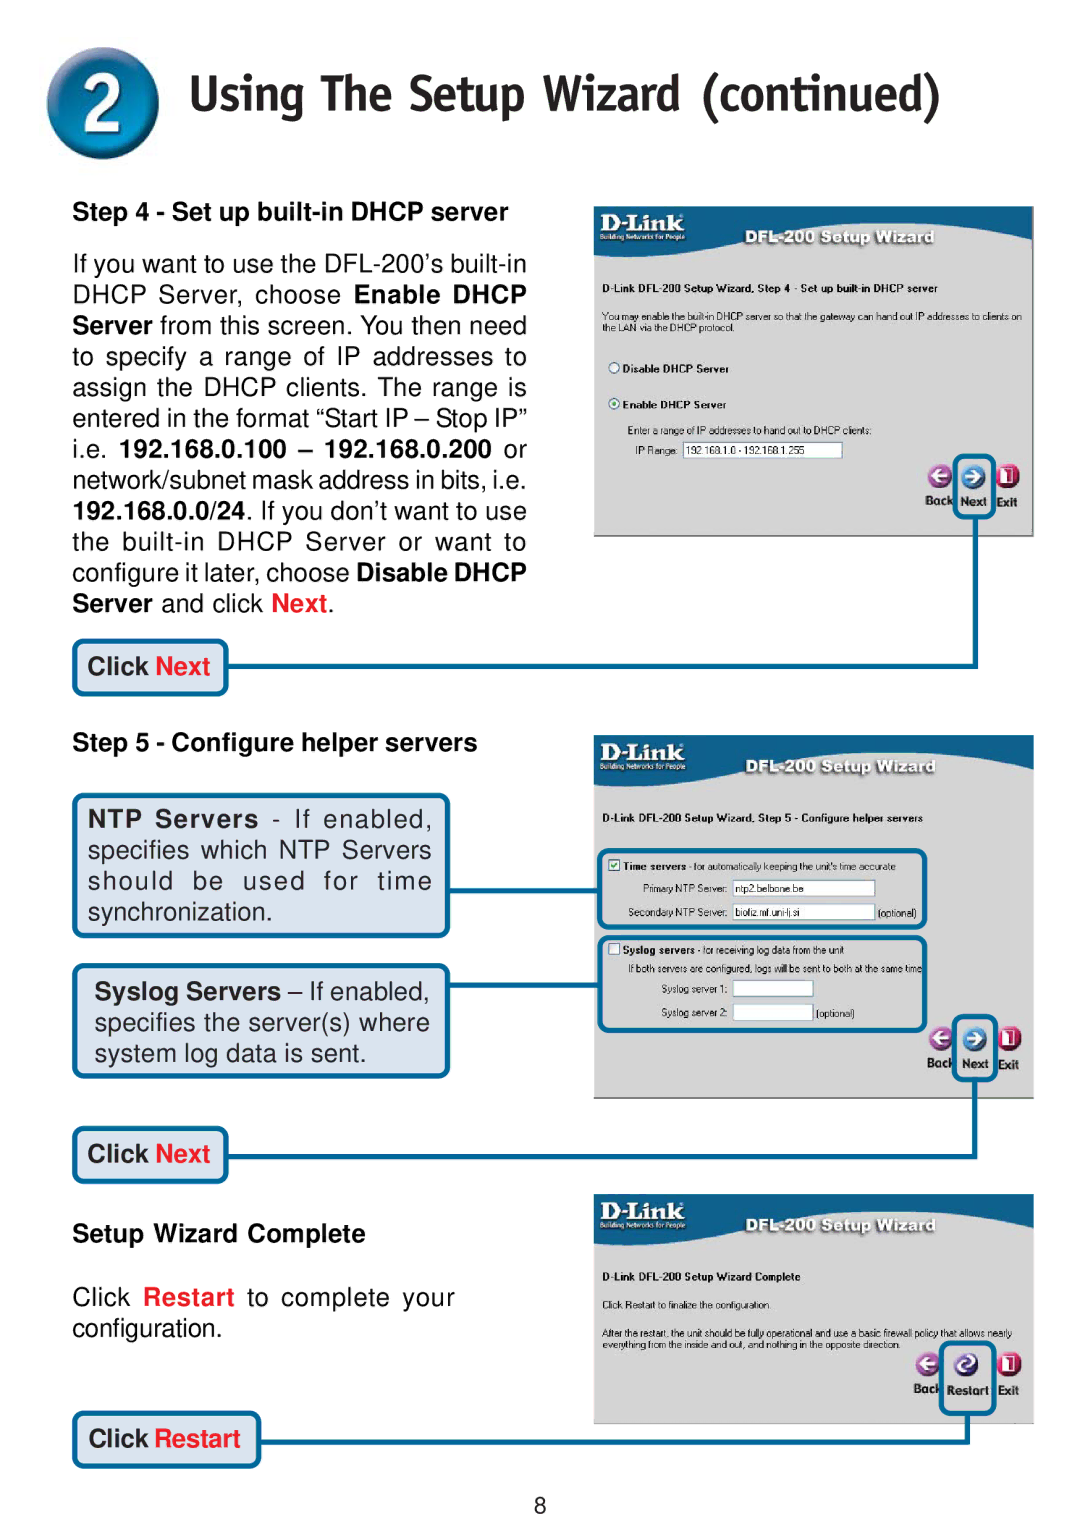
Step 4 - Set up built-in DHCP server

If you want to use the DFL-200’s built-in DHCP Server, choose Enable DHCP Server from this screen. You then need to specify a range of IP addresses to assign the DHCP clients. The range is entered in the format “Start IP – Stop IP” i.e. 192.168.0.100 – 192.168.0.200 or network/subnet mask address in bits, i.e. 192.168.0.0/24. If you don’t want to use the built-in DHCP Server or want to configure it later, choose Disable DHCP Server and click Next.

Click Next

Step 5 - Configure helper servers

NTP Servers - If enabled, specifies which NTP Servers should be used for time synchronization.

Syslog Servers – If enabled, specifies the server(s) where system log data is sent.

Click Next

Setup Wizard Complete

Click Restart to complete your configuration.

Click Restart

8
Page 8
Image 8
D-Link DFL-200 warranty Set up built-in Dhcp server, Configure helper servers, Setup Wizard Complete