Connecting The
A.Connect the power adapter to the receptor on the back panel of the
B.Power off your Cable or DSL modem; some devices may not have an on/off switch and will require you to unplug the power adapter. Now, the
Cable / DSL modem (Power Off) –
C.Attach an Ethernet cable to the Ethernet jack located on the Cable / DSL modem. After the Ethernet cable is securely connected, power on the Cable / DSL modem by turning on the unit or plugging in the power adapter.
Cable / DSL modem (Power On) –
D.Attach the other end of the Ethernet cable to the WAN port on the back panel of the
E.Attach an Ethernet cable to a LAN port on the back panel of the
F.Connect the computer that you will use to configure the
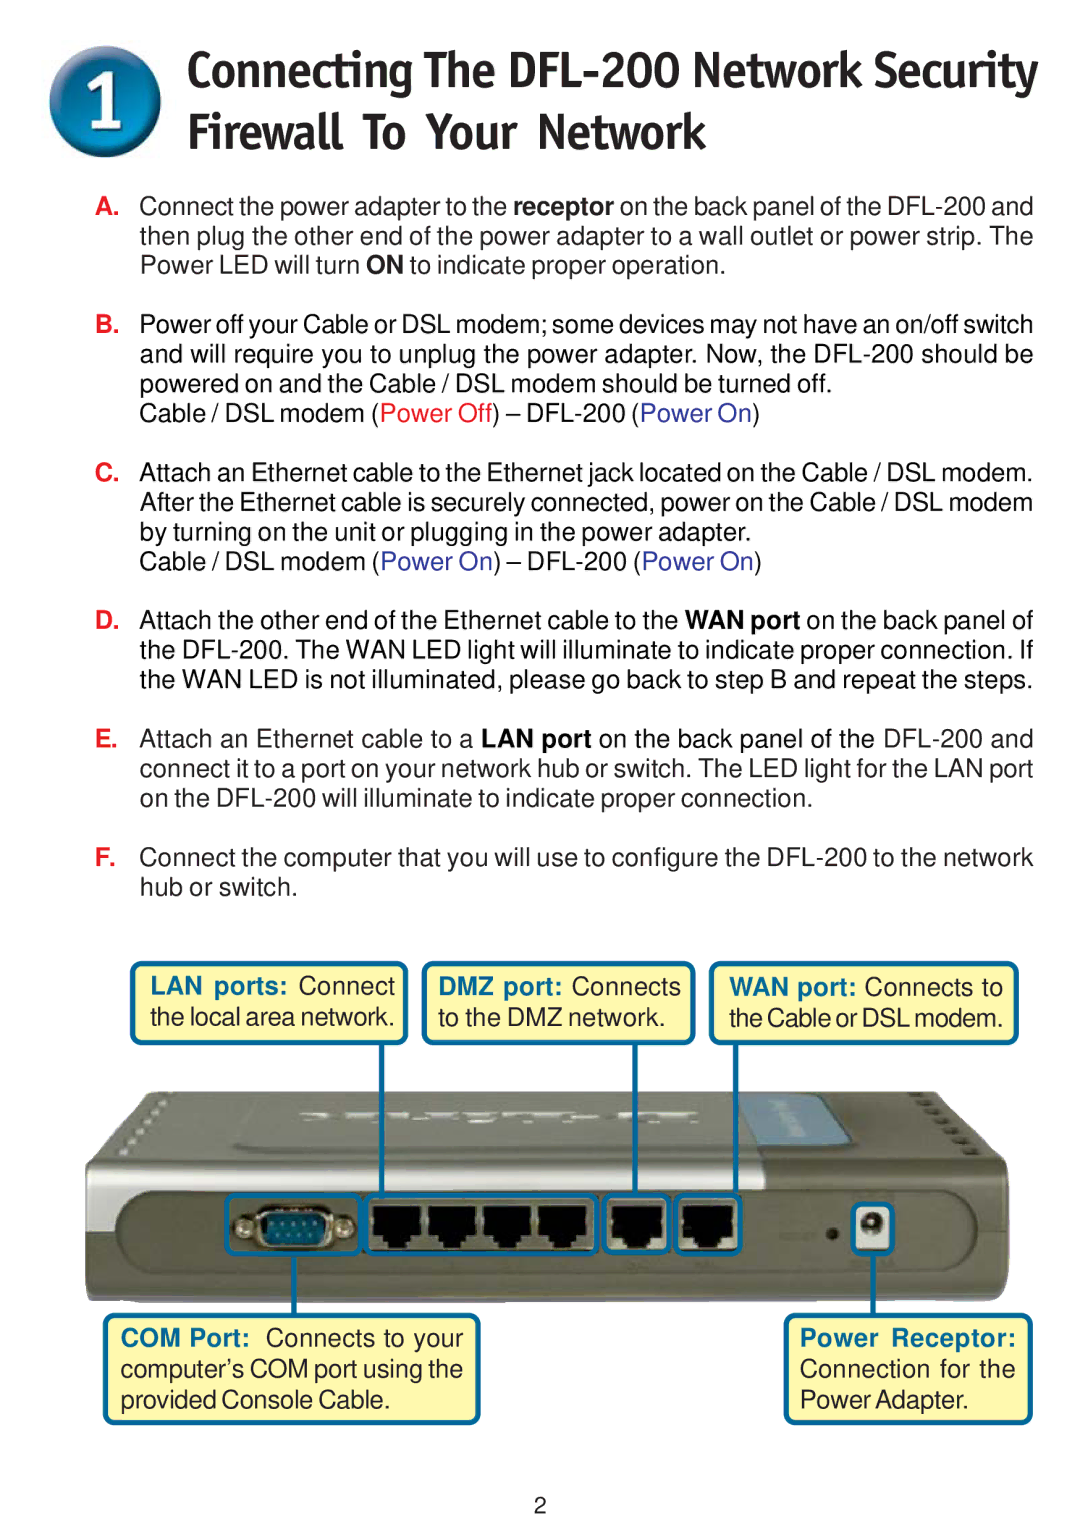
LAN ports: Connect | DMZ port: Connects | WAN port: Connects to |
the local area network. | to the DMZ network. | the Cable or DSL modem. |
|
|
|
|
|
|
|
|
COM Port: Connects to your | Power Receptor: | ||
computer’s COM port using the | Connection for the | ||
provided Console Cable. | Power Adapter. | ||
2