1. Assembly of the Upper Channel, to | 3a. |
Cabinet. (Factory installed on some models) | • |
|
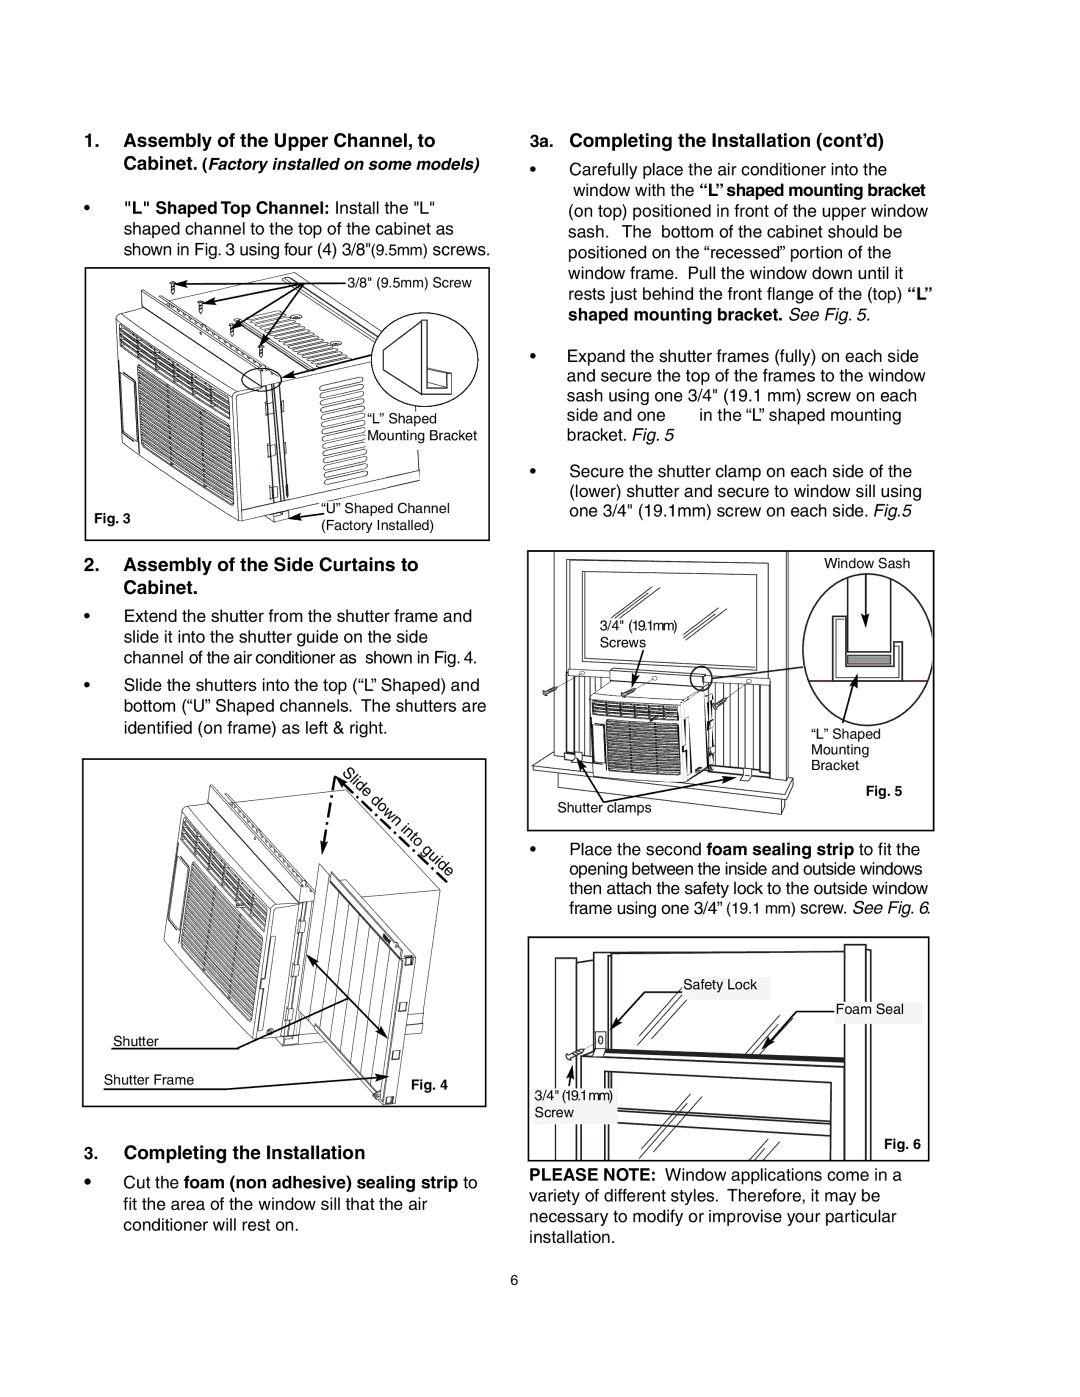
•"L" Shaped Top Channel: Install the "L" shaped channel to the top of the cabinet as shown in Fig. 3 using four (4) 3/8"(9.5mm) screws.
| 3/8" (9.5mm) Screw | |
| • | |
| “L” Shaped | |
| Mounting Bracket | |
| • | |
Fig. 3 | “U” Shaped Channel | |
(Factory Installed) | ||
|
Completing the Installation (cont’d)
Carefully place the air conditioner into the window with the “L” shaped mounting bracket (on top) positioned in front of the upper window sash. The bottom of the cabinet should be positioned on the “recessed” portion of the window frame. Pull the window down until it rests just behind the front flange of the (top) “L” shaped mounting bracket. See Fig. 5.
Expand the shutter frames (fully) on each side and secure the top of the frames to the window sash using one 3/4" (19.1 mm) screw on each
side and one in the “L” shaped mounting bracket. Fig. 5
Secure the shutter clamp on each side of the (lower) shutter and secure to window sill using one 3/4" (19.1mm) screw on each side. Fig.5
2.Assembly of the Side Curtains to Cabinet.
•Extend the shutter from the shutter frame and slide it into the shutter guide on the side channel of the air conditioner as shown in Fig. 4.
•Slide the shutters into the top (“L” Shaped) and bottom (“U” Shaped channels. The shutters are identified (on frame) as left & right.
Shutter |
|
Shutter Frame | Fig. 4 |
|
3.Completing the Installation
•Cut the foam (non adhesive) sealing strip to fit the area of the window sill that the air conditioner will rest on.
Window Sash |
3/4" (19.1mm) |
Screws |
“L” Shaped |
Mounting |
Bracket |
Fig. 5 |
Shutter clamps |
•Place the second foam sealing strip to fit the opening between the inside and outside windows then attach the safety lock to the outside window frame using one 3/4” (19.1 mm) screw. See Fig. 6.
Safety Lock |
Foam Seal |
3/4" (19.1mm) |
Screw |
Fig. 6 |
PLEASE NOTE: Window applications come in a variety of different styles. Therefore, it may be necessary to modify or improvise your particular installation.
6