Manuals
/
DAVIS
/
Household Appliance
/
Home Security System
DAVIS
6322C Cabled ISS Assembly, Applying Power, Verifying Communication with the Console
Models:
6322C
6322
1
9
32
32
Download
32 pages
34.38 Kb
6
7
8
9
10
11
12
13
Troubleshooting
Specification
Install
Wireless ISS Assembly
Accessories for Pole Mounting
Tools for Setup
Cabled ISS Assembly
Cleaning the Radiation Shield
Page 9
Image 9
Page 8
Page 10
Page 9
Image 9
Page 8
Page 10
Contents
Integrated Sensor Suite Installation Manual
Contents
Introduction
Included Components and Hardware
Components
Preparing the ISS for Installation
Tools for Setup
Hardware
Assemble the Anemometer
Check SIM Sensor Connections
Open the SIM Box
Check the Factory Installed Sensor Connections
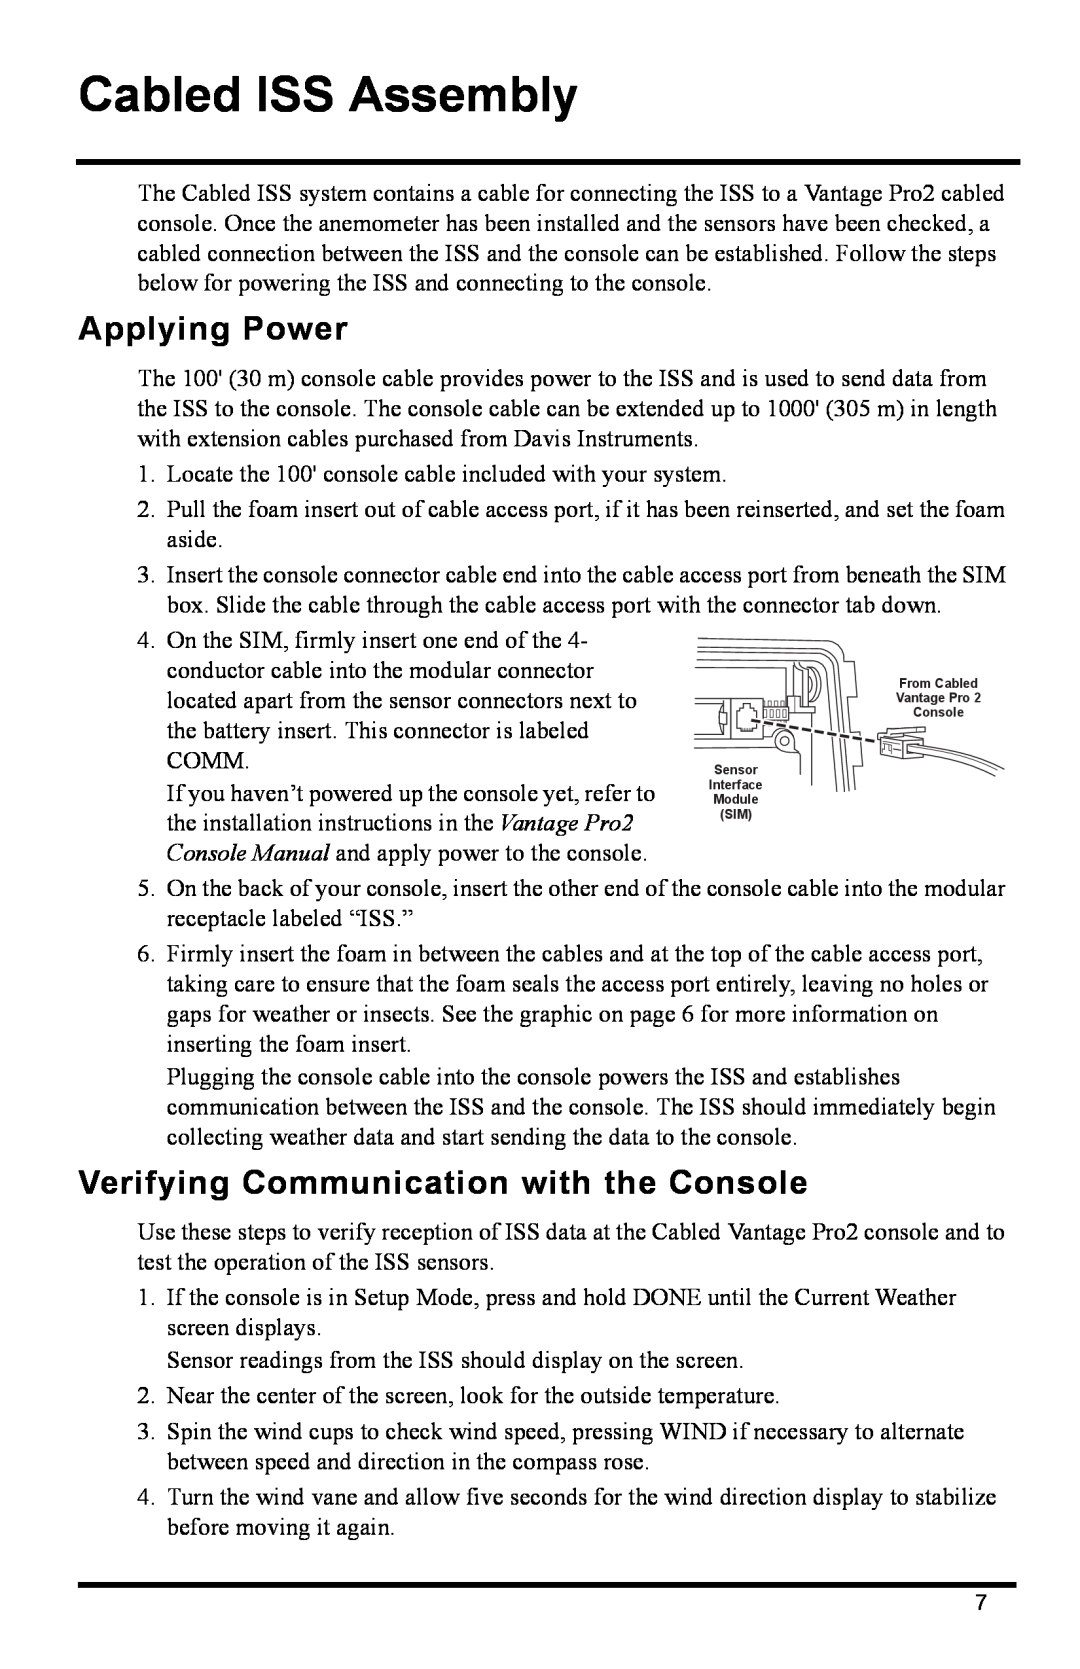
Connect the Anemometer Cable to the SIM
Cabled ISS Assembly
Applying Power
Verifying Communication with the Console
Troubleshooting Cabled ISS Communication
Troubleshooting Cabled ISS Communication
Applying Power to a Wireless ISS
Wireless ISS Assembly
Checking Transmitter ID
to eight different wireless stations. The default
Troubleshooting Wireless ISS Reception
Verifying Data from the ISS Sensors
Verifying Data from the ISS Sensors
Optional Changing ISS Transmitter ID
Using Multiple Transmitting Stations
Preparing the ISS for Installation
Close the SIM Box
Prepare the Rain Collector
Optional Insert the Metric Measurement Adapter
General ISS Siting Guidelines
Locating the ISS and Anemometer
Locating the ISS and Anemometer
Anemometer Siting Guidelines
Optional Anemometer Cable Length Considerations
Optional Wireless Transmission Considerations
Testing Wireless Transmission at ISS Location
General ISS Installation Guidelines
Installing the ISS
ping tape around both the cables and the pole
Orient the Wind Vane
Installing the ISS on a Flat Surface
Installation Instructions
Installing the ISS on a Pole
Accessories for Pole Mounting
General Guidelines for Installing on a Pole
Guidelines for Installing the ISS on a Pole
Option 1 Installing ISS and Anemometer Together
Option 2 Installing ISS Only
Additional Mounting Options
Finishing the Installation
Extending Wireless Transmission Range
Level the Solar and UV Sensors
Optional Wireless Stations
Extending the Console Cable Cabled ISS Only
Relocating the Anemometer
Cleaning the Radiation Shield
Maintenance and Troubleshooting
4 Screw 3 Lock Washer Flat Washer
Rain Collector Base
Cleaning the Rain Collector Cone
Troubleshooting
Most Common Rain Collector Problem
Most Common Anemometer Problems
Contacting Davis Instruments
Appendices
Appendix A Re-orientingthe Wind Vane
To re-orientthe wind vane
Wireless ISS
Appendix B Specifications
ISS Weather Variable Update Intervals
Cabled ISS
SENSOR
SIM Board Display and Contents
INTERFACE
MODULE
Top
Page
Image
Contents