Preparing for installation.
The extractor hood has the ability to ei- ther recirculate the filtered air back into the kitchen, or to vent the filtered air through an outside wall.
Decide on which option best suits you be- fore commencing with the installation.
•The extractor hood is intended to be mounted onto a flat perpendicular kitchen wall capable of supporting the weight of the hood. (approximately 26 kg.)
Tools required for installation:
•An electric drill.
•A 3.5 mm dia. steel drill bit.
•8mm and 5mm dia. masonry drill bits
•A star screw driver (Posi bit 2).
•A ratchet with a 10mm socket and a 100mm extension.
•A tape measure, masking tape and a pencil.
| ITEM |
|
|
| DESCRIPTION | QUANTITY | |||
|
|
|
|
|
|
|
|
|
|
|
|
|
|
|
|
|
| 8mm wall plug | 2 |
|
|
|
|
| |||||
|
|
|
|
|
|
|
| 6mm screw | |
|
|
|
|
|
|
|
|
| |
|
|
|
|
|
|
|
| 5mm wall plug | 6 |
|
|
|
|
| |||||
|
|
|
|
|
|
|
| 5mm screw | |
|
|
|
|
|
|
|
| ||
|
|
|
|
|
|
|
|
| |
|
|
|
|
|
|
|
|
|
|
|
|
|
|
|
|
|
| Self tapping screw | 10 |
|
|
|
|
|
|
| |||
|
|
|
|
|
|
| |||
|
|
|
|
|
|
|
|
|
|
|
|
|
|
|
|
|
| Slotted washer | 2 |
|
|
|
|
|
|
|
|
|
|
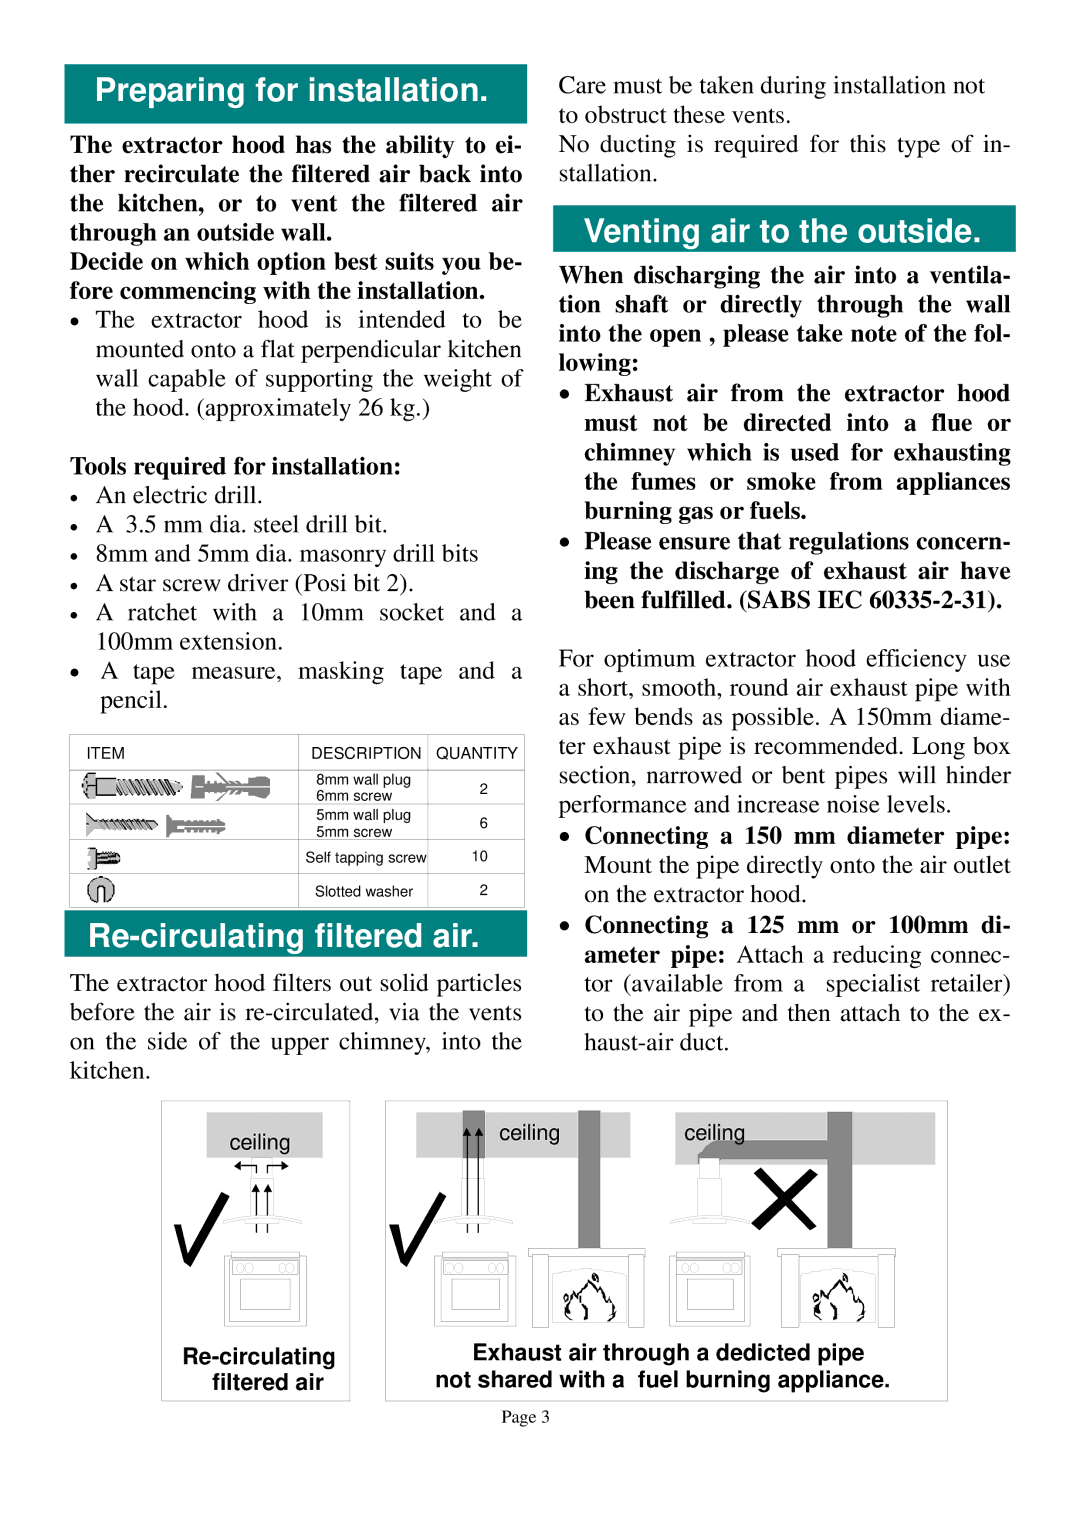
Re-circulating filtered air.
The extractor hood filters out solid particles before the air is
Care must be taken during installation not to obstruct these vents.
No ducting is required for this type of in- stallation.
Venting air to the outside.
When discharging the air into a ventila- tion shaft or directly through the wall into the open , please take note of the fol- lowing:
•Exhaust air from the extractor hood must not be directed into a flue or chimney which is used for exhausting the fumes or smoke from appliances burning gas or fuels.
•Please ensure that regulations concern- ing the discharge of exhaust air have been fulfilled. (SABS IEC
For optimum extractor hood efficiency use a short, smooth, round air exhaust pipe with as few bends as possible. A 150mm diame- ter exhaust pipe is recommended. Long box section, narrowed or bent pipes will hinder performance and increase noise levels.
•Connecting a 150 mm diameter pipe: Mount the pipe directly onto the air outlet on the extractor hood.
•Connecting a 125 mm or 100mm di- ameter pipe: Attach a reducing connec- tor (available from a specialist retailer) to the air pipe and then attach to the ex-
ceiling
ceilingceiling
Exhaust air through a dedicted pipe not shared with a fuel burning appliance.
Page 3