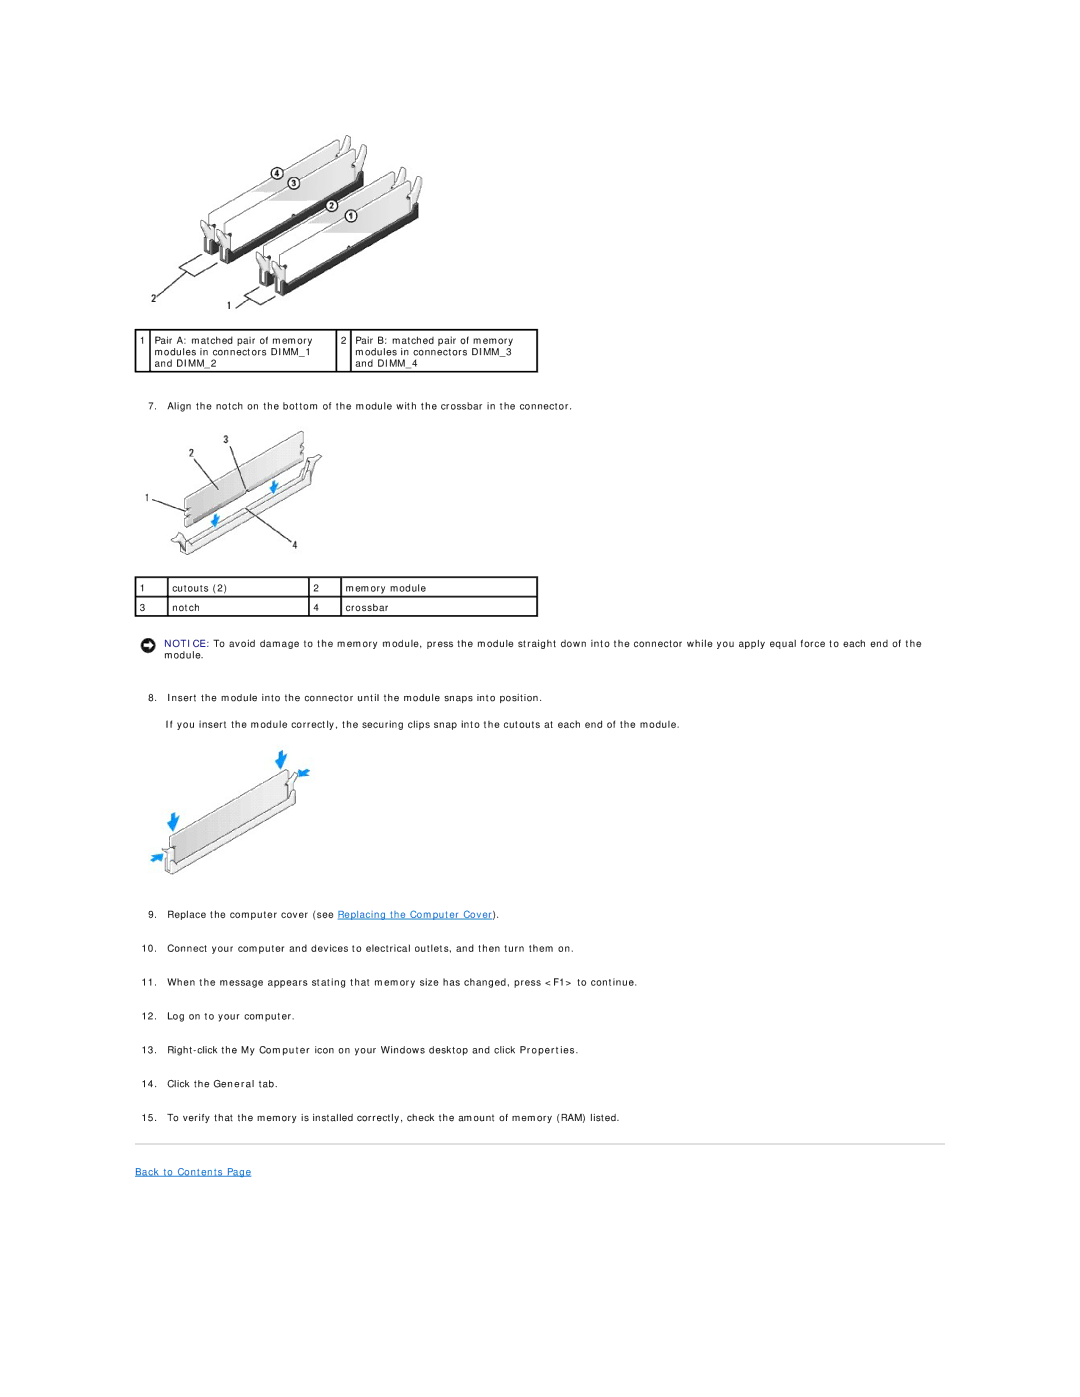
1Pair A: matched pair of memory modules in connectors DIMM_1 and DIMM_2
2Pair B: matched pair of memory modules in connectors DIMM_3 and DIMM_4
7. Align the notch on the bottom of the module with the crossbar in the connector.
1 | cutouts (2) | 2 | memory module |
|
|
|
|
3 | notch | 4 | crossbar |
|
|
|
|
NOTICE: To avoid damage to the memory module, press the module straight down into the connector while you apply equal force to each end of the module.
8.Insert the module into the connector until the module snaps into position.
If you insert the module correctly, the securing clips snap into the cutouts at each end of the module.
9.Replace the computer cover (see Replacing the Computer Cover).
10.Connect your computer and devices to electrical outlets, and then turn them on.
11.When the message appears stating that memory size has changed, press <F1> to continue.
12.Log on to your computer.
13.
14.Click the General tab.
15.To verify that the memory is installed correctly, check the amount of memory (RAM) listed.