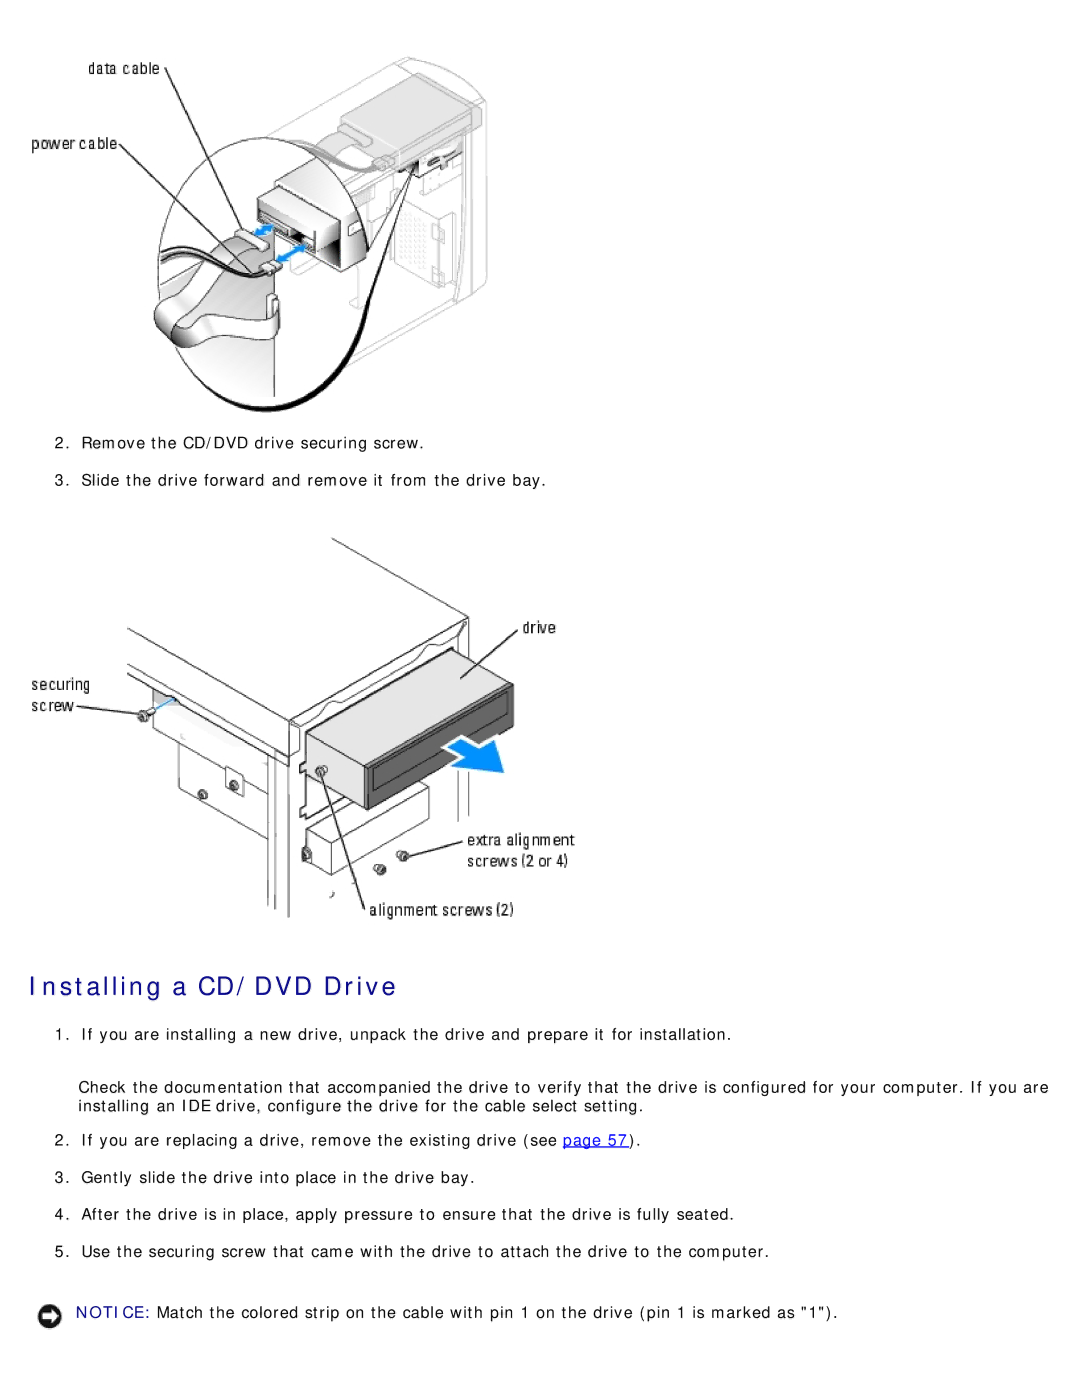
2.Remove the CD/DVD drive securing screw.
3.Slide the drive forward and remove it from the drive bay.
Installing a CD/DVD Drive
1. If you are installing a new drive, unpack the drive and prepare it for installation.
Check the documentation that accompanied the drive to verify that the drive is configured for your computer. If you are installing an IDE drive, configure the drive for the cable select setting.
2.If you are replacing a drive, remove the existing drive (see page 57).
3.Gently slide the drive into place in the drive bay.
4.After the drive is in place, apply pressure to ensure that the drive is fully seated.
5.Use the securing screw that came with the drive to attach the drive to the computer.
NOTICE: Match the colored strip on the cable with pin 1 on the drive (pin 1 is marked as "1").