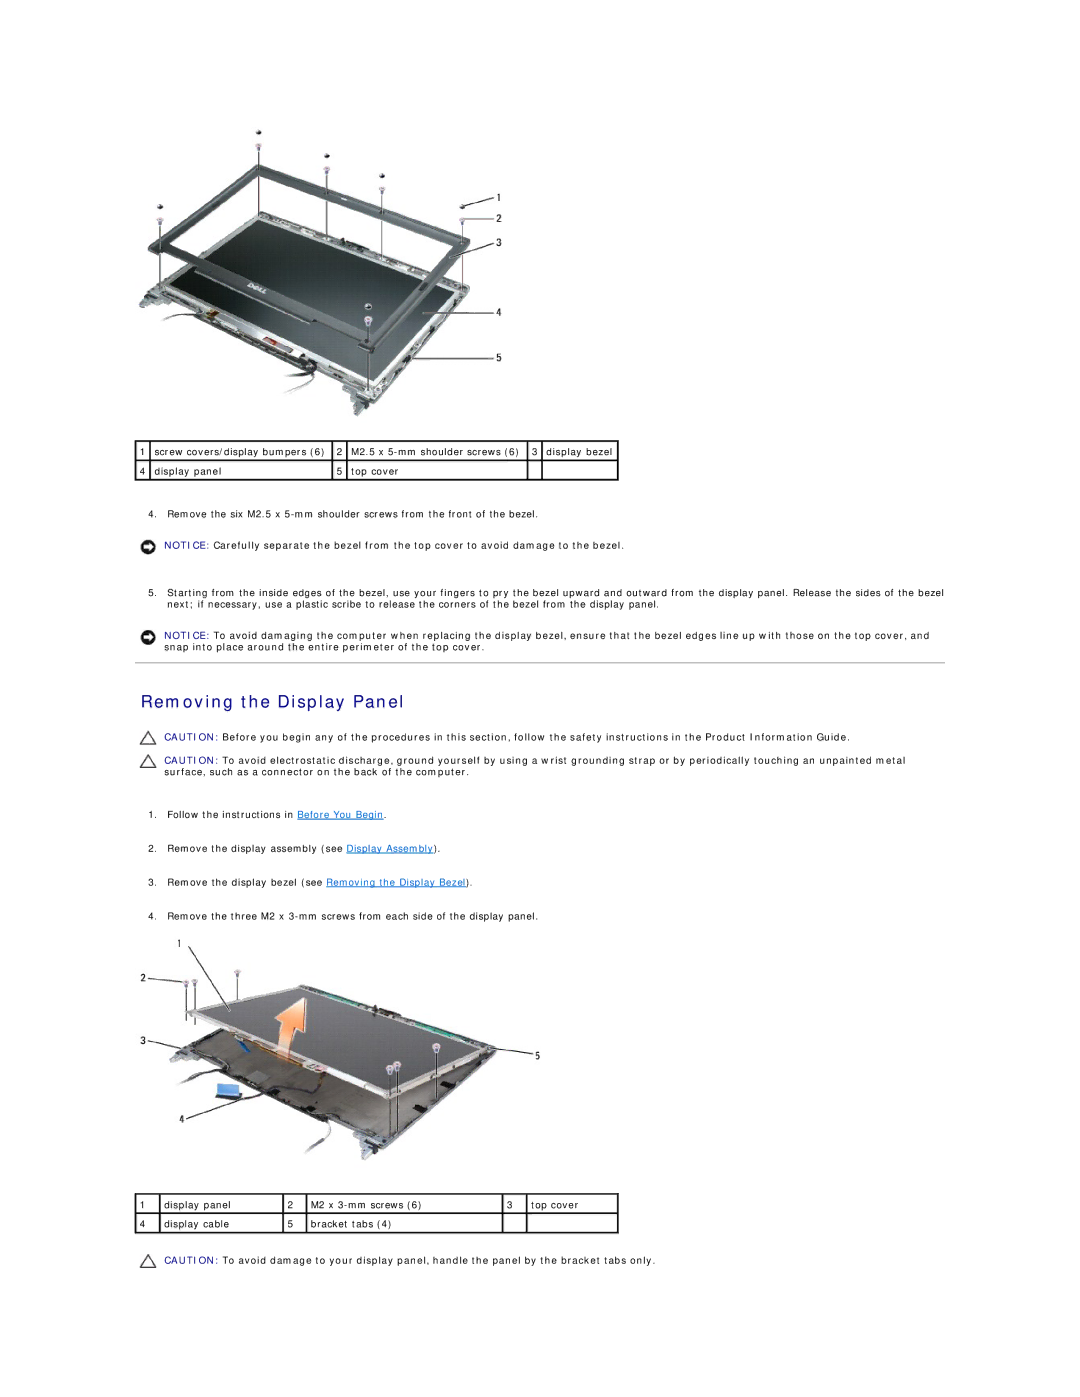
1 | screw covers/display bumpers (6) | 2 | M2.5 x | 3 | display bezel |
|
|
|
|
|
|
4 | display panel | 5 | top cover |
|
|
|
|
|
|
|
|
4. Remove the six M2.5 x
NOTICE: Carefully separate the bezel from the top cover to avoid damage to the bezel.
5.Starting from the inside edges of the bezel, use your fingers to pry the bezel upward and outward from the display panel. Release the sides of the bezel next; if necessary, use a plastic scribe to release the corners of the bezel from the display panel.
NOTICE: To avoid damaging the computer when replacing the display bezel, ensure that the bezel edges line up with those on the top cover, and snap into place around the entire perimeter of the top cover.
Removing the Display Panel
CAUTION: Before you begin any of the procedures in this section, follow the safety instructions in the Product Information Guide.
CAUTION: To avoid electrostatic discharge, ground yourself by using a wrist grounding strap or by periodically touching an unpainted metal surface, such as a connector on the back of the computer.
1.Follow the instructions in Before You Begin.
2.Remove the display assembly (see Display Assembly).
3.Remove the display bezel (see Removing the Display Bezel).
4.Remove the three M2 x
1 | display panel | 2 | M2 x | 3 | top cover |
|
|
|
|
|
|
4 | display cable | 5 | bracket tabs (4) |
|
|
|
|
|
|
|
|
CAUTION: To avoid damage to your display panel, handle the panel by the bracket tabs only.