Display Controls and Indicators
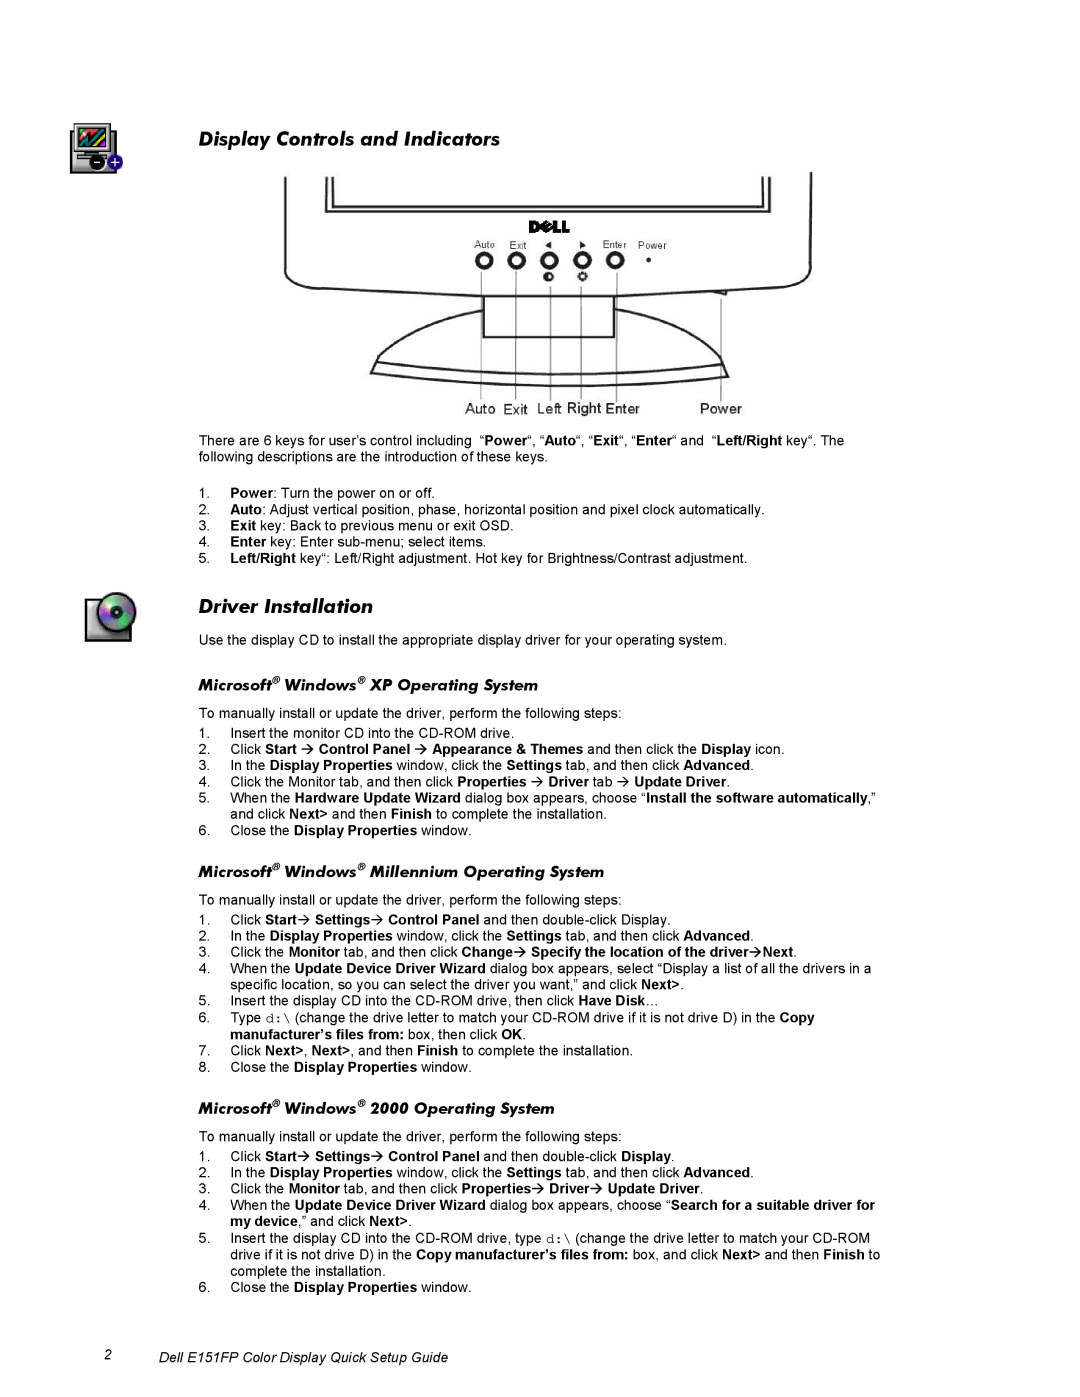
There are 6 keys for user’s control including “Power“, “Auto“, “Exit“, “Enter“ and “Left/Right key“. The following descriptions are the introduction of these keys.
1.Power: Turn the power on or off.
2.Auto: Adjust vertical position, phase, horizontal position and pixel clock automatically.
3.Exit key: Back to previous menu or exit OSD.
4.Enter key: Enter
5.Left/Right key“: Left/Right adjustment. Hot key for Brightness/Contrast adjustment.
Driver Installation
Use the display CD to install the appropriate display driver for your operating system.
Microsoft Windows XP Operating System
To manually install or update the driver, perform the following steps:
1.Insert the monitor CD into the
2.Click Start Æ Control Panel Æ Appearance & Themes and then click the Display icon.
3.In the Display Properties window, click the Settings tab, and then click Advanced.
4.Click the Monitor tab, and then click Properties Æ Driver tab Æ Update Driver.
5.When the Hardware Update Wizard dialog box appears, choose “Install the software automatically,” and click Next> and then Finish to complete the installation.
6.Close the Display Properties window.
Microsoft Windows Millennium Operating System
To manually install or update the driver, perform the following steps:
1.Click StartÆ SettingsÆ Control Panel and then
2.In the Display Properties window, click the Settings tab, and then click Advanced.
3.Click the Monitor tab, and then click ChangeÆ Specify the location of the driverÆNext.
4.When the Update Device Driver Wizard dialog box appears, select “Display a list of all the drivers in a specific location, so you can select the driver you want,” and click Next>.
5.Insert the display CD into the
6.Type d:\ (change the drive letter to match your
7.Click Next>, Next>, and then Finish to complete the installation.
8.Close the Display Properties window.
Microsoft Windows 2000 Operating System
To manually install or update the driver, perform the following steps:
1.Click StartÆ SettingsÆ Control Panel and then
2.In the Display Properties window, click the Settings tab, and then click Advanced.
3.Click the Monitor tab, and then click PropertiesÆ DriverÆ Update Driver.
4.When the Update Device Driver Wizard dialog box appears, choose “Search for a suitable driver for my device,” and click Next>.
5.Insert the display CD into the
6.Close the Display Properties window.
2 | Dell E151FP Color Display Quick Setup Guide |
