1
2
3
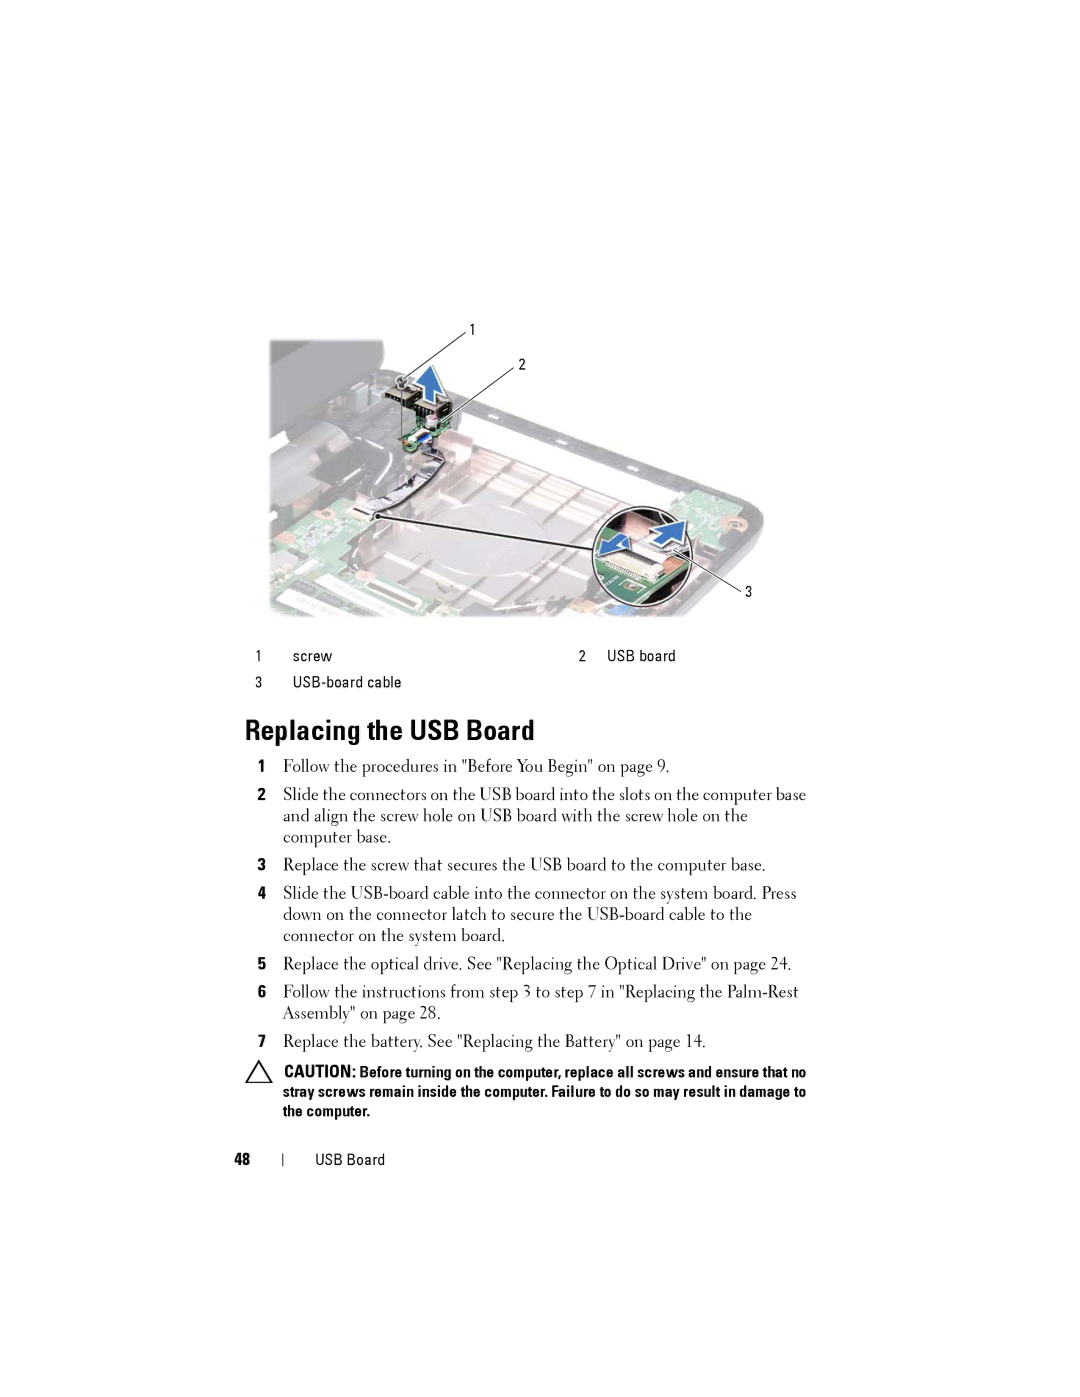
1 | screw | 2 USB board |
3 |
|
Replacing the USB Board
1Follow the procedures in "Before You Begin" on page 9.
2Slide the connectors on the USB board into the slots on the computer base and align the screw hole on USB board with the screw hole on the computer base.
3Replace the screw that secures the USB board to the computer base.
4Slide the
5Replace the optical drive. See "Replacing the Optical Drive" on page 24.
6Follow the instructions from step 3 to step 7 in "Replacing the
7Replace the battery. See "Replacing the Battery" on page 14.
CAUTION: Before turning on the computer, replace all screws and ensure that no stray screws remain inside the computer. Failure to do so may result in damage to the computer.
48
USB Board
