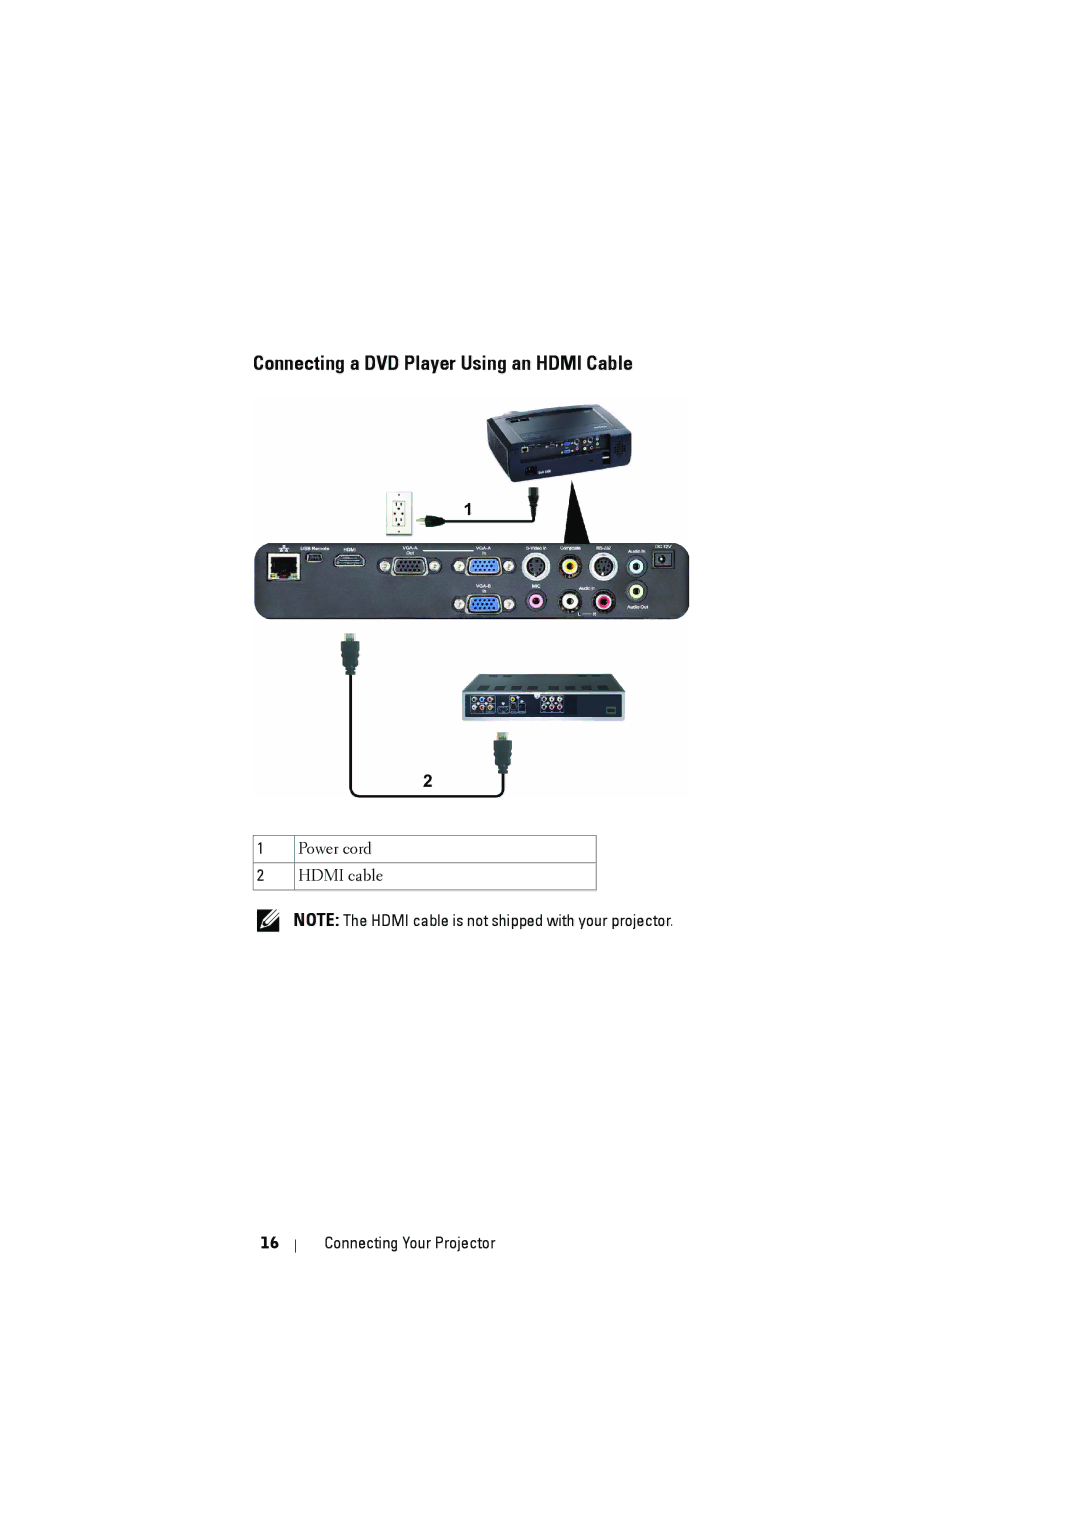
Connecting a DVD Player Using an HDMI Cable
1Power cord
2HDMI cable
NOTE: The HDMI cable is not shipped with your projector.
16
Connecting Your Projector
1Power cord
2HDMI cable
NOTE: The HDMI cable is not shipped with your projector.
16
Connecting Your Projector