Using the Remote Control
15
16
17
18
19
21
20
22
23
25
26
1
2
3
4
5
6
7
8
9
10
11
12
14
13
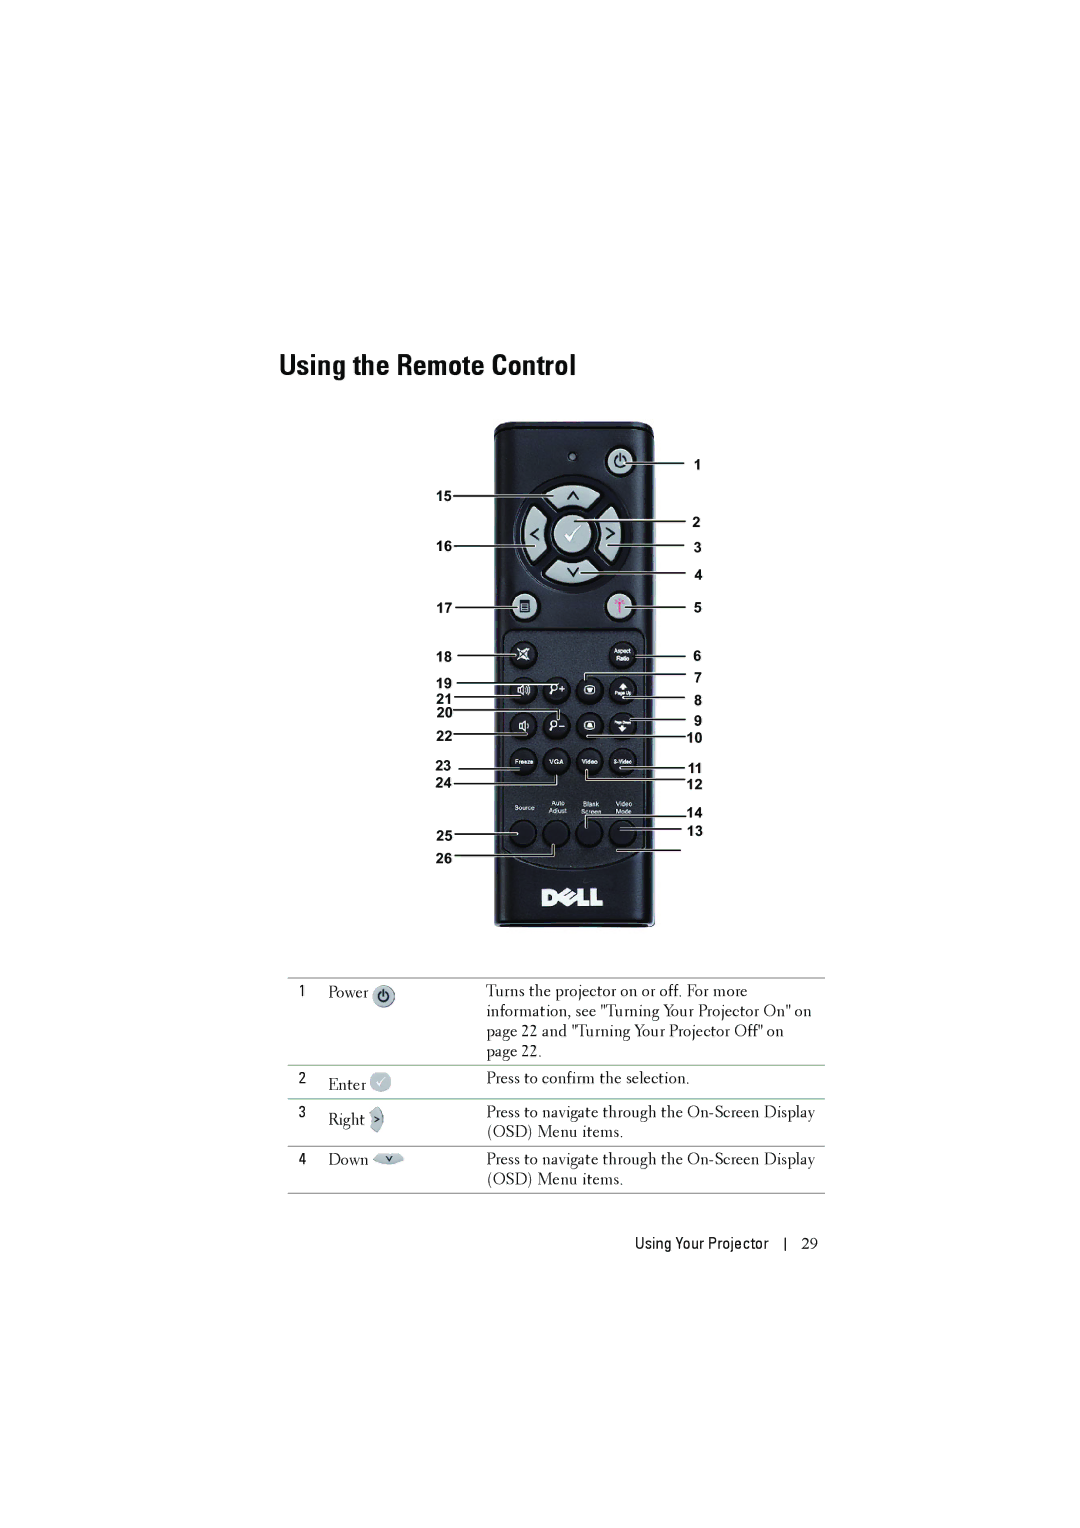
1 | Power | Turns the projector on or off. For more |
|
| information, see "Turning Your Projector On" on |
|
| page 22 and "Turning Your Projector Off" on |
|
| page 22. |
|
|
|
2 | Enter | Press to confirm the selection. |
|
| |
|
|
|
3 | Right | Press to navigate through the |
| (OSD) Menu items. | |
|
| |
|
|
|
4 | Down | Press to navigate through the |
|
| (OSD) Menu items. |
|
|
|
Using Your Projector
29