Dell XPS 13 owner manual Replacing the Solid-State Drive

Models: XPS 13

1 74
Download 74 pages 4.63 Kb
Page 28
Image 28

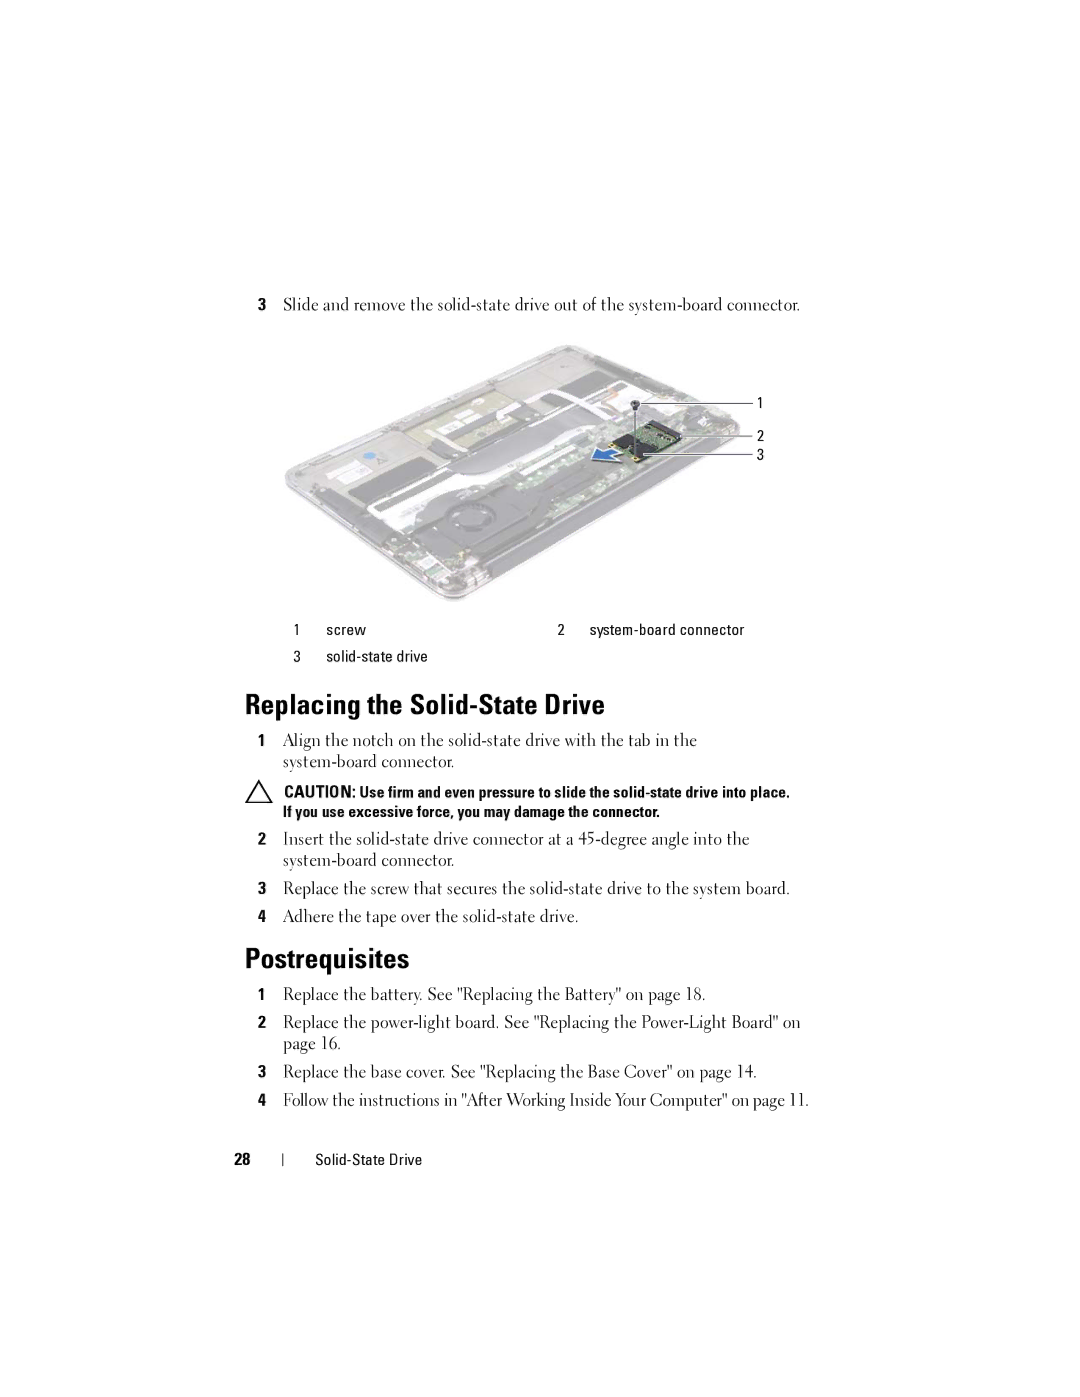
3Slide and remove the solid-state drive out of the system-board connector.

1

2

3

1

screw

2

system-board connector

3

solid-state drive


Replacing the Solid-State Drive

1Align the notch on the solid-state drive with the tab in the system-board connector.

CAUTION: Use firm and even pressure to slide the solid-state drive into place. If you use excessive force, you may damage the connector.

2Insert the solid-state drive connector at a 45-degree angle into the system-board connector.

3Replace the screw that secures the solid-state drive to the system board.

4Adhere the tape over the solid-state drive.

Postrequisites

1Replace the battery. See "Replacing the Battery" on page 18.

2Replace the power-light board. See "Replacing the Power-Light Board" on page 16.

3Replace the base cover. See "Replacing the Base Cover" on page 14.

4Follow the instructions in "After Working Inside Your Computer" on page 11.

28

Solid-State Drive

Page 28
Image 28
Dell XPS 13 owner manual Replacing the Solid-State Drive