electrical connection

WARNING

TO AVOID ELECTRICAL SHOCK HAZARD, BEFORE INSTALLING THE APPLIANCE, SWITCH POWER OFF AT THE SERVICE PANEL AND LOCK THE PANEL TO PREVENT THE POWER F R O M B E I N G S W I T C H E D O N ACCIDENTALLY.

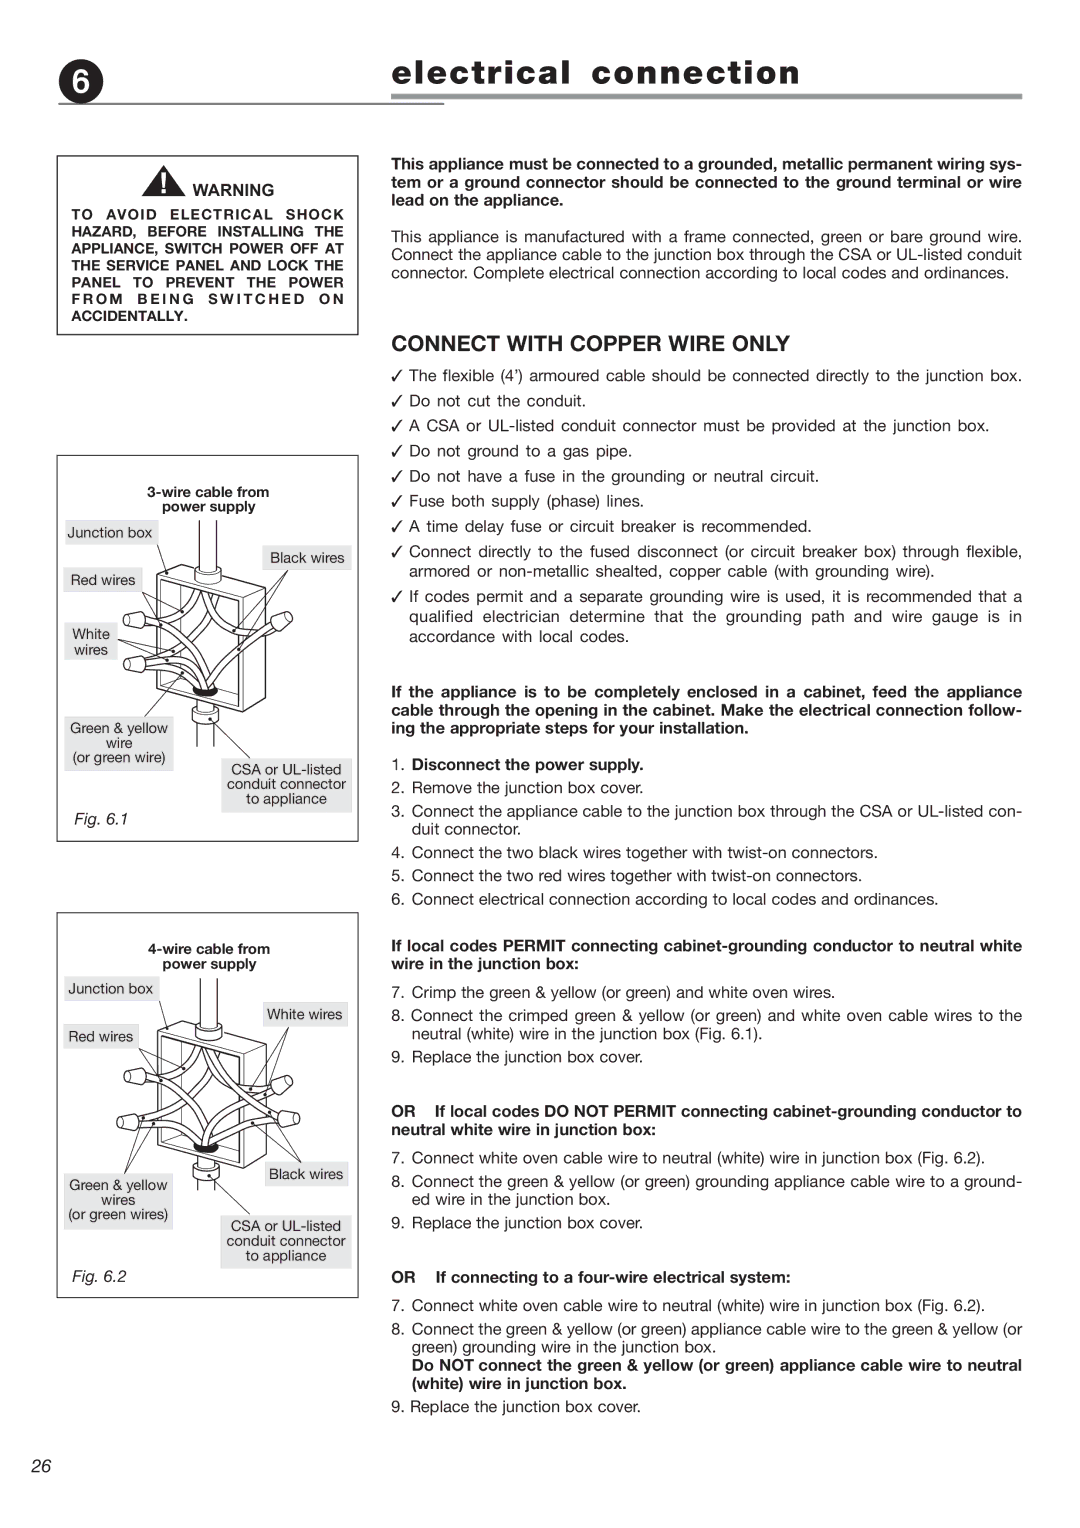
3-wire cable from

power supply

This appliance must be connected to a grounded, metallic permanent wiring sys- tem or a ground connector should be connected to the ground terminal or wire lead on the appliance.

This appliance is manufactured with a frame connected, green or bare ground wire. Connect the appliance cable to the junction box through the CSA or UL-listed conduit connector. Complete electrical connection according to local codes and ordinances.

CONNECT WITH COPPER WIRE ONLY

The flexible (4’) armoured cable should be connected directly to the junction box.

Do not cut the conduit.

A CSA or UL-listed conduit connector must be provided at the junction box.

Do not ground to a gas pipe.

Do not have a fuse in the grounding or neutral circuit.

Fuse both supply (phase) lines.

A time delay fuse or circuit breaker is recommended.

Junction box

Red wires

White wires

Green & yellow

wire

(or green wire)

Black wires

CSA or UL-listed conduit connector to appliance

Connect directly to the fused disconnect (or circuit breaker box) through flexible,

armored or non-metallic shealted, copper cable (with grounding wire).

If codes permit and a separate grounding wire is used, it is recommended that a

qualified electrician determine that the grounding path and wire gauge is in

accordance with local codes.

If the appliance is to be completely enclosed in a cabinet, feed the appliance cable through the opening in the cabinet. Make the electrical connection follow- ing the appropriate steps for your installation.

1.

Disconnect the power supply.

2.

Remove the junction box cover.

3.

Connect the appliance cable to the junction box through the CSA or UL-listed con-

Fig. 6.1

4-wire cable from

power supply


duit connector.

4.

Connect the two black wires together with twist-on connectors.

5.

Connect the two red wires together with twist-on connectors.

6.

Connect electrical connection according to local codes and ordinances.

If local codes PERMIT connecting cabinet-grounding conductor to neutral white wire in the junction box:

Junction box

Red wires

Green & yellow

wires

(or green wires)

White wires

Black wires

CSA or UL-listed conduit connector to appliance

7.Crimp the green & yellow (or green) and white oven wires.

8.Connect the crimped green & yellow (or green) and white oven cable wires to the neutral (white) wire in the junction box (Fig. 6.1).

9.Replace the junction box cover.

OR If local codes DO NOT PERMIT connecting cabinet-grounding conductor to neutral white wire in junction box:

7.Connect white oven cable wire to neutral (white) wire in junction box (Fig. 6.2).

8.Connect the green & yellow (or green) grounding appliance cable wire to a ground- ed wire in the junction box.

9.Replace the junction box cover.

Fig. 6.2

OR If connecting to a four-wire electrical system:

7.Connect white oven cable wire to neutral (white) wire in junction box (Fig. 6.2).

8.Connect the green & yellow (or green) appliance cable wire to the green & yellow (or green) grounding wire in the junction box.

Do NOT connect the green & yellow (or green) appliance cable wire to neutral (white) wire in junction box.

9.Replace the junction box cover.

26

Page 26
Image 26
DeLonghi 24 SS Electrical connection, Connect with Copper Wire only, Or If connecting to a four-wire electrical system

24 E, 24 SS specifications

The DeLonghi 24 SS and 24 E coffee machines embody a perfect blend of innovation, functionality, and style, making them standout choices for coffee enthusiasts. DeLonghi, renowned for its commitment to high-quality coffee equipment, has integrated advanced features and technologies into these models to ensure an exceptional brewing experience.

The DeLonghi 24 SS is designed for users who appreciate the art of espresso making. It comes equipped with a powerful 15-bar pressure pump, which is essential for extracting rich flavors while creating a beautiful crema on top of each shot. The stainless steel boiler ensures that the machine heats up quickly, allowing for rapid brewing and minimizing wait times. Its compact design makes it suitable for small kitchens or office settings, without compromising on its functionality.

The 24 E model, on the other hand, caters to those looking for versatility. It features a built-in grinder with adjustable settings, allowing users to choose between different coarseness levels for a personalized brew. This means coffee lovers can prepare not only espresso but also drip coffee or other variations, all tailored to their taste preferences. The programmable settings enable users to pre-set their brewing times and strength, ensuring a consistent cup of coffee every time.

Both models are equipped with DeLonghi's patented cappuccino system, which combines steam and milk for creamy, frothy beverages. This feature is perfect for lattes, cappuccinos, and macchiatos, providing a café-like experience at home. The easy-to-use interface, complete with intuitive controls, makes navigating the various functions simple even for beginners.

The DeLonghi 24 SS and 24 E also boast an energy-efficient design, equipped with an automatic shut-off feature that activates after a predetermined period of inactivity. This not only conserves energy but also enhances the safety of these machines.

Cleaning and maintenance are simplified thanks to removable drip trays and water tanks, which help to streamline the post-brewing process. A descaling indicator reminds users when it’s time for maintenance, ensuring longevity and consistent performance.

In conclusion, the DeLonghi 24 SS and 24 E models stand out in the realm of home coffee machines, combining aesthetics with advanced technology. They represent the pinnacle of convenience, customization, and quality, making them ideal for anyone looking to elevate their coffee experience at home.