EUROCHEF - PRO WALL HOOD
IF CHANGING BLOWER POSITION | SECURITY SCREW | ||
|
|
|
|
|
|
|
|
1.Disconnect motor from power supply
2.Remove Blower security screw from blower bracket and remove blower.
3.Loosen 4 screws from blower bracket.
4.Shift blower to right and Remove Blower.
5.Loosen 4 screws and remove sealing plate covering back venting hole.
6.Reverse this procedure in new locations.
7.Reconnect blower to power supply.
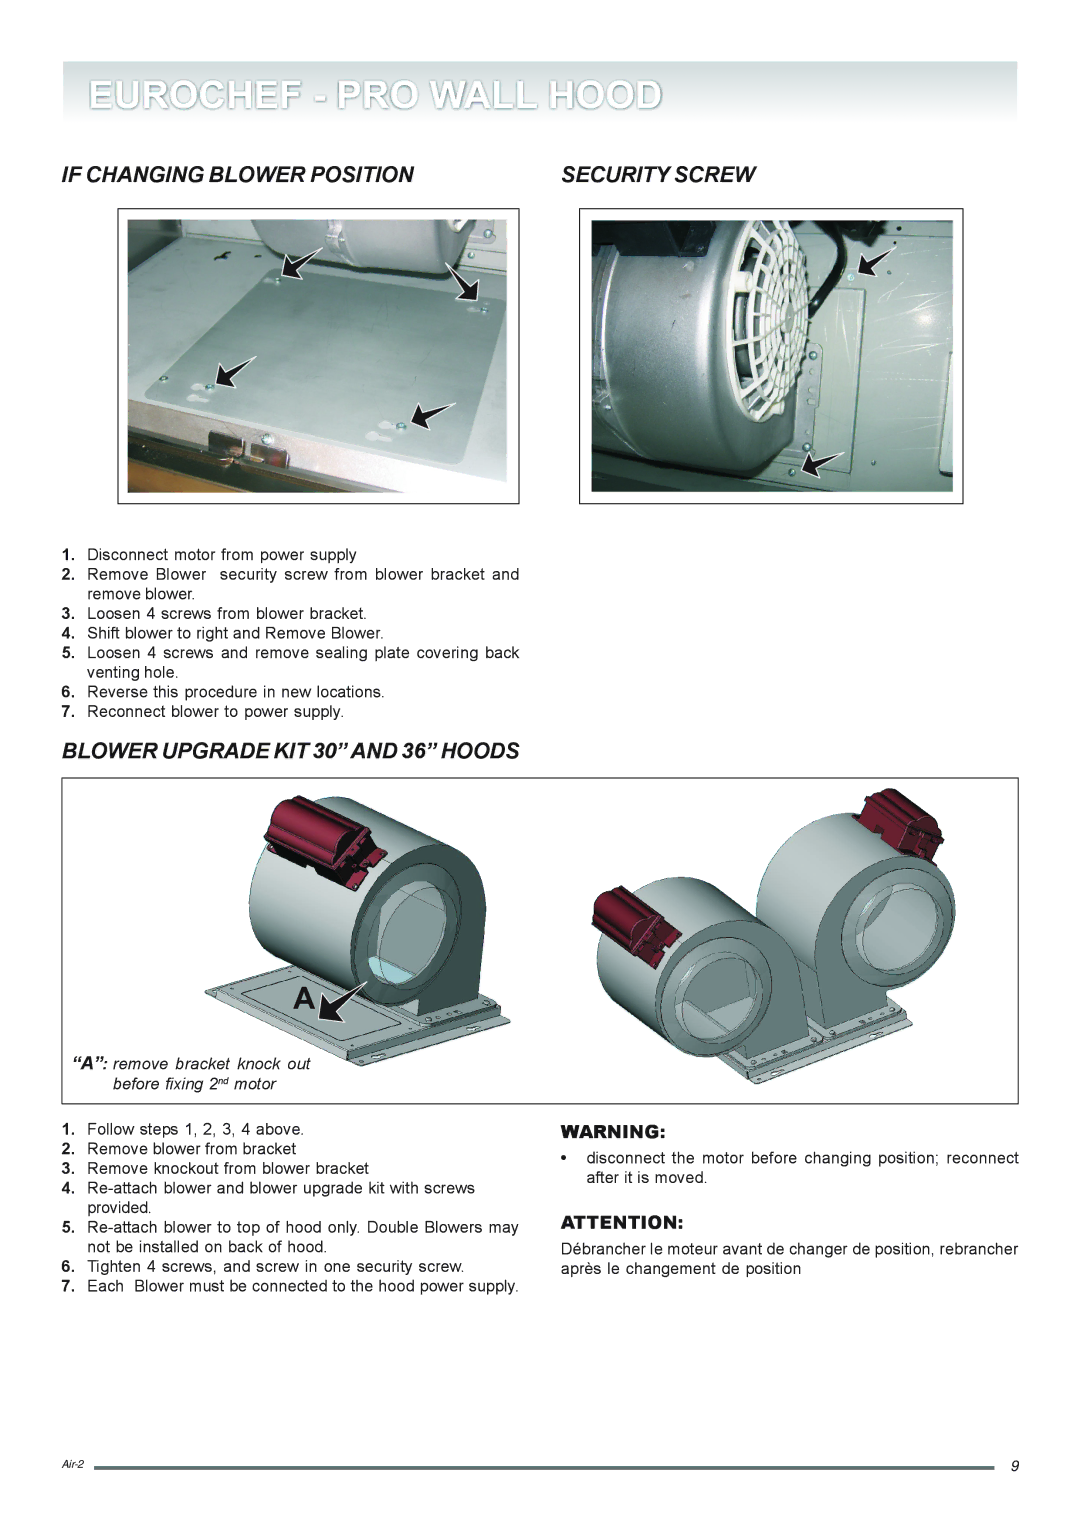
BLOWER UPGRADE KIT 30” AND 36” HOODS
A![]()
“A”: remove bracket knock out before fixing 2nd motor
1.Follow steps 1, 2, 3, 4 above.
2.Remove blower from bracket
3.Remove knockout from blower bracket
4.
5.
6.Tighten 4 screws, and screw in one security screw.
7.Each Blower must be connected to the hood power supply.
WARNING:
•disconnect the motor before changing position; reconnect after it is moved.
ATTENTION:
Débrancher le moteur avant de changer de position, rebrancher après le changement de position
| 9 | |
|