CONTROL PANEL
TIMER ON signal lamp “Alarm” warning light
1 | OFF |
2 3
![]() O
O ![]() I
I ![]() ON
ON
A ![]()
![]() B
B
|
| “Fan” signal lamp |
|
| |||||||||
|
|
| |||||||||||
|
|
| |||||||||||
|
|
| 6 |
|
|
|
|
|
|
|
|
| Min. air- |
4 |
|
|
|
|
|
|
|
|
|
| |||
|
|
| MIN |
|
|
|
|
|
|
|
| conditioning | |
|
|
|
|
|
| signal lamp | |||||||
|
|
|
|
|
|
|
|
|
|
|
|
| |
5 |
| 7 |
|
|
|
|
|
|
|
|
| Max. air- | |
|
|
|
|
|
|
|
|
|
|
|
|
| |
|
|
| MAX |
|
| conditioning | |||||||
|
|
|
|
| |||||||||
|
|
|
|
|
|
|
|
|
|
|
|
| signal lamp |
C |
| D |
|
|
| ||||||||
|
|
|
|
|
|
|
|
|
|
|
|
|
|
Timer notches
Thermostat knob
ON/OFF main switch key
Timer key
Fan speed selection key
Fan/conditioning selection key
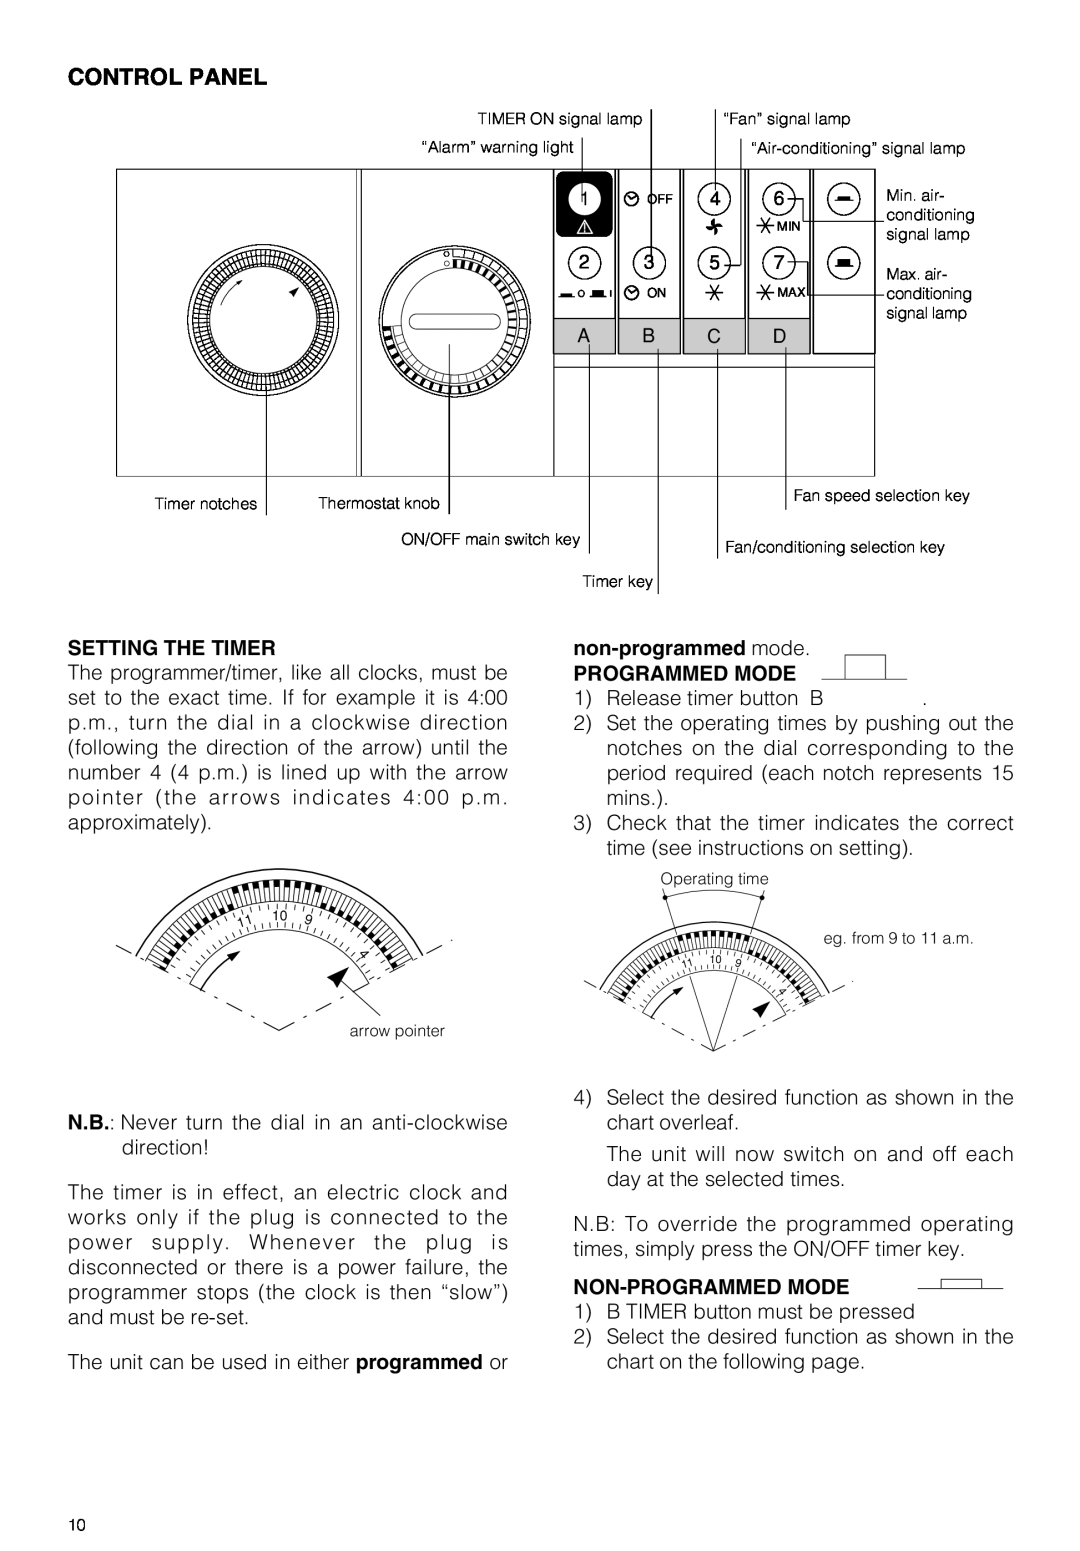
SETTING THE TIMER
The programmer/timer, like all clocks, must be set to the exact time. If for example it is 4:00 p.m., turn the dial in a clockwise direction (following the direction of the arrow) until the number 4 (4 p.m.) is lined up with the arrow pointer (the arrows indicates 4:00 p.m. approximately).
11 | 10 | 9 |
4
|
|
PROGRAMMED MODE |
|
1) Release timer button B | . |
2)Set the operating times by pushing out the notches on the dial corresponding to the period required (each notch represents 15 mins.).
3)Check that the timer indicates the correct time (see instructions on setting).
Operating time
eg. from 9 to 11 a.m.
11 | 10 | 9 |
4
arrow pointer
N.B.: Never turn the dial in an
The timer is in effect, an electric clock and works only if the plug is connected to the power supply. Whenever the plug is disconnected or there is a power failure, the programmer stops (the clock is then “slow”) and must be
The unit can be used in either programmed or
4)Select the desired function as shown in the chart overleaf.
The unit will now switch on and off each day at the selected times.
N.B: To override the programmed operating times, simply press the ON/OFF timer key.
NON-PROGRAMMED MODE
1)B TIMER button must be pressed
2)Select the desired function as shown in the chart on the following page.
10