WIR 2 26-06-2003 18:21 Pagina 9

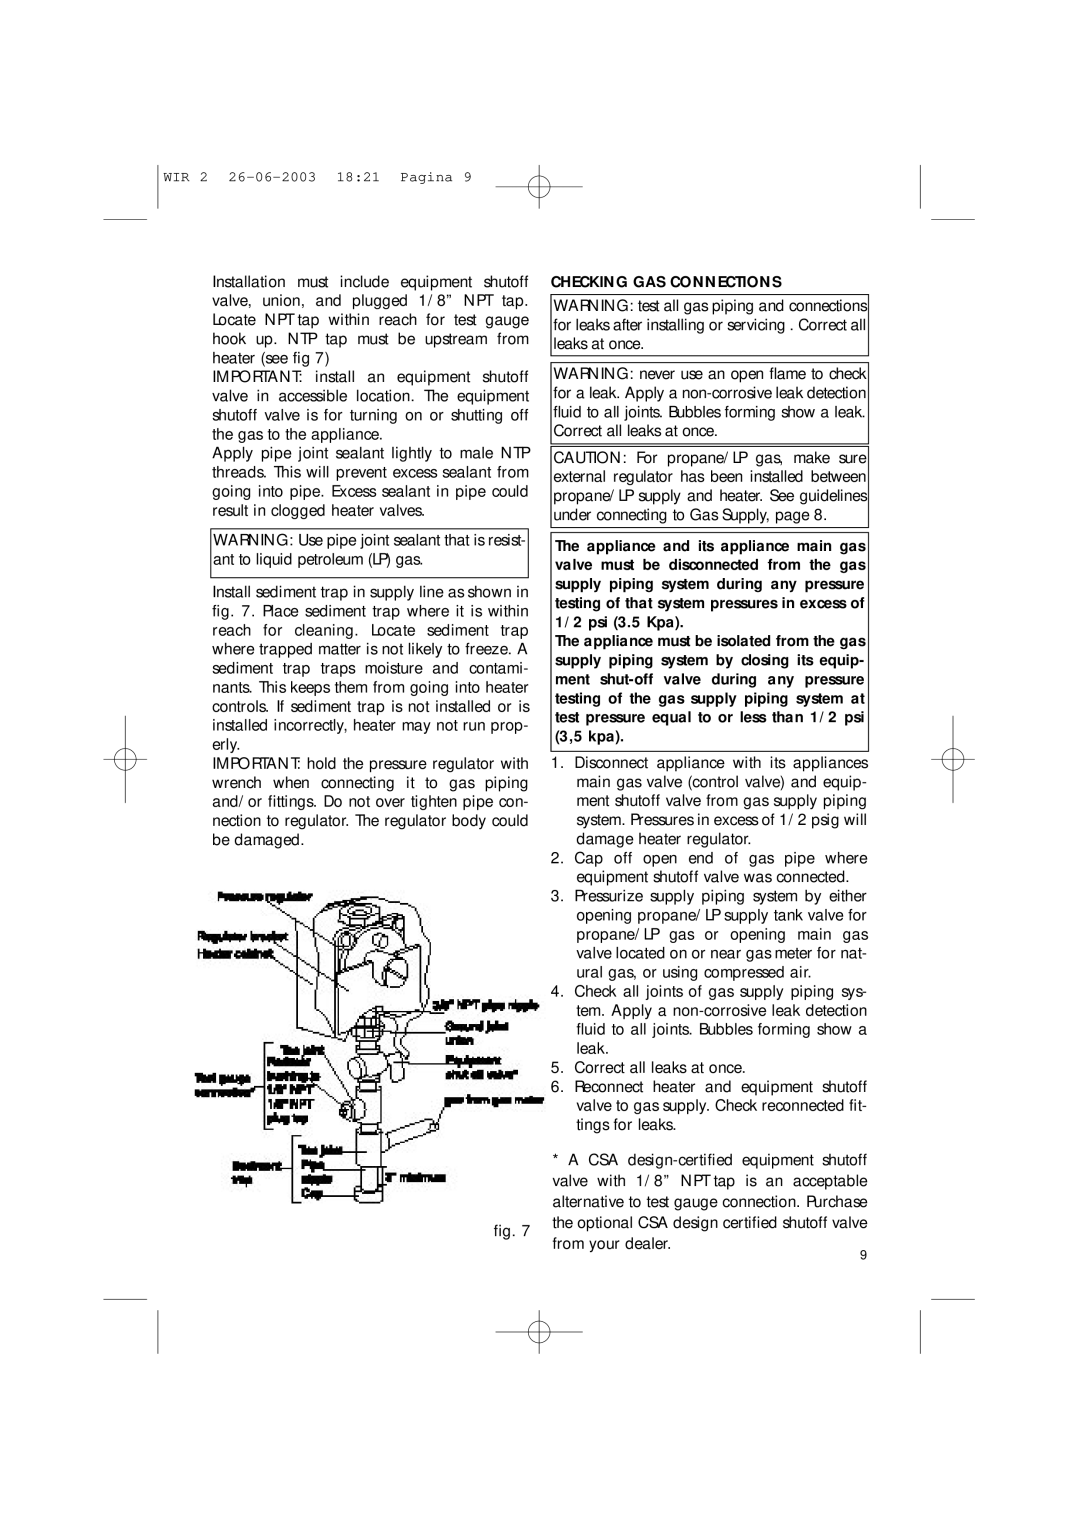
Installation must include equipment shutoff valve, union, and plugged 1/8” NPT tap. Locate NPT tap within reach for test gauge hook up. NTP tap must be upstream from heater (see fig 7)

IMPORTANT: install an equipment shutoff valve in accessible location. The equipment shutoff valve is for turning on or shutting off the gas to the appliance.

Apply pipe joint sealant lightly to male NTP threads. This will prevent excess sealant from going into pipe. Excess sealant in pipe could result in clogged heater valves.

WARNING: Use pipe joint sealant that is resist- ant to liquid petroleum (LP) gas.

Install sediment trap in supply line as shown in fig. 7. Place sediment trap where it is within reach for cleaning. Locate sediment trap where trapped matter is not likely to freeze. A sediment trap traps moisture and contami- nants. This keeps them from going into heater controls. If sediment trap is not installed or is installed incorrectly, heater may not run prop- erly.

IMPORTANT: hold the pressure regulator with wrench when connecting it to gas piping and/or fittings. Do not over tighten pipe con- nection to regulator. The regulator body could be damaged.

fig. 7

CHECKING GAS CONNECTIONS

WARNING: test all gas piping and connections for leaks after installing or servicing . Correct all leaks at once.

WARNING: never use an open flame to check for a leak. Apply a non-corrosive leak detection fluid to all joints. Bubbles forming show a leak. Correct all leaks at once.

CAUTION: For propane/LP gas, make sure external regulator has been installed between propane/LP supply and heater. See guidelines under connecting to Gas Supply, page 8.

The appliance and its appliance main gas valve must be disconnected from the gas supply piping system during any pressure testing of that system pressures in excess of 1/2 psi (3.5 Kpa).

The appliance must be isolated from the gas supply piping system by closing its equip- ment shut-off valve during any pressure testing of the gas supply piping system at test pressure equal to or less than 1/2 psi (3,5 kpa).

1.Disconnect appliance with its appliances main gas valve (control valve) and equip- ment shutoff valve from gas supply piping system. Pressures in excess of 1/2 psig will damage heater regulator.

2.Cap off open end of gas pipe where equipment shutoff valve was connected.

3.Pressurize supply piping system by either opening propane/LP supply tank valve for propane/LP gas or opening main gas valve located on or near gas meter for nat- ural gas, or using compressed air.

4.Check all joints of gas supply piping sys- tem. Apply a non-corrosive leak detection fluid to all joints. Bubbles forming show a leak.

5.Correct all leaks at once.

6.Reconnect heater and equipment shutoff valve to gas supply. Check reconnected fit- tings for leaks.

*A CSA design-certified equipment shutoff valve with 1/8” NPT tap is an acceptable alternative to test gauge connection. Purchase the optional CSA design certified shutoff valve from your dealer.

9

Page 9
Image 9
DeLonghi WIR2, WIR1 manual Checking GAS Connections

WIR2, WIR1 specifications

The DeLonghi WIR2 and WIR1 are innovative and versatile kitchen appliances designed to elevate the food preparation experience. These models exemplify DeLonghi's commitment to combining technology with user-friendly design, making them ideal for both amateur cooks and culinary enthusiasts.

One of the standout features of the DeLonghi WIR2 and WIR1 is their advanced heating technology. Both models utilize a highly efficient heating system that ensures even temperature distribution. This not only helps in achieving perfect cooking results but also reduces cooking times, making meal preparation more efficient. The rapid heating capability allows users to get started without long waiting periods, ideal for busy households.

Another notable characteristic of the DeLonghi WIR2 and WIR1 is their sleek and compact design. These appliances are designed to fit seamlessly into modern kitchens without taking up excessive counter space. Their aesthetic appeal is coupled with robust construction, ensuring durability and longevity. The elegant finish is easy to clean, maintaining a pristine appearance despite regular use.

The cooking versatility offered by both models is impressive. They come with multiple cooking modes, including baking, roasting, broiling, and grilling, allowing users to explore various culinary techniques. This multifunctionality means that the DeLonghi WIR2 and WIR1 can serve as a substitute for several traditional kitchen appliances, saving both space and money.

Ease of use is another key feature of these models. The intuitive control panel simplifies the cooking process, allowing users to select cooking modes and adjust temperatures with minimal effort. The inclusion of programmable timers further enhances convenience, enabling users to set their desired cooking duration without needing to monitor the appliance constantly.

The DeLonghi WIR2 and WIR1 also prioritize safety with features such as automatic shut-off and cool-touch exteriors. These elements ensure that using the appliance is safer, especially in households with children.

In conclusion, the DeLonghi WIR2 and WIR1 are exemplary choices for those who value efficiency, versatility, and modern design in their kitchen appliances. With their advanced technologies, user-friendly interfaces, and robust safety features, these models are poised to make cooking a more enjoyable and fulfilling experience. Whether you are baking a delicate soufflé or grilling a hearty steak, the DeLonghi WIR2 and WIR1 stand ready to meet your culinary needs with excellence.