| REPLACING SANDING DISC | |||
When it becomes necessary to replace the sanding disc, proceed as follows: | ||||
1. | DISCONNECT MACHINE FROM POWER SOURCE. |
| ||
| ||||
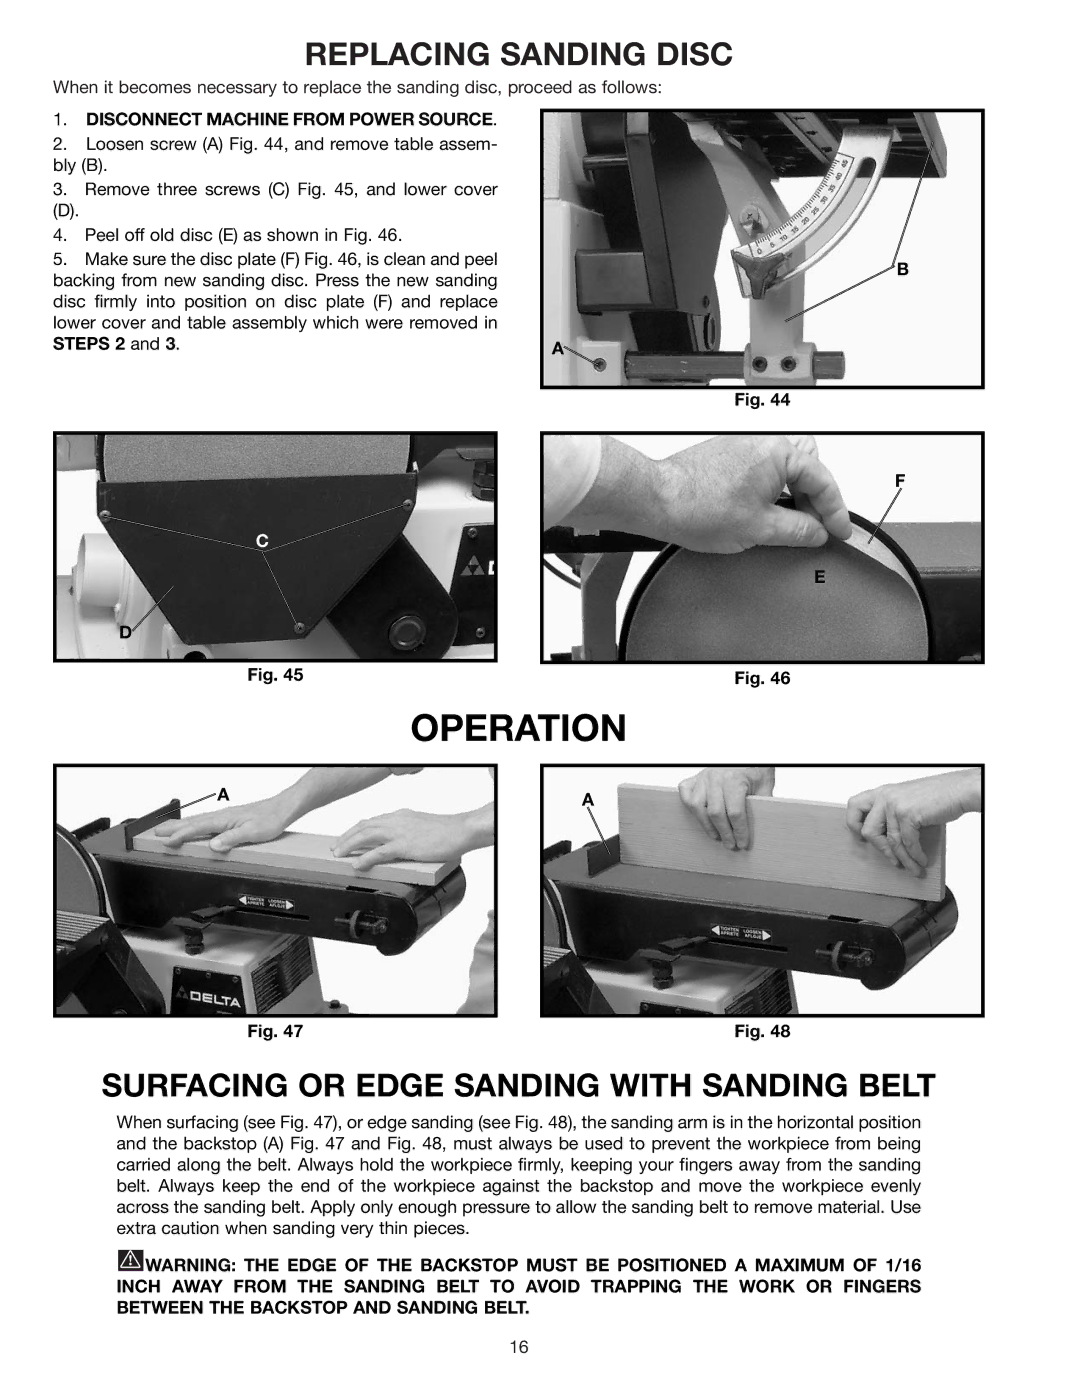
2. | Loosen screw (A) Fig. 44, and remove table assem- |
| ||
bly (B). |
| |||
3. | Remove three screws (C) Fig. 45, and lower cover |
| ||
(D). |
|
|
| |
4. | Peel off old disc (E) as shown in Fig. 46. |
| ||
5. | Make sure the disc plate (F) Fig. 46, is clean and peel | B | ||
backing from new sanding disc. Press the new sanding | ||||
| ||||
disc firmly into position on disc plate (F) and replace |
| |||
lower cover and table assembly which were removed in |
| |||
STEPS 2 and 3. | A | |||
|
|
|
| |
|
|
| Fig. 44 | |
|
|
|
| |
|
|
| F | |
| C |
| ||
|
|
| E | |
D
Fig. 45 | Fig. 46 |
OPERATION
![]() A
A
A
Fig. 47 | Fig. 48 |
SURFACING OR EDGE SANDING WITH SANDING BELT
When surfacing (see Fig. 47), or edge sanding (see Fig. 48), the sanding arm is in the horizontal position and the backstop (A) Fig. 47 and Fig. 48, must always be used to prevent the workpiece from being carried along the belt. Always hold the workpiece firmly, keeping your fingers away from the sanding belt. Always keep the end of the workpiece against the backstop and move the workpiece evenly across the sanding belt. Apply only enough pressure to allow the sanding belt to remove material. Use extra caution when sanding very thin pieces.
![]() WARNING: THE EDGE OF THE BACKSTOP MUST BE POSITIONED A MAXIMUM OF 1/16 INCH AWAY FROM THE SANDING BELT TO AVOID TRAPPING THE WORK OR FINGERS BETWEEN THE BACKSTOP AND SANDING BELT.
WARNING: THE EDGE OF THE BACKSTOP MUST BE POSITIONED A MAXIMUM OF 1/16 INCH AWAY FROM THE SANDING BELT TO AVOID TRAPPING THE WORK OR FINGERS BETWEEN THE BACKSTOP AND SANDING BELT.
16