LOCKING CUTTING ARM
IN THE DOWN POSITION
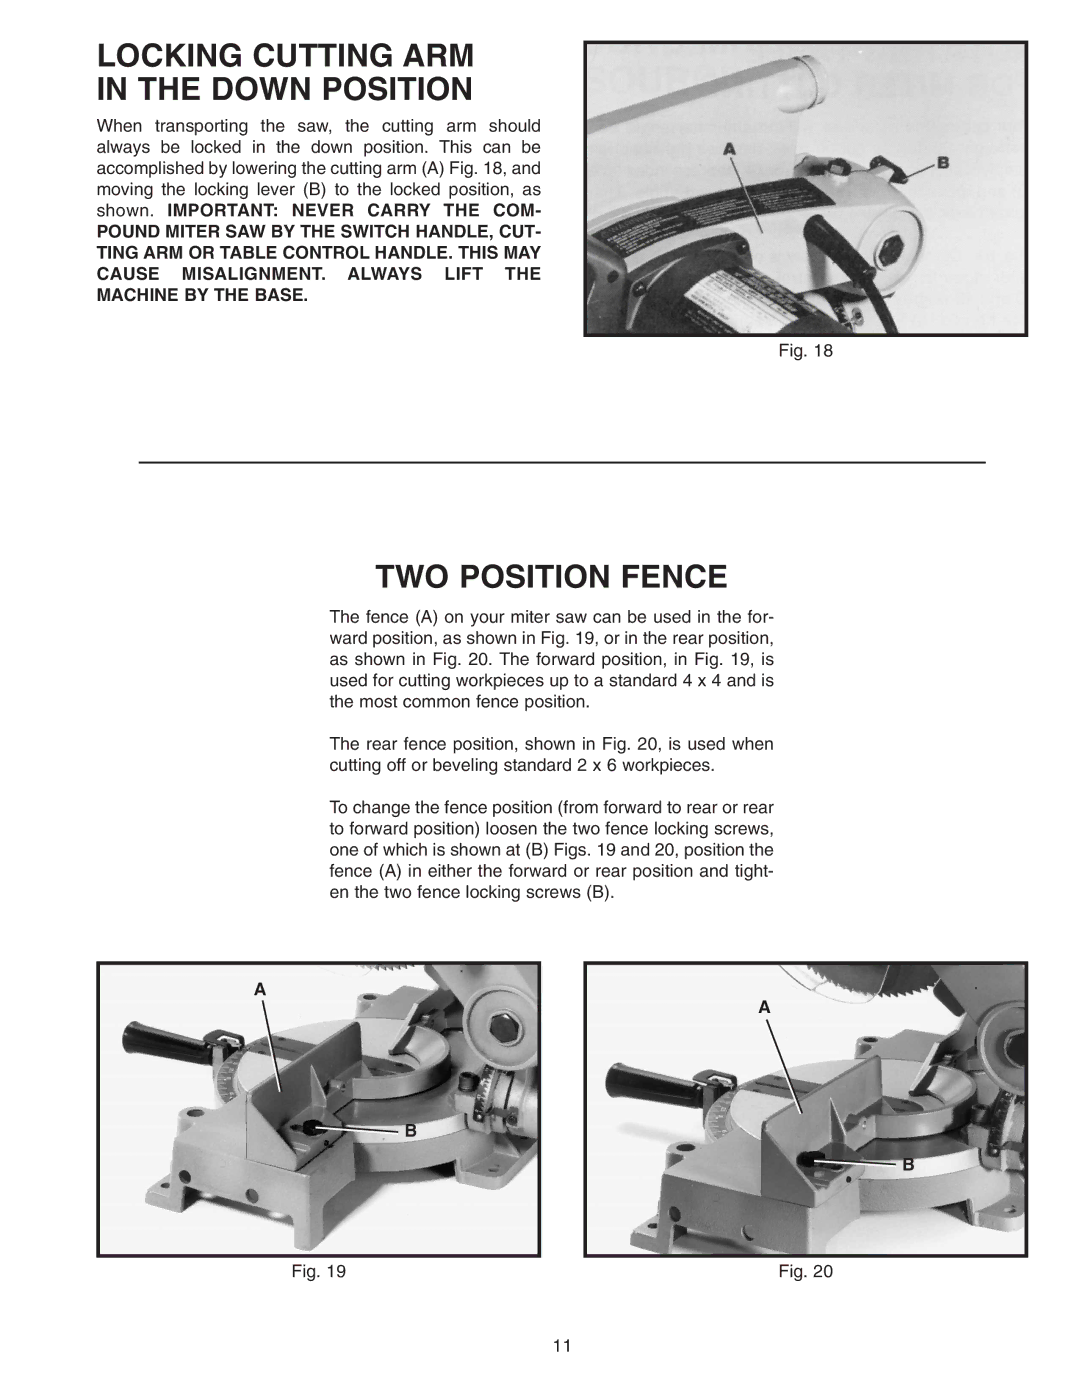
When transporting the saw, the cutting arm should always be locked in the down position. This can be accomplished by lowering the cutting arm (A) Fig. 18, and moving the locking lever (B) to the locked position, as shown. IMPORTANT: NEVER CARRY THE COM-
POUND MITER SAW BY THE SWITCH HANDLE, CUT-
TING ARM OR TABLE CONTROL HANDLE. THIS MAY
CAUSE MISALIGNMENT. ALWAYS LIFT THE
MACHINE BY THE BASE.
Fig. 18
TWO POSITION FENCE
The fence (A) on your miter saw can be used in the for- ward position, as shown in Fig. 19, or in the rear position, as shown in Fig. 20. The forward position, in Fig. 19, is used for cutting workpieces up to a standard 4 x 4 and is the most common fence position.
The rear fence position, shown in Fig. 20, is used when cutting off or beveling standard 2 x 6 workpieces.
To change the fence position (from forward to rear or rear to forward position) loosen the two fence locking screws, one of which is shown at (B) Figs. 19 and 20, position the fence (A) in either the forward or rear position and tight- en the two fence locking screws (B).
A
A
![]() B
B
![]() B
B
Fig. 19 | Fig. 20 |
11
