ASSEMBLING LOWER BLADE GUARD LINK
![]() WARNING: DO NOT ATTEMPT TO OPERATE THE SAW WITHOUT THE BLADE GUARD IN PLACE, AS PERSONAL INJURY OR PRODUCT DAMAGE CAN OCCUR. THE BLADE GUARD ASSEMBLY SERVES AS A RETENTION MEANS FOR THE SAW ARBOR. ANY PRODUCT ADJUST- MENTS OR SERVICING, NOT COVERED BY THIS INSTRUCTION MANUAL, SHOULD BE UNDERTAK- EN ONLY BY AN AUTHORIZED DELTA SERVICE REPRESENTATIVE.
WARNING: DO NOT ATTEMPT TO OPERATE THE SAW WITHOUT THE BLADE GUARD IN PLACE, AS PERSONAL INJURY OR PRODUCT DAMAGE CAN OCCUR. THE BLADE GUARD ASSEMBLY SERVES AS A RETENTION MEANS FOR THE SAW ARBOR. ANY PRODUCT ADJUST- MENTS OR SERVICING, NOT COVERED BY THIS INSTRUCTION MANUAL, SHOULD BE UNDERTAK- EN ONLY BY AN AUTHORIZED DELTA SERVICE REPRESENTATIVE.
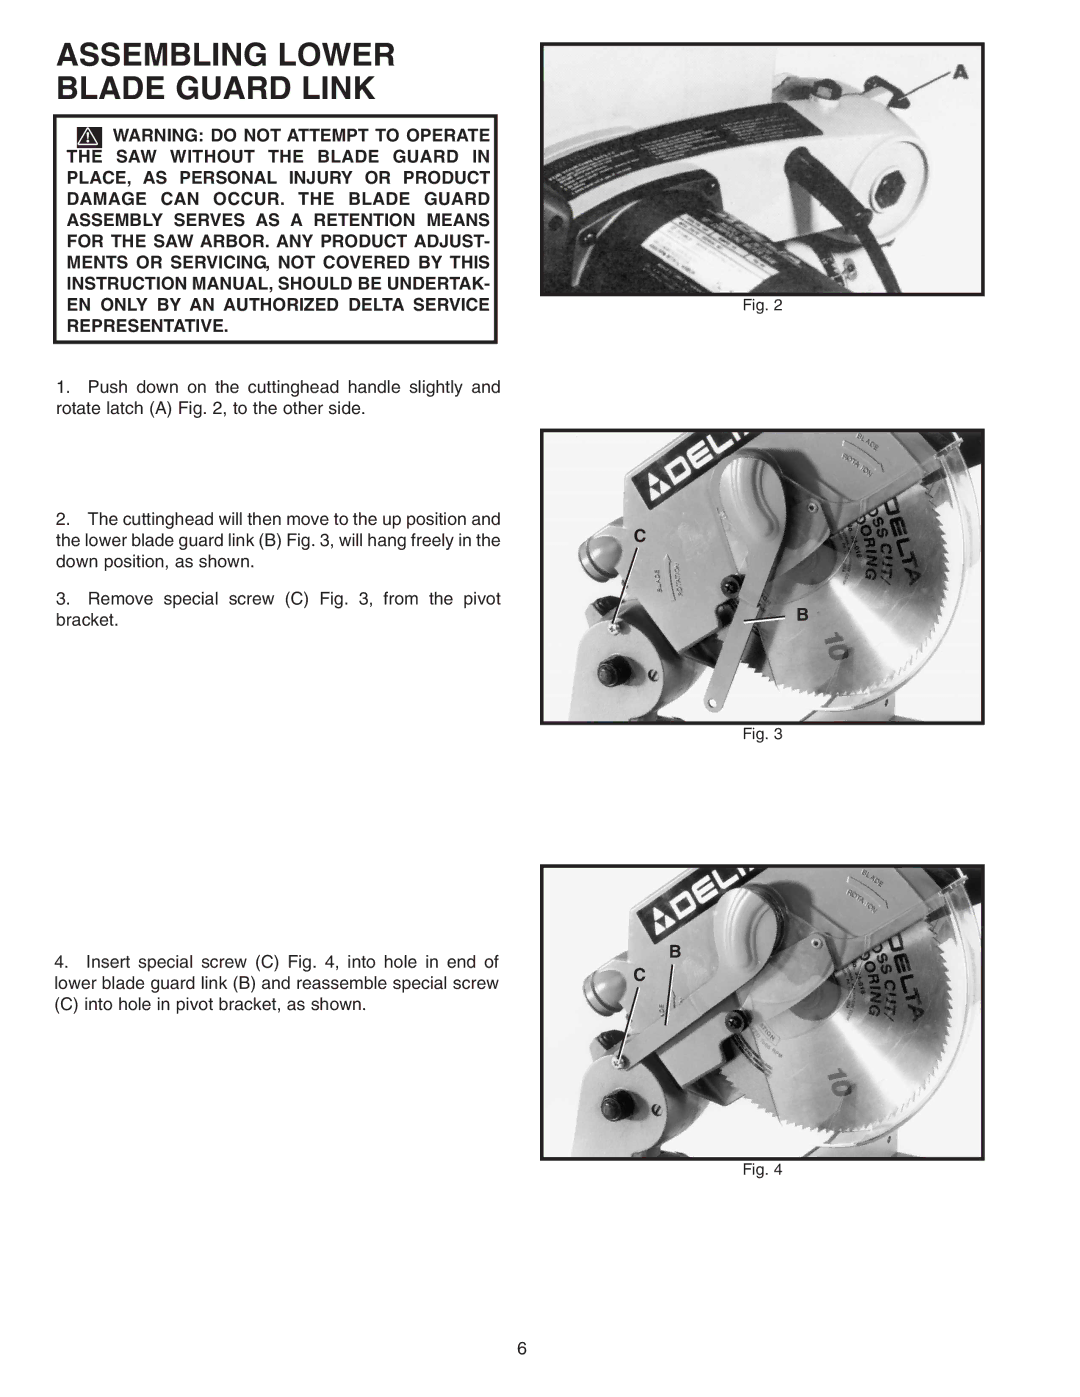
1.Push down on the cuttinghead handle slightly and rotate latch (A) Fig. 2, to the other side.
2.The cuttinghead will then move to the up position and the lower blade guard link (B) Fig. 3, will hang freely in the down position, as shown.
3.Remove special screw (C) Fig. 3, from the pivot bracket.
4.Insert special screw (C) Fig. 4, into hole in end of lower blade guard link (B) and reassemble special screw
(C) into hole in pivot bracket, as shown.
Fig. 2
C
B
Fig. 3
B
C
Fig. 4
6
