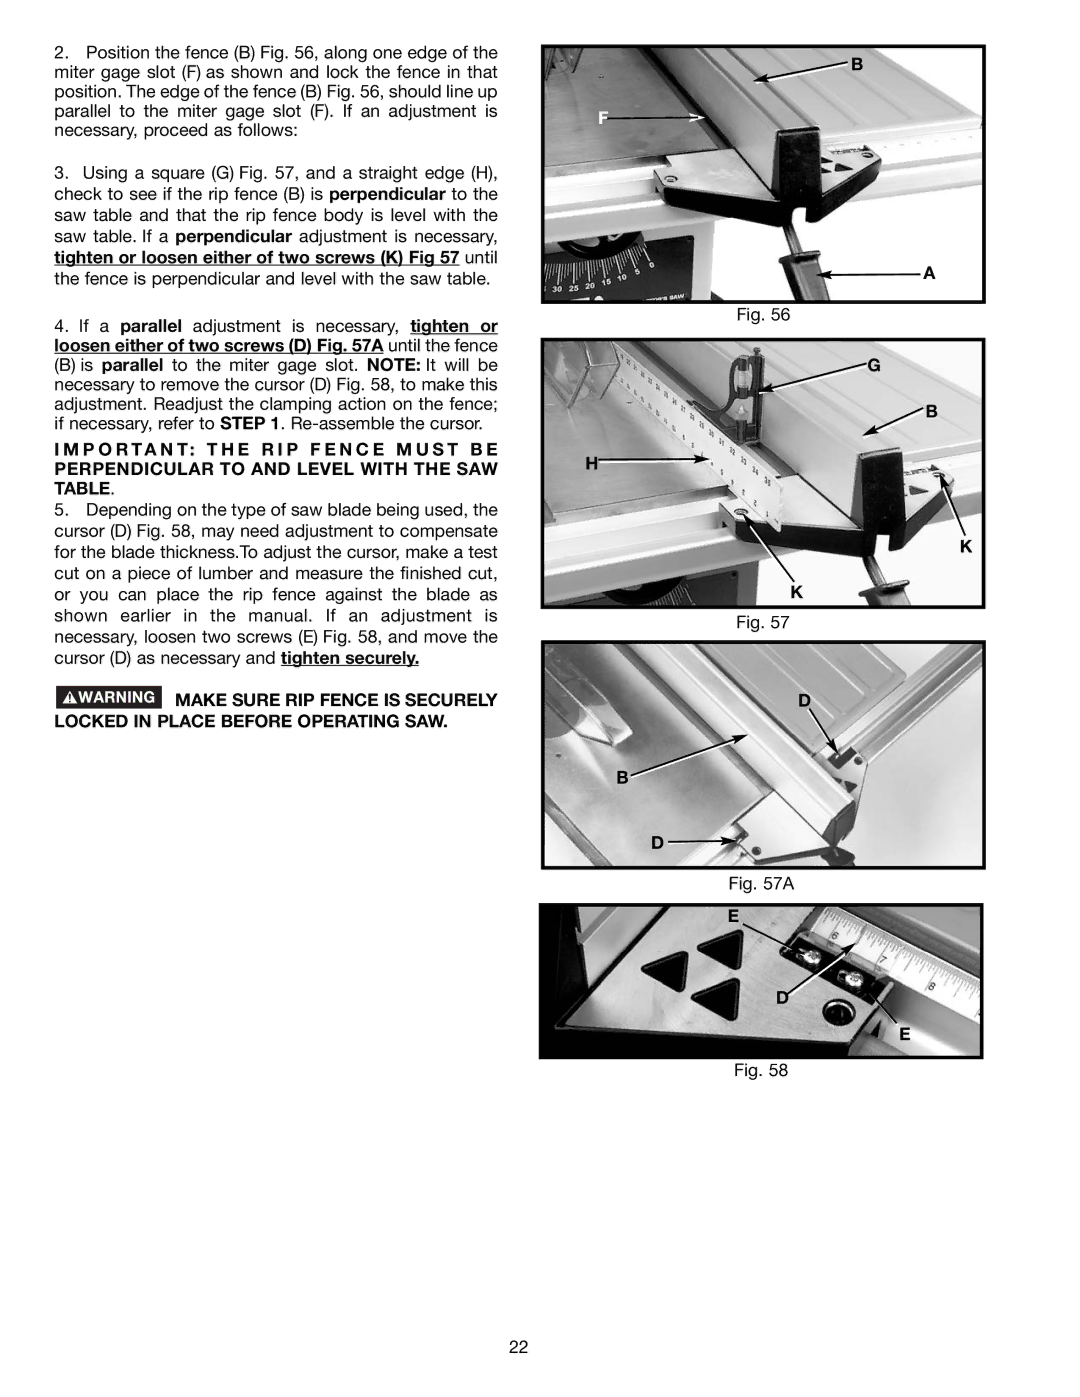
2.Position the fence (B) Fig. 56, along one edge of the miter gage slot (F) as shown and lock the fence in that position. The edge of the fence (B) Fig. 56, should line up parallel to the miter gage slot (F). If an adjustment is necessary, proceed as follows:
3.Using a square (G) Fig. 57, and a straight edge (H), check to see if the rip fence (B) is perpendicular to the saw table and that the rip fence body is level with the saw table. If a perpendicular adjustment is necessary, tighten or loosen either of two screws (K) Fig 57 until the fence is perpendicular and level with the saw table.
4.If a parallel adjustment is necessary, tighten or loosen either of two screws (D) Fig. 57A until the fence
(B) is parallel to the miter gage slot. NOTE: It will be necessary to remove the cursor (D) Fig. 58, to make this adjustment. Readjust the clamping action on the fence; if necessary, refer to STEP 1.
I M P O R TA N T: T H E R I P F E N C E M U S T B E PERPENDICULAR TO AND LEVEL WITH THE SAW TABLE.
5.Depending on the type of saw blade being used, the cursor (D) Fig. 58, may need adjustment to compensate for the blade thickness.To adjust the cursor, make a test cut on a piece of lumber and measure the finished cut, or you can place the rip fence against the blade as shown earlier in the manual. If an adjustment is necessary, loosen two screws (E) Fig. 58, and move the cursor (D) as necessary and tighten securely.
![]() MAKE SURE RIP FENCE IS SECURELY LOCKED IN PLACE BEFORE OPERATING SAW.
MAKE SURE RIP FENCE IS SECURELY LOCKED IN PLACE BEFORE OPERATING SAW.
![]() B
B
F![]()
![]() A
A
Fig. 56
G
B
H![]()
K
K
Fig. 57
D
B
D ![]()
Fig. 57A
E
D
E
Fig. 58
22